

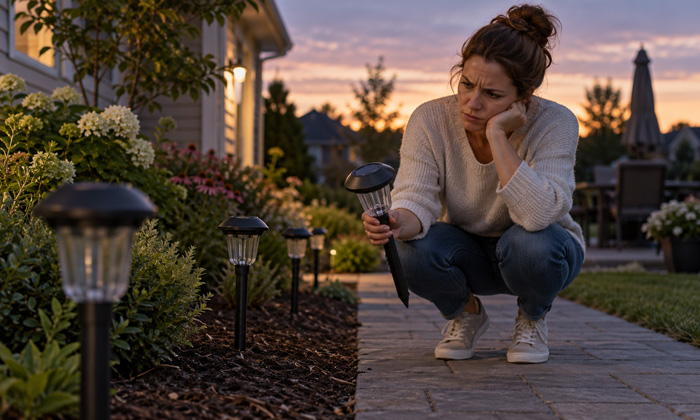
1. The Solar Lights Have Not Charged Long Enough
2. The Power Switch Is Still Off
3. A Battery Isolation Tab Is Still Installed
4. The Light Sensor Thinks It Is Still Daytime
5. The Solar Panel Is Not Receiving Enough Sunlight
6. The Lights Are Installed in Too Much Shade
7. A Protective Film Is Covering the Solar Panel
8. The Solar Panel Is Dirty or Obstructed
9. Cloudy Weather Has Prevented a Full First Charge
10. The Battery Is Not Making Proper Contact
11. The Battery May Be Defective
12. The Solar Panel and Battery Are Not Properly Connected
13. The Light Needs to Be Reset
14. The Panel Angle Is Reducing Charging Efficiency
15. Low Temperatures Are Affecting Battery Performance
16. Moisture or Condensation Has Entered the Housing
17. The Solar Panel Is Damaged
18. Nearby Outdoor Lighting Is Preventing Activation
19. The LEDs or Internal Controller May Be Defective
20. A Simple Step-by-Step Test for Brand New Solar Lights
How Much Sun Do New Solar Lights Really Need?
How to Tell Whether the Battery or Solar Panel Is the Problem
Why New Solar Lights Sometimes Work for a Few Minutes and Then Turn Off
Why One New Solar Light Works but Another Does Not
Should Brand New Solar Lights Be Returned?
FAQs
Brand new solar lights that refuse to turn on can be frustrating, especially when they have just been installed and appear completely undamaged. In most cases, however, new solar lights are not defective. The problem usually comes from insufficient initial charging, an overlooked power switch, a battery tab that has not been removed, poor solar-panel placement, or the light sensor being exposed to surrounding light.
Solar lights depend on several components working together: the solar panel collects energy, the rechargeable battery stores it, the controller manages charging and discharging, and the light sensor determines when the LEDs should turn on. A small problem with any one of these elements can make a new light appear completely dead.
The fastest way to solve the problem is to work through the most common causes in a logical order.
1. The Solar Lights Have Not Charged Long Enough
One of the most common reasons brand new solar lights do not work is simply that the batteries have not received enough energy yet.
Solar lights are often shipped with rechargeable batteries only partially charged. During storage and transportation, those batteries can lose additional power. By the time the lights reach your home, the remaining charge may be too low to operate the LEDs.
Many new solar lights need a full day of strong sunlight before their first nighttime use. Some models may need two or even three charging cycles before the battery reaches normal operating capacity.
The exact charging period depends on panel size, battery capacity, sunlight intensity, season, and weather. In typical conditions, how long solar lights take to charge is closely related to how many hours of usable sunlight reach the panel rather than simply how many hours the light remains outdoors.
Place the lights where the panels can receive several hours of strong daylight and allow them to charge without repeatedly testing them during the day. A weak first charge can result in very dim illumination, a few minutes of operation, or no visible light at all.
2. The Power Switch Is Still Off
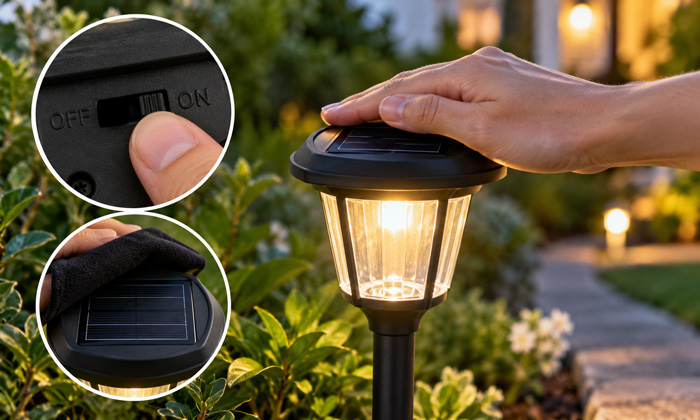
Many solar lights have a small ON/OFF switch located underneath the solar panel, inside the light housing, or next to the battery compartment.
Because solar lights charge automatically, it is easy to assume they do not need to be switched on. That is not true for many models.
Some solar lights can still collect energy while switched off, while others are designed differently. The relationship between the switch position and charging is explained by the way the internal charging circuit is wired, which is why the question of whether solar lights should be left on or off to charge does not have exactly the same answer for every product design.
Before troubleshooting anything more complicated, locate the switch and move it firmly into the ON position. Small outdoor-light switches can sometimes stop between positions, so make sure it clicks or slides completely into place.
After switching the light on, cover the solar panel completely with your hand or a dark cloth. A properly charged unit should normally illuminate within a few seconds.
3. A Battery Isolation Tab Is Still Installed
New solar lights frequently contain a small plastic strip between the rechargeable battery and its electrical contact.
This tab prevents the battery from discharging while the product is stored, shipped, or displayed in a store. Until the strip is removed, electricity cannot flow normally through the circuit.
Open the battery compartment and inspect the battery area carefully. Look for a clear, white, or colored plastic strip protruding from beneath the battery.
Remove the strip, confirm that the battery is seated correctly, close the compartment securely, switch the light on, and place it in direct daylight for a full charging cycle.
This simple shipping feature is responsible for a surprising number of brand new solar lights appearing defective straight out of the box.
4. The Light Sensor Thinks It Is Still Daytime
Solar garden lights are designed to remain off during daylight. A photosensor detects surrounding light and activates the LEDs only after the environment becomes sufficiently dark.
This means testing solar lights indoors under ceiling lights, beside a window, near a porch lamp, or beneath another outdoor fixture may produce misleading results.
A new solar light can be fully charged and working correctly while still refusing to illuminate because its sensor detects nearby light.
This behavior also explains some seemingly strange situations involving solar garden lights that respond unexpectedly to surrounding light. Sensor position, reflected light, nearby fixtures, and internal wiring can all affect when the control circuit changes between charging and illumination modes.
For a reliable test, completely cover the solar panel and any visible light sensor with an opaque material. Do not simply place a finger over part of the panel because enough light may still reach the sensor around the edges.
When darkness is simulated properly, the LEDs should activate after a short delay.
5. The Solar Panel Is Not Receiving Enough Sunlight
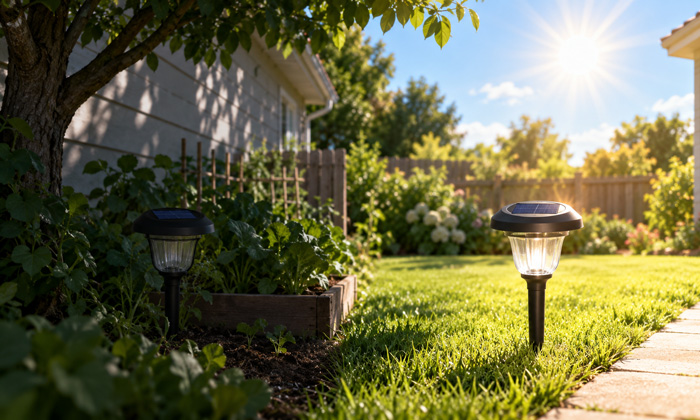
A location that looks bright to the human eye is not necessarily a good charging location for a solar panel.
Solar cells perform best when exposed to strong sunlight. A garden bed beside a house may receive plenty of general daylight while remaining shaded from direct sun for most of the day. The same problem can occur beneath trees, beside fences, under roof overhangs, or on north-facing sides of buildings.
There is an important difference between daylight and useful solar energy. The question of whether solar lights need direct sunlight largely comes down to how much energy the panel can collect during the available charging window. Strong direct sun provides far more usable energy than weak indirect illumination.
Before assuming a new light is faulty, move it to an open location where the panel can receive direct sun for most of the day. Test the light again after sunset.
A temporary relocation is often enough to determine whether placement is the real problem.
6. The Lights Are Installed in Too Much Shade
Shade does not necessarily stop a solar panel from producing electricity altogether, but it can dramatically reduce charging performance.
A solar light placed beneath a tree may receive scattered daylight throughout the day and still fail to store enough energy to power its LEDs for a meaningful period. This is particularly common with decorative lights that use small solar panels and compact batteries.
Whether solar lights can charge in the shade depends heavily on shade density, panel efficiency, battery capacity, and the amount of indirect sunlight available. Light shade for part of the day may be acceptable, while deep shade for most of the charging period often causes poor performance.
Watch the installation area over several hours rather than checking it once. Trees, walls, fences, patio structures, and neighboring buildings can cast moving shadows across the panel as the sun changes position.
Moving the panel only a few feet can sometimes increase the available solar energy substantially.
7. A Protective Film Is Covering the Solar Panel
Some new solar lights are shipped with a thin protective plastic film over the solar panel.
This film protects the surface against scratches during manufacturing, packaging, and transportation. Because it may be transparent and tightly fitted, it can be easy to miss.
While a clear film does not always block all sunlight, it can reduce the amount of energy reaching the solar cells. Printed labels, cloudy protective coatings, packaging residue, and adhesive marks can reduce charging even further.
Inspect the panel from an angle and look carefully around the edges. Remove any protective film intended for shipping.
The panel surface should be exposed directly to daylight without packaging material covering the photovoltaic cells.
8. The Solar Panel Is Dirty or Obstructed
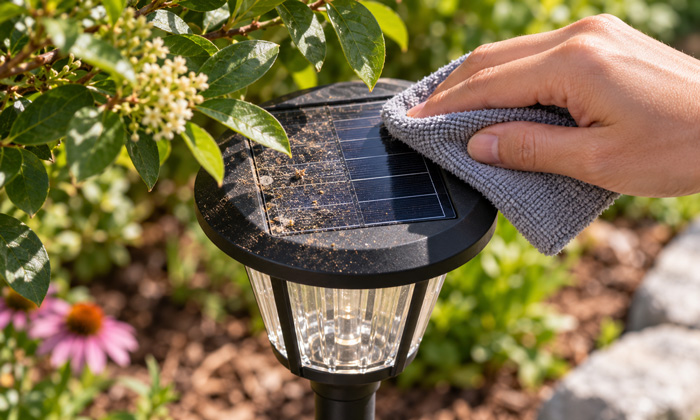
Brand new lights can already have dust, fingerprints, packaging residue, or dirt on the panel before installation. After being placed outdoors, pollen, soil, bird droppings, hard-water spots, and construction dust can accumulate quickly.
Anything that reduces the amount of light reaching the photovoltaic cells can lower charging efficiency.
Proper solar panel cleaning for solar lights generally involves gentle cleaning rather than abrasive scrubbing. A soft cloth and mild cleaning method help preserve the transparent surface covering the cells.
After cleaning, inspect the panel for cloudy residue or scratches. Even though a small amount of surface dirt rarely causes a complete failure by itself, cleaning eliminates one variable while troubleshooting and helps maintain better charging performance over time.
9. Cloudy Weather Has Prevented a Full First Charge
Solar panels do not stop working every time the sky becomes cloudy. They can still collect energy from diffuse sunlight, but their output is usually much lower than under clear direct sun.
That difference matters especially when solar lights are brand new and their batteries are already nearly discharged.
The ability of solar lights to charge on cloudy days depends on cloud density, available daylight, solar-cell efficiency, and charging duration. Several dark or rainy days immediately after installation can leave new lights with too little stored energy to operate normally.
Instead of judging the lights after one cloudy charging cycle, give them a full sunny day.
When possible, temporarily place the lights in the sunniest available location during initial charging, then move them to their permanent positions after confirming normal operation.
10. The Battery Is Not Making Proper Contact
Rechargeable batteries can shift slightly during shipping.
A battery that is not seated firmly against the metal contacts may prevent the light from operating even though every other component is working correctly.
Open the battery compartment and inspect the battery orientation. Match the positive and negative symbols on the battery with the markings inside the compartment.
Then check the metal terminals. They should touch the battery firmly without visible gaps.
For lights using removable rechargeable batteries, take the battery out and reinstall it securely. This simple action can restore contact between the battery terminals and the internal circuit.
Do not replace a rechargeable battery with a disposable alkaline battery unless the manufacturer specifically permits it. Solar lighting systems are designed around rechargeable cells, and using the wrong battery type can interfere with charging or damage the system.
11. The Battery May Be Defective
Being brand new does not always mean the rechargeable battery is in perfect condition. Solar lights can remain in warehouses or retail storage for months before purchase, and batteries may gradually lose charge or capacity during that time.
Battery chemistry, storage conditions, charging habits, and operating temperature all influence how long solar light batteries last. In some cases, a battery that has been stored for an extended period may arrive deeply discharged or with reduced usable capacity.
Common signs of a weak or defective battery include very short runtime, dim illumination, failure to hold a charge, or one light in a multi-pack performing noticeably worse than the others.
For identical solar lights, swapping the battery from a working unit into the non-working one can help isolate the problem. When the light operates normally with a known-good battery, the original battery is likely the cause. Always use a rechargeable replacement that matches the required battery type, voltage, and size.
12. The Solar Panel and Battery Are Not Properly Connected
Some solar lights require minor assembly. The solar panel may connect to the light through a cable, plug, or internal connector.
A loose connector can prevent charging even though the panel and LEDs are individually functional.
Check all removable plugs and wiring connections. Push connectors together firmly without forcing them. Look for bent pins, partially inserted plugs, damaged insulation, or wires pinched during assembly.
For solar spotlights with a separate panel, verify that the panel cable is connected to the correct port. Some fixtures also include multiple operating modes controlled by a button, and a partially connected plug can make the entire unit appear unresponsive.
13. The Light Needs to Be Reset
Electronic solar lights sometimes fail to initialize correctly after shipping, battery installation, or extended storage.
Turning the unit off, disconnecting the battery briefly, reconnecting it, and restoring power can clear certain temporary control issues.
Different products respond to different reset procedures, so resetting solar lights may involve the power switch, battery removal, a reset button, or a complete recharge cycle depending on the design.
A basic reset can be attempted by switching the light off, removing the rechargeable battery for several minutes, reinstalling it correctly, turning the light back on, and placing the panel in strong sunlight.
After charging, test it in complete darkness.
14. The Panel Angle Is Reducing Charging Efficiency
Solar panels produce the most useful energy when sunlight reaches their surface effectively. Poor positioning can reduce daily energy collection substantially.
Horizontal panels may collect dirt and water more easily, while panels pointed away from the strongest sunlight may spend much of the day operating below their potential.
Adjustable solar spotlights should be positioned so the panel faces the area of the sky receiving the strongest sun during the charging period.
Also consider seasonal changes. A location that performs well in midsummer can become heavily shaded as the sun sits lower in the sky during autumn and winter.
A small adjustment to panel direction or tilt can turn an unreliable light into a consistently charged one.
15. Low Temperatures Are Affecting Battery Performance
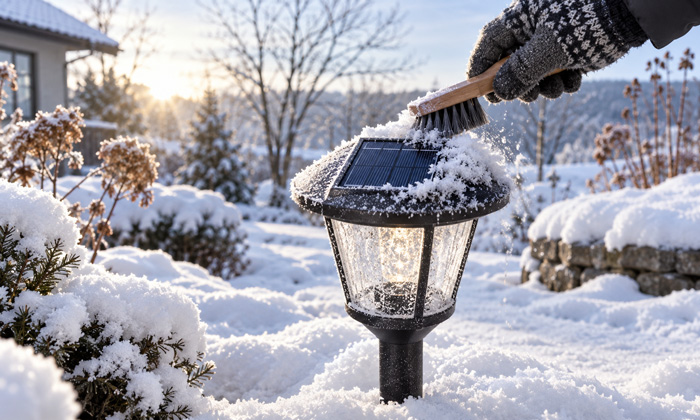
Cold weather can reduce rechargeable battery performance, particularly when solar lights are trying to charge with limited winter sunlight.
Winter creates two challenges at the same time: shorter daylight periods reduce available charging energy, while low temperatures can reduce the amount of usable energy the battery delivers.
The performance of solar-powered lights in winter therefore depends on more than outdoor temperature alone. Panel placement, snow cover, daylight duration, battery chemistry, and local weather all influence nighttime operating time.
A new light installed during winter may be functioning normally but receiving far less energy than the same unit would receive during summer.
Clear snow from the panel, place the unit in the strongest available sunlight, and allow additional charging time before diagnosing a hardware fault.
16. Moisture or Condensation Has Entered the Housing
Outdoor solar lights are designed to tolerate weather, but waterproofing quality varies between products.
Condensation inside a brand new light can occur because of temperature changes between storage, transportation, indoor unpacking, and outdoor installation. Small amounts of moisture may also enter through poorly sealed battery covers or housing joints.
The reason solar lights sometimes fog up is usually related to moisture trapped inside the housing and temperature differences that cause water vapor to condense on cooler surfaces.
A slight temporary haze may disappear as temperatures stabilize. Persistent droplets, pooled water, or corrosion around electrical contacts are more serious.
Check that battery covers, seals, and threaded housings are properly closed. A new fixture showing significant internal water immediately after normal outdoor exposure may have a sealing defect.
17. The Solar Panel Is Damaged
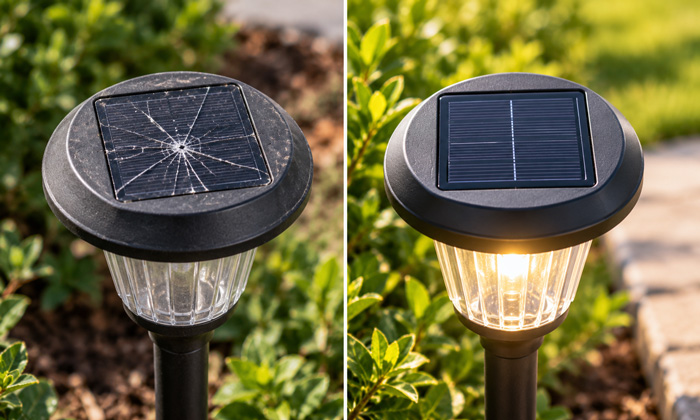
Although less common, a solar panel can be damaged before the product reaches the customer.
Cracks may occur during shipping, while internal electrical connections can fail without obvious external damage. A defective panel may look perfectly normal but produce little or no charging current.
Compare the faulty light with other units from the same package. Place all of them side by side under the same sunlight for the same amount of time.
When every unit works except one, the installation environment becomes a less likely cause. The problem is more likely to involve that unit's battery, panel, switch, sensor, wiring, or controller.
On repairable garden-light designs, solar panel replacement for garden lights can restore an otherwise functional fixture when the photovoltaic section has failed. For a genuinely new product, however, replacement under the seller's or manufacturer's warranty usually makes more sense than modifying the fixture.
18. Nearby Outdoor Lighting Is Preventing Activation
One of the most overlooked causes of solar lights not working at night is artificial light.
Streetlights, porch lights, security lights, landscape lighting, illuminated windows, and even nearby solar fixtures can affect the photosensor.
The solar panel often acts as both the charging surface and part of the day/night detection system. When artificial light reaches it after sunset, the controller may interpret that light as daylight and keep the LEDs switched off.
This issue often appears after installation rather than during testing. A light may work perfectly in a dark garage but fail once placed beside a brightly illuminated driveway.
Move the fixture temporarily to a darker location. When it starts operating normally, reposition the panel so nearby lighting does not shine directly onto the sensor.
19. The LEDs or Internal Controller May Be Defective
Once charging, battery contact, switch position, sunlight exposure, sensor conditions, and wiring have all been checked, an internal electronic fault becomes more plausible.
Possible defects include:
- A failed LED board
- A damaged charging controller
- A faulty light sensor
- Broken internal wiring
- A failed switch
- Poor solder connections
- A defective battery protection circuit
These failures are less common than charging or installation problems, but manufacturing defects do occur.
A multi-pack makes diagnosis easier. Charge all units together under identical conditions. When one repeatedly fails while the others operate normally, that unit is likely defective.
At that point, exchanging the product is generally more practical than opening a sealed new fixture and attempting an electronic repair.
20. A Simple Step-by-Step Test for Brand New Solar Lights
A structured test can quickly separate charging problems from hardware faults.
Start by checking the power switch and removing any battery isolation tab. Confirm that the rechargeable battery is installed in the correct direction and firmly touching its contacts.
Next, remove any protective film from the solar panel and wipe the panel clean. Place the fixture in an open area with strong direct sunlight for a full day.
After sunset, move away from porch lights, streetlights, and illuminated windows. Cover the panel completely to simulate darkness.
When the light still does not operate, switch it off and perform a basic reset. Reinstall the battery, return the switch to ON, and charge it again.
For lights sold in a set, swap the battery with a working identical unit. This can reveal whether the battery or the fixture itself is causing the failure.
A light that remains completely unresponsive after these checks is much more likely to have a defective panel, controller, sensor, switch, LED assembly, or internal connection.
How Much Sun Do New Solar Lights Really Need?
There is no single sunlight requirement that applies to every solar light.
Small decorative pathway lights may operate with relatively modest energy because their LEDs consume little power. High-output spotlights, wall lights, and security lights need substantially more stored energy.
Panel size also matters. A physically larger or more efficient panel can collect more energy than a very small panel under the same conditions.
Direct sunlight generally provides the strongest charging performance, but the total energy collected across the day matters most. A panel receiving several hours of strong sun can outperform one receiving weak indirect daylight from morning until evening.
The permanent installation position should therefore be chosen according to actual sun exposure rather than convenience alone.
How to Tell Whether the Battery or Solar Panel Is the Problem
Battery and panel failures can produce similar symptoms, but a simple comparison can often separate them.
A light with a weak battery may charge but run only briefly after dark. A light with a failed panel may never replenish the battery at all.
With identical solar lights, interchange only the rechargeable batteries. When the previously dead light starts working with a known-good charged battery, its original battery is likely the problem.
When the known-good battery also becomes depleted after being installed in the suspect fixture, the solar panel or charging circuit deserves closer attention.
This type of controlled comparison is much more reliable than replacing random components.
Why New Solar Lights Sometimes Work for a Few Minutes and Then Turn Off
Brief operation usually indicates that the LEDs and light sensor are functioning, but the battery does not contain enough usable energy.
This commonly happens after:
- A short first charge
- Several cloudy days
- Installation in partial shade
- A weak rechargeable battery
- Poor panel orientation
- A dirty or covered panel
- Cold-weather charging
- A battery that has been stored in a discharged state
Allowing a longer charge under stronger sunlight often resolves the issue.
When the runtime remains extremely short after several strong charging cycles, the battery may have unusually low capacity and should be tested or replaced with the correct rechargeable type.
Why One New Solar Light Works but Another Does Not
When several lights from the same package are installed together and only one fails, sunlight is less likely to be the sole cause, particularly when all panels receive similar exposure.
Compare the failed unit directly with a working one.
Check switch position, battery orientation, battery voltage, protective film, sensor exposure, panel condition, and visible wiring. Swapping only one component at a time can reveal the cause without introducing additional variables.
A single failed unit in an otherwise functioning set often points to a loose battery connection, bad battery, defective switch, damaged panel, or manufacturing fault.
Should Brand New Solar Lights Be Returned?
Returning a new solar light is reasonable once the basic setup, charging, battery, switch, and sensor checks have been completed and the light still does not operate properly.
Visible cracks, water intrusion, damaged wiring, loose internal parts, or repeated failure after adequate charging may indicate a manufacturing or product defect. Customers who purchased from Lumetrolight can contact our support team for professional troubleshooting guidance and practical recommendations based on the specific issue. When the product qualifies under our return and refund policy, an eligible refund can also be arranged.
For a brand-new solar light, basic troubleshooting is appropriate, but extensive repair or internal modification should not be necessary.
FAQs
Can New Solar Lights Charge Through a Window?
Solar lights may receive some energy through a window, but glass can reduce the intensity of sunlight reaching the solar panel.
For the initial charge, placing the light outdoors in unobstructed sunlight generally provides more reliable charging performance.
Can Artificial Light Charge Brand New Solar Lights?
Some artificial light sources can produce a small amount of electrical output from a solar panel, but they are usually far less effective than sunlight.
Household lighting is generally not a practical substitute for outdoor solar charging.
See also: Can You Charge Solar Panels with Artificial Light?
Why Are My New Solar Lights Flickering Instead of Staying On?
Flickering can be caused by unstable electrical connections, inconsistent sensor signals, low battery voltage, or an internal electronic fault.
A new light that continues flickering after a proper charge and basic inspection may require replacement.
Why Do New Solar Lights Turn On at Different Times?
Individual solar lights may activate at slightly different times because their sensors respond differently to surrounding brightness.
Panel orientation, nearby objects, shadows, and small differences in sensor sensitivity can also affect when each light switches on.
Can I Use a Higher-Capacity Rechargeable Battery in New Solar Lights?
A higher-capacity rechargeable battery may provide longer potential runtime, but it must match the light's required battery chemistry, voltage, and physical size.
An incompatible battery can cause poor charging performance or interfere with the light's charging circuit.
