
Why Solar Lights Sometimes Need a Reset
What a Reset Actually Does
Before You Reset Solar Lights
How to Reset Solar Lights: Step-by-Step
How to Reset Solar Lights with No Removable Battery
When Resetting Solar Lights Does Not Work
Best Practices After Resetting
Common Mistakes to Avoid
FAQs
Solar lights are one of the simplest and most energy-efficient ways to illuminate gardens, pathways, driveways, patios, and outdoor living spaces. They are affordable, easy to install, and require very little maintenance compared with traditional wired lighting systems. However, like any outdoor device exposed to weather, dust, and changing temperatures, solar lights can sometimes stop working properly. When that happens, many people assume the light is broken and needs to be replaced. In reality, a reset is often all it takes to bring a solar light back to normal operation.
If you are wondering how to reset solar lights, the good news is that the process is usually straightforward. Still, the exact steps can vary depending on the type of light, battery design, switch placement, and whether the unit includes a power-saving or automatic sensor mode. Understanding why a reset is necessary and how solar lights function will help you troubleshoot more effectively and avoid unnecessary replacements.
Why Solar Lights Sometimes Need a Reset
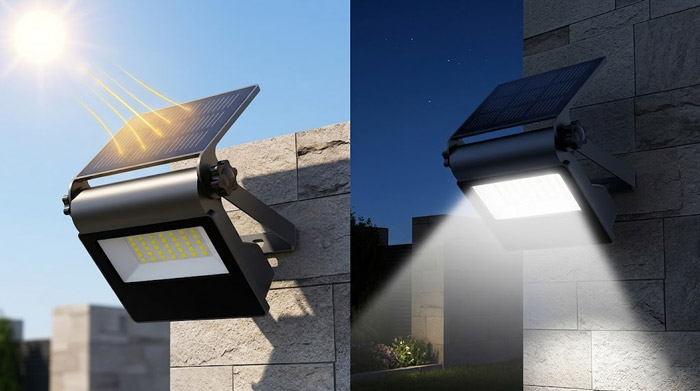
Solar lights work by using a small photovoltaic panel to collect sunlight during the day and store that energy in a rechargeable battery. At night, a light sensor detects darkness and turns on the LED bulb using the stored battery power. This sounds simple, but several factors can interrupt the process.
A solar light may need a reset because of:
- Battery connection problems
- Low battery charge after cloudy weather
- Dirt or debris covering the solar panel
- Moisture entering the housing
- A malfunctioning light sensor
- Switches accidentally left in the wrong position
- Internal power management errors after battery replacement
In many cases, resetting the light helps restore the normal charging and lighting cycle. It essentially gives the unit a fresh start, especially after the battery has been removed, replaced, or drained too far.
What a Reset Actually Does
A reset does not magically repair damaged hardware, but it can clear temporary issues in the light’s power flow. For example, if the battery is installed correctly but the light does not respond, turning the unit off, disconnecting the battery briefly, and then reactivating it may help the internal system recalibrate.
Think of it as restarting a small electronic device. If the problem is caused by a minor interruption rather than a broken part, a reset can solve it quickly.
Before You Reset Solar Lights
Before starting the reset process, it is important to inspect the light carefully. Sometimes the issue is not technical at all. A simple blockage or incorrect setup may be the real cause.
Check the following first:
- Make sure the power switch is on.
Many solar lights have an on/off switch hidden under the top cover or near the battery compartment. If the switch is off, the light will never charge or illuminate properly. - Inspect the solar panel.
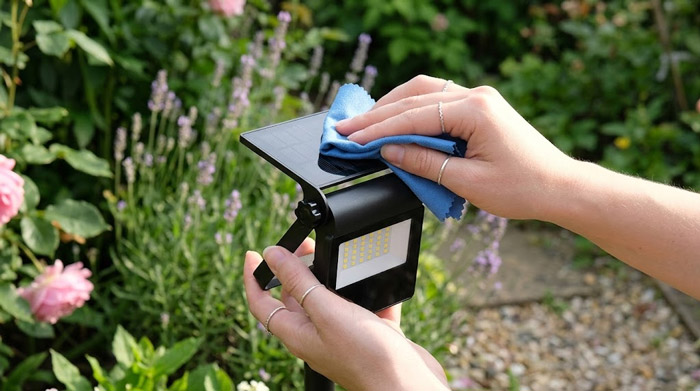
Dirt, leaves, bird droppings, or a layer of dust can reduce charging performance. Wipe the panel gently with a soft damp cloth. - Test for enough sunlight exposure.
If the light is placed under trees, near walls, or in a shaded area, it may not receive enough direct sunlight to charge fully. - Check the battery.
Rechargeable batteries in solar lights degrade over time. If the battery is old, swollen, rusted, or leaking, resetting alone will not solve the problem. - Look for corrosion.
Battery terminals may develop corrosion, especially in humid outdoor environments. This can block the electrical connection. - Confirm the light sensor is not confused.
Solar lights usually turn on only in darkness. If you test one in daylight, it may appear dead when it is actually working normally.
Once these basic checks are complete, you can move on to the actual reset process.
How to Reset Solar Lights: Step-by-Step
Although models vary, the following method works for most common solar pathway lights, garden stake lights, decorative solar lanterns, and wall-mounted solar fixtures.
Step 1: Turn the Solar Light Off
Locate the power switch and turn the light off completely. This is the first step in interrupting the current operating cycle. Leave it off for at least 10 to 20 seconds.
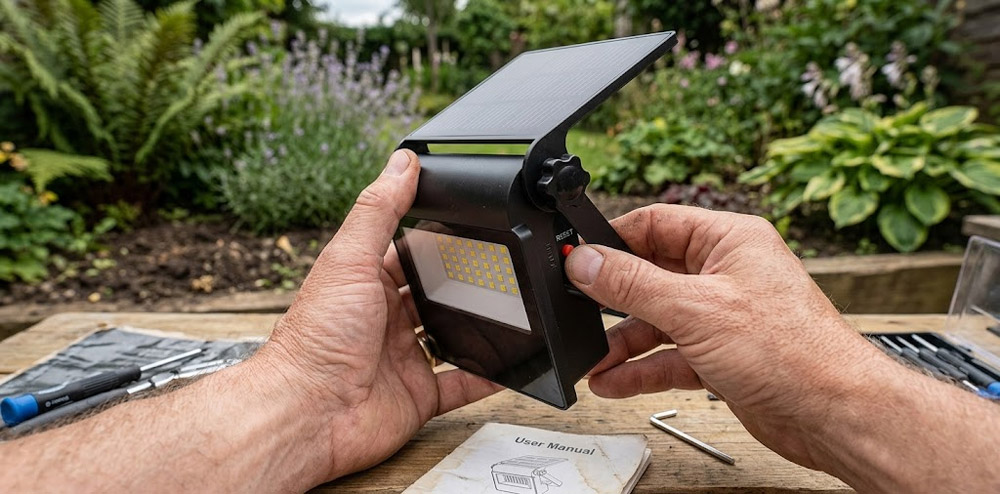
If your solar light does not have a visible switch, consult the product manual. Some models use a pull tab or require opening the battery compartment during initial setup.
Step 2: Remove the Battery
Open the battery compartment carefully and remove the rechargeable battery. Most solar lights use AA or AAA NiMH rechargeable batteries, though some larger models may use lithium-ion battery packs.
Once the battery is removed, wait about 30 seconds to one minute. This pause allows any residual electrical charge inside the device to dissipate.
Step 3: Inspect and Clean the Battery Contacts
Before reinstalling the battery, inspect the battery terminals. If you see dirt, oxidation, or corrosion, clean the contacts gently using a dry cloth or a cotton swab. For heavier corrosion, a small amount of vinegar on a cotton swab can help, followed by drying thoroughly.
Be careful not to damage the metal contacts or leave moisture behind.
See also: How to Clean Garden Lights?
Step 4: Reinsert or Replace the Battery
Put the battery back in, making sure the positive and negative ends match the markings inside the compartment. If the battery is old or weak, replace it with a compatible rechargeable battery of the same type and voltage.
Using the wrong battery type can damage the light or reduce performance, so always match the original specifications.
Step 5: Turn the Light Back On
After the battery is secure, switch the light back on. At this point, the light has been effectively reset.
Step 6: Charge the Light in Direct Sunlight
Place the solar light in an area with strong direct sunlight for at least 6 to 8 hours. Some lights may need a full day of charging after a reset, especially if the battery was deeply discharged.
Do not test the light immediately unless it has already received enough charge.
Step 7: Test the Light in Darkness
To test whether the reset worked, cover the solar panel completely with your hand or a dark cloth. This simulates nighttime. If the light turns on, the reset was successful.
If it still does not work, the issue may be related to the battery, LED, circuit board, or moisture damage rather than a simple system error.
How to Reset Solar Lights with No Removable Battery
Some modern solar lights have sealed battery compartments. In those cases, resetting is still possible, but the method is slightly different.
Try this approach:
- Turn the light off.
- Place it in direct sunlight for a full day while switched off.
- Turn it on after sunset.
- Cover the panel to test the sensor.
- If the light has a reset button, press and hold it for 5 to 10 seconds.
Not every sealed unit includes a reset button, but some premium models do. If there is no button and no removable battery, the off-and-recharge method is usually the closest equivalent to a reset.
When Resetting Solar Lights Does Not Work
If your solar light still fails after a proper reset, the problem may be more serious. Here are the most common non-reset issues:
1. Dead Rechargeable Battery
The battery is one of the first parts to wear out. Most solar light batteries last between one and three years depending on quality, climate, and charging conditions. If the battery no longer holds a charge, the light may seem broken even though the panel and LED are fine.
2. Water Damage
Outdoor lights are designed to resist weather, but cheaper models may still allow moisture inside. Water can corrode the circuit board, damage battery contacts, or short internal components.
3. Failed LED Bulb
LEDs usually last a long time, but they can still fail. If the battery and charging system are fine yet there is no light output, the LED itself may be defective.
4. Faulty Solar Panel
If the panel is cracked, badly scratched, or no longer generating enough voltage, the battery will not charge properly. Resetting cannot solve this issue.
5. Sensor Malfunction
The light sensor tells the unit when it is dark enough to turn on. If that sensor fails, the light may never activate or may stay on at the wrong times.
See also: Why Aren’t My Solar Lights Working?
Best Practices After Resetting
Once your solar lights are working again, a few maintenance habits can help prevent future problems.
Keep the Solar Panel Clean
A dirty panel cannot absorb sunlight efficiently. Cleaning the panel every few weeks can improve performance significantly.
Place Lights in Full Sun
Solar lights need strong direct sunlight, not just daylight. Six to eight hours of sun is ideal for most models.
Replace Batteries Periodically
Even if a light still works, battery performance may decline gradually. Replacing old batteries before complete failure often restores brightness and runtime.
See also: Solar Powered Garden Lights Battery Life: How Long Does It Last?
Protect Against Water Intrusion
Check that covers, seals, and battery compartments are closed tightly. If necessary, add a weather-resistant seal where appropriate, as long as it does not block ventilation or manufacturer access points.
Store Seasonal Lights Properly
If you use decorative solar lights only during certain times of year, store them in a dry place during the off-season. Remove the batteries if recommended by the manufacturer.
Common Mistakes to Avoid
Many people unintentionally reduce the life of their solar lights by making a few avoidable mistakes.
One common mistake is replacing the rechargeable battery with a standard alkaline battery. This is dangerous because solar lights are designed to recharge batteries, and standard alkaline batteries are not meant for that purpose.
Another mistake is assuming the light is broken after one cloudy day. Solar lights often need strong charging conditions to perform at their best, especially in winter or rainy seasons.
A third mistake is testing the light in bright daylight and thinking it has failed. Remember that the darkness sensor may prevent it from turning on unless the panel is covered.
FAQs
How long do solar lights usually last?
Most solar lights last 2 to 5 years, depending on build quality, battery type, weather exposure, and daily sunlight conditions.
The LED itself can last much longer, but batteries, seals, and solar panels usually determine the product’s real lifespan.
Do solar lights work well in winter?
Yes, solar lights can still work in winter, but performance is often reduced because of shorter daylight hours, weaker sunlight, snow cover, and lower temperatures.
Keeping panels clean and placing lights in the sunniest spot can improve winter charging efficiency.
Can solar lights charge on cloudy days?
Yes, solar lights can charge on cloudy days, but they collect far less energy than they do in direct sunlight.
As a result, the lights may run for fewer hours at night or appear less bright after several overcast days in a row.
What is the best battery type for solar lights?
The best battery type depends on the light design, but NiMH rechargeable batteries are commonly preferred for standard solar garden lights because they are durable, widely available, and perform better than older NiCd batteries.
Higher-end models may use lithium-ion batteries for longer runtime and better energy density.
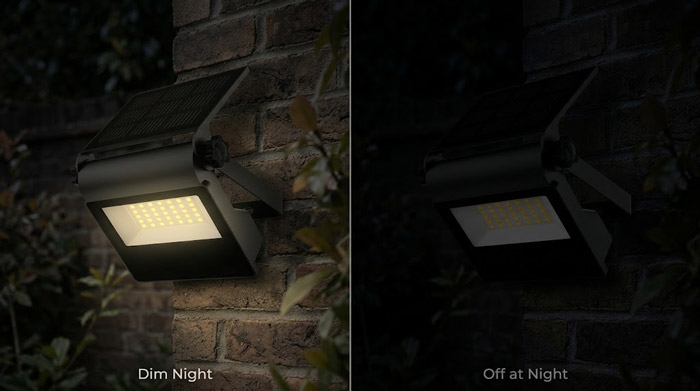
Why do solar lights flicker or turn on and off repeatedly?
Solar lights may flicker because of a loose battery connection, dirty panel, unstable sensor response, moisture inside the housing, or a weak battery that cannot deliver steady power.
Repeated flickering is usually a sign that the light is not getting consistent energy storage or power flow.
