
How Solar Garden Lights Are Wired
Before You Replace: Diagnose the Actual Failure
Quick symptom-to-cause mapping (regular paragraph)
Simple tests you can do with a multimeter (regular paragraph)
Choosing the Right Replacement Panel
Key selection criteria (bullet list)
Compatibility Table
Tools and Materials You’ll Want
Recommended kit (bullet list)
Step-by-Step Solar Panel Replacement
Solar Light Safety Features
Professional Troubleshooting After Replacement
Common issues and fixes (bullet list)
Upgrades That Actually Improve Results
Practical upgrades (bullet list)
Maintenance to Extend the Life of the New Panel
FAQs
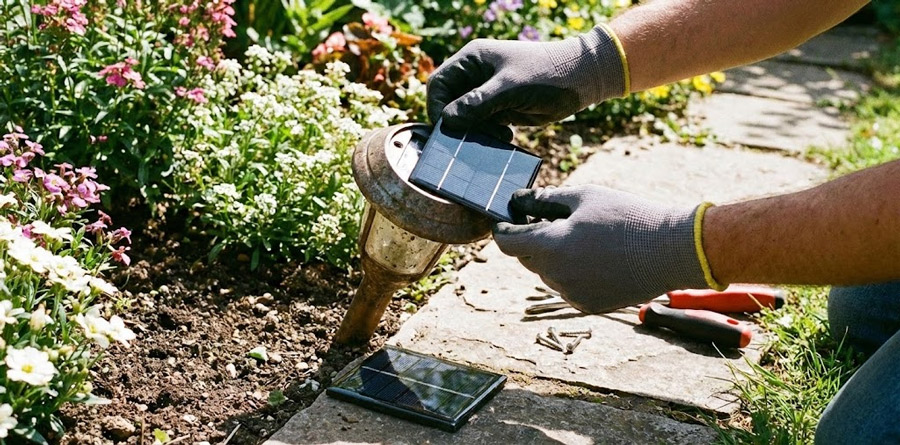
Solar garden lights are deceptively simple: a small photovoltaic (PV) panel charges a battery during the day, and a light sensor turns on an LED at dusk. When they stop performing—dim light, shorter runtime, or no light at all—the solar panel is often blamed first. In reality, performance is the result of a system: panel + battery + charge controller (sometimes integrated) + LED + wiring + sealing. Replacing the solar panel can be a cost-effective way to extend the life of a fixture, especially when the housing and LED are still in good condition. This guide explains how to diagnose the real problem, choose the right replacement panel, and install it correctly so the repaired light lasts.
A successful replacement starts with identifying what failed and why. Garden lights live outdoors year-round. UV exposure embrittles plastics, temperature swings stress solder joints, moisture attacks contacts, and dust reduces panel output. Sometimes the panel is physically cracked or delaminated. Other times it’s fine, but corrosion in the battery compartment or a worn-out rechargeable cell prevents charging. Treat panel replacement as a professional repair: verify symptoms, select compatible parts, protect against water intrusion, and test the electrical behavior rather than guessing.
How Solar Garden Lights Are Wired
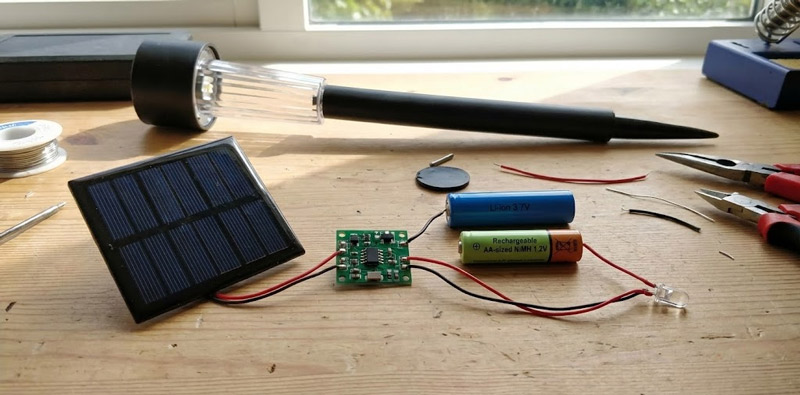
Most small garden lights use a panel rated roughly 1.5–2.5V (nominal) feeding a simple charging circuit that charges either 1× NiMH/NiCd (1.2V) or 1× Li-ion/LiFePO₄ (3.2–3.7V) depending on design. The energy collected by the solar panel is stored in a rechargeable lithium-ion battery built into the solar light. Many popular stake lights use a 1.2V NiMH cell with a 2V panel and a small controller that also drives the LED at night. Some newer decorative lights use 3.2V LiFePO₄ or 3.7V Li-ion with a higher-voltage panel and a different controller. This matters because panel replacement is not just “same size, same look”—the electrical characteristics must match the battery chemistry and the charging method.
Using high-quality rechargeable batteries, such as lithium-ion, is important for longer lighting times and overall performance of solar garden lights. Rechargeable batteries in solar garden lights typically need replacement every 1–3 years for consistent performance.
Before You Replace: Diagnose the Actual Failure
Panel replacement is worthwhile when the panel is visibly damaged or measurably underperforming. If you skip diagnosis, you can spend money and time only to discover the real issue was the battery—so always check the batteries' lifespan and consider replacement if they are old or degraded—water ingress, or a failed controller IC.
Quick symptom-to-cause mapping (regular paragraph)
If the light turns on briefly and then fades quickly, the battery capacity is usually degraded. Degraded batteries are a common cause of reduced performance in solar garden lights and may need replacement every 1–3 years. If the light never turns on at night but the battery measures reasonable voltage, the dusk sensor or controller may be faulty. If the light works after charging the battery externally but not after a sunny day, the panel or charging path (corroded contacts, broken wires) is suspect. If the panel is cloudy, yellowed, cracked, or delaminated, output is often reduced enough that runtime drops even with a good battery.
Simple tests you can do with a multimeter (regular paragraph)
In full sun, disconnect the panel from the circuit (or access its leads) and measure open-circuit voltage (Voc). A “2V” small panel can show ~2.0–2.4V in strong sun; a higher-voltage panel might show 5–6V depending on its rating. Then measure short-circuit current (Isc) by briefly switching the meter to current mode (use the correct port and range). Compare your readings to the replacement panel’s typical current rating (mA). If Voc is dramatically low in full sun, or Isc is near zero, the panel is likely bad or its leads are broken internally.
Choosing the Right Replacement Panel

The best replacement matches electrical rating, physical fit, mounting method, and environmental sealing. Most failures happen when people match only the size and ignore voltage/current compatibility. For optimal performance, solar garden lights should be placed in areas that receive six to eight hours of direct sunlight each day.
- Panel nominal voltage & Voc: Match the original panel’s voltage. Panels should be positioned to receive sunlight for a minimum of 3-4 hours, but ideally 6-8 hours, to ensure reliable operation.
- Panel current & wattage: Match or slightly exceed the original panel’s current and wattage ratings.
- Panel type: Monocrystalline solar panels are the most efficient, converting up to 22% of sunlight and performing better on cloudy days.
- Physical size: Ensure the replacement panel fits the available space.
- Mounting method: Check if the panel is glued, screwed, or clipped in.
- Environmental sealing: Make sure the panel is weatherproof for outdoor use.
Key selection criteria (bullet list)
Battery chemistry and configuration
- 1× NiMH/NiCd (1.2V): commonly paired with a ~2V panel.
- 1× LiFePO₄ (3.2V) or Li-ion (3.7V): typically needs a higher-voltage panel and a different charge controller.
Panel nominal voltage & Voc
- Pick a panel with similar nominal voltage to the original. Too low: won’t charge. Too high: may overheat or stress the controller if it wasn’t designed for it.
Current (mA) rating / wattage
- Higher current can improve charging if the controller can handle it and the battery capacity is appropriate.
Connector type
- Many lights use soldered leads; some use JST-style micro connectors. Matching the connector saves time and reduces failure points.
Physical dimensions
- Ensure the panel fits the top cap, including thickness, wire exit point, and any lip/gasket.
Weatherproof construction
- Prefer epoxy-laminated or tempered glass mini-panels; avoid flimsy panels without sealing if the light is exposed to rain.
Polarity
- Confirm positive/negative leads. Reversed polarity can kill the controller.
Adjustable settings
- Check if the replacement panel or light offers adjustable settings such as brightness levels, timing controls, or motion sensor sensitivity. Customizing these settings can help optimize performance and conserve power for your specific needs.
Compatibility Table
Use this as a professional checklist when selecting a replacement. Values are typical ranges for common garden lights; always confirm your specific unit.
|
Garden light type |
Typical battery |
Typical panel nominal |
Full-sun Voc (approx.) |
Typical charging current |
Replacement notes |
|---|---|---|---|---|---|
|
Basic stake/path light (classic) |
1× NiMH 1.2V (AA/AAA) |
2V |
2.0–2.4V |
20–80 mA |
Most common. Match ~2V panel and similar lead routing. |
|
Brighter path light (larger head) |
1× NiMH 1.2V (AA) |
2V (larger area) |
2.0–2.4V |
60–200 mA |
Higher current ok if controller and battery capacity suit. Upgrade battery too. |
|
Spotlights (adjustable) |
1× Li-ion 3.7V or pack |
5–6V panel |
5.5–7.0V |
150–600 mA |
Versatile for highlighting landscape features or providing security illumination. Can be staked into ground or wall-mounted. Ensure durability and adjustable modes. |
|
Decorative string/fairy (some models) |
1× Li-ion 3.7V or pack |
5–6V panel |
5.5–7.0V |
100–500 mA |
Fairy lights are ideal for wrapping trees or highlighting garden features to create a festive atmosphere. Do not replace with 2V panel. Must match controller + battery pack. |
|
“Edison bulb” style solar lantern |
1× LiFePO₄ 3.2V or Li-ion |
5–6V panel |
5.5–7.0V |
150–600 mA |
Edison bulbs offer vintage style and aesthetic appeal, adding elegance and charm to outdoor spaces. Often sealed; panel replacement requires careful waterproofing. |
|
Wall-mounted solar step light |
1× NiMH or Li-ion |
Varies |
Varies |
Varies |
Check original label; many have integrated boards and odd connectors. |
|
Color-changing / multi-LED head |
1× NiMH 1.2V |
2V (medium/large) |
2.0–2.4V |
80–250 mA |
Higher draw at night; ensure battery capacity and charging current are sufficient. |
Tools and Materials You’ll Want
A neat repair is usually more durable than the factory assembly—if you seal correctly.
Before final installation, testing the repaired solar garden light for brightness, durability, and weather resistance is essential to ensure optimal performance.
Tip: When selecting replacement parts or new solar garden lights, check for IP65 or IP67 ratings to confirm the lights are waterproof and dust-resistant, making them suitable for year-round outdoor use.
Recommended kit (bullet list)
- Multimeter (voltage + current ranges)
- Soldering iron, solder, flux (or crimp connectors if designed for them)
- Heat-shrink tubing in small diameters
- Silicone sealant (outdoor-rated, non-corrosive / “neutral cure” if possible)
- Small Phillips and flat screwdrivers, plastic pry tool
- Isopropyl alcohol + cotton swabs for cleaning corrosion
- Fine sandpaper or fiberglass pen for contacts
- Replacement gasket material (optional) or thin foam tape
- UV-resistant epoxy (optional, for panel edge sealing)
- Replacement battery (strongly recommended if the old one is more than ~1–2 seasons)
Step-by-Step Solar Panel Replacement
1) Document and open the unit (regular paragraph)
Work on a dry bench. Take photos before disassembly—especially wire routing and polarity. Remove the top cap or lens assembly. Many stake lights twist open; others use small screws. If the housing is brittle, use a plastic pry tool and gentle pressure to avoid cracking tabs.
2) Inspect for water damage (regular paragraph)
Look for condensation marks, green/white corrosion on springs and terminals, and blackened PCB areas. If the unit has been wet inside, replacing the panel alone won’t fix repeated failure. Plan to clean contacts and improve sealing during reassembly.
3) Identify panel rating and polarity (regular paragraph)
Some panels have markings on the back; many don’t. If you can, measure the panel’s Voc in sun or under a strong lamp. Note which lead goes to the board’s positive input. Mark it with tape. If the original wiring is color-coded (red/black), don’t assume it’s correct—confirm with the meter.
4) Remove the old panel (regular paragraph)
Panels are often held with adhesive, clips, or a gasket compression fit. If adhesive is used, warming the area slightly (not hot enough to warp plastic) can help. Disconnect the leads: desolder at the PCB or unplug the connector. Avoid pulling wires through tiny holes without noting strain relief.
5) Prepare the mounting surface (regular paragraph)
Scrape off old adhesive and clean with isopropyl alcohol. A clean, flat surface helps both adhesion and sealing. If the top cap has a gasket groove, ensure it’s intact. Replace torn gaskets; they’re a common reason for future moisture intrusion.
6) Fit the new panel and manage cables (regular paragraph)
Dry-fit the panel first. Confirm that it sits flush and does not pinch wires. Provide strain relief—tiny wire joints fail from repeated movement and temperature cycling. If the design lacks strain relief, a small bead of silicone where the wire exits can reduce stress.
7) Electrical connection (regular paragraph)
Solder or connect the leads with correct polarity. Use heat-shrink tubing over joints. Keep joints compact so the housing closes fully without pressure on the solder points. If the panel wires are thin, use minimal heat time to avoid melting insulation.
8) Seal against moisture (regular paragraph)
Outdoor reliability lives or dies on sealing. Apply a thin, continuous bead of outdoor silicone along the panel edge if the design allows, or reinstall the gasket carefully. Ensure any drain holes remain unobstructed (some designs intentionally drain). Avoid sealing in a way that traps water inside.
9) Reassemble and test (regular paragraph)
Before fully closing, test the panel output in light and verify the battery is charging (battery voltage should gradually rise over time; with NiMH, the change may be subtle). Cover the panel with your hand to simulate night—many lights will turn on immediately if the sensor is panel-based. If the light uses a separate sensor, locate and shade it. Note that solar garden lights are designed to automatically illuminate at dusk when the right level of darkness is reached. Testing the light in the evening ensures it will provide illumination for several hours at night after being charged during the day, offering reliable lighting throughout the evening without ongoing costs.
Solar Light Safety Features

Figure illustrates the Lumetro LM-SL-904 Model
When choosing solar lights for your outdoor space, safety features are just as important as style and brightness. Modern solar lights are designed with a range of built-in protections to ensure they illuminate your garden, pathway, or yard reliably and efficiently, no matter the conditions.
One of the standout safety features is the automatic dusk-to-dawn operation. These lights are equipped with sensors that detect the level of sunlight, allowing them to switch on automatically at dusk and turn off at dawn. This means your pathways, patios, and gardens are always bright when you need them, without the need for manual switches or timers. Not only does this provide peace of mind—knowing your outdoor space will be illuminated even if you’re not home—but it also conserves energy and extends the life of your lights.
Many best selling solar lights also include motion sensors, which add an extra layer of security and functionality. Motion sensor lights detect movement and instantly brighten the area, making them ideal for pathways, entrances, and any spot where you want to deter unwanted visitors or simply light your way when walking at night. For example, wall mounted lights with motion sensors can provide a bright, focused beam when someone approaches, then return to a soft glow or dim light to save energy.
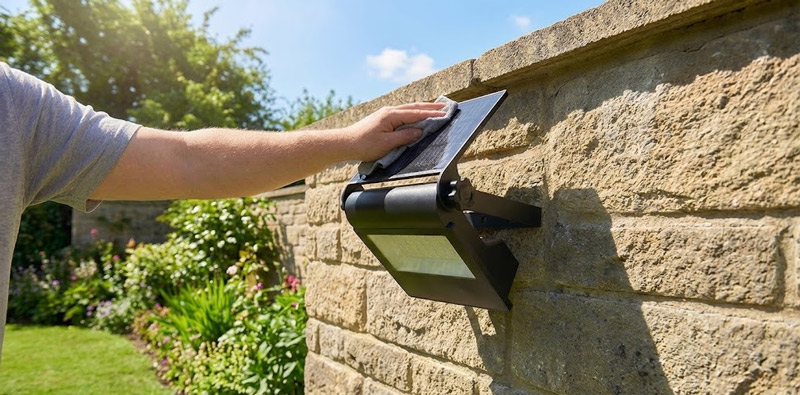
Weather resistance is another crucial safety feature. Quality solar lights are manufactured to be weatherproof, with durable housings and sealed panels that withstand rain, wind, and even snow. This ensures your lights continue to function and illuminate your outdoor space through all seasons, reducing the worry of electrical hazards or water damage. Whether you’re installing lanterns along a pathway or string lights across your backyard, choosing weather resistant models means you can expect reliable performance with little maintenance.
Installation is also designed with safety and simplicity in mind. Most solar lights require no wiring or electrical access—just stick them into the ground, hang them on fences, or attach them to walls. This not only makes them easy to install but also eliminates the risks associated with traditional electrical lighting. With minimal tools and no need for an electrician, you can quickly brighten your space and enjoy the benefits of solar lighting.
Durability is a hallmark of well-made solar lights. Using robust materials and advanced sealing techniques, these lights are built to last for years, providing a consistent soft glow or bright illumination night after night. Many models, such as solar lanterns and pathway lights, are designed to withstand the rigors of outdoor use, ensuring your investment continues to pay off with reliable performance and enhanced ambience.
In summary, solar lights offer a combination of safety, convenience, and style for any outdoor space. With features like automatic dusk-to-dawn operation, motion sensors, weatherproof construction, and easy installation, they provide both functional and decorative benefits. Whether you’re looking to secure your pathway, highlight your garden, or create a welcoming atmosphere around your house, solar lights deliver a worry-free, energy-efficient solution that’s built to last.
Professional Troubleshooting After Replacement
If the new panel is installed and performance still isn’t right, treat it like a system issue.
- Make sure the solar panel is positioned to receive sunlight for a minimum of 3-4 hours, though at least six hours of full sunlight per day is ideal for the light to last all night.
- Ensure the solar panel is not blocked by obstructions such as overhangs or nearby objects, so it can receive sunlight throughout the day.
- Trim surrounding vegetation regularly to prevent shading that can obstruct sunlight from reaching the solar panel.
- Clean the solar panels regularly to maintain optimal charging performance.
Common issues and fixes (bullet list)
Light still doesn’t turn on at night
- Battery is dead or inserted incorrectly.
- Controller board failed (water damage is common).
- LED or LED driver failed.
- Sensor is not being triggered (some are finicky; test in a darker area).
Charges but runtime is short
- Battery capacity degraded—replace it with a quality rechargeable.
- Panel is shaded (trees, eaves) or dirty; relocate or clean.
- LED draw is higher than the system was designed for (after modifications).
Works only intermittently
- Loose solder joint or cable pinch.
- Corrosion on battery spring terminals causing high resistance.
- Moisture re-entering due to poor gasket alignment.
Panel shows voltage but no charging
- Broken trace or connector on the PCB.
- Reverse polarity.
- Faulty blocking diode or controller input stage.
Upgrades That Actually Improve Results
Panel replacement is a good moment to make small upgrades that improve reliability and brightness without overcomplicating the design.
When considering upgrades, think about the purchase of stylish solar garden lights that combine attractive design with functional purposes such as safety, visibility, and ambiance. For example, the Koda 3-Head Motion-Activated Flood Light is a versatile option with adjustable heads and multiple settings for brightness and sensitivity. Another excellent choice is the Cyhkee Motion Sensor Solar Powered Wall Lanterns, which are durable, weatherproof, and feature a stylish design with multiple lighting modes.
Practical upgrades (bullet list)
Replace the battery at the same time
- A fresh panel charging an old battery is like putting new tires on a car with a failing engine.
Choose a slightly higher-current panel (within reason)
- More current can help on cloudy days, but don’t jump from a tiny 40 mA panel to a huge 500 mA panel unless the controller is designed for it.
Improve sealing and strain relief
- The most common repeat failure is water ingress and wire fatigue.
Clean/restore contacts
- Shiny metal contact surfaces reduce resistance and improve charging efficiency.
Use UV-resistant materials
- Cheap tapes and glues degrade quickly; outdoor silicone and UV-stable epoxies last longer.
Maintenance to Extend the Life of the New Panel
A replacement panel can last years if you keep it clean and the housing dry. Dust, pollen, and bird droppings reduce solar input more than people expect, especially on small panels with limited surface area.
Clean the panel gently with water and a soft cloth a few times per season. Avoid abrasive pads that haze the surface. In winter or during extreme cold weather, store your solar lights indoors to protect their batteries and electronics from freezing temperatures. In summer, solar garden lights are especially effective and convenient, providing extended evening illumination thanks to longer daylight hours. For best results, install solar lights along paths, driveways, and stairs to enhance safety and visibility, and use them to highlight plants and garden features for decorative appeal. Make sure to place your solar lights in locations where they can be easily accessed for regular maintenance, such as cleaning the solar panels. If your lights are in sprinklers’ direct spray, reposition them—irrigation water often carries minerals that leave film on the panel.
FAQs
Can a replacement solar panel be physically oversized if the electrical ratings match?
Yes, electrically compatible panels can be physically larger, but oversizing introduces mechanical and environmental risks.
Panels that overhang the housing are more exposed to wind uplift, vibration, and water intrusion at the edges.
Larger panels also increase stress on mounts and wire exits, especially during storms.
For long-term reliability, replacement panels should fit within the original housing footprint or be mechanically reinforced and resealed to the same standard as the factory design.
How does panel degradation differ from sudden panel failure?
Gradual degradation usually results from UV exposure, surface haze, microcracks, or slow delamination, leading to steadily reduced charging over time.
Sudden failure is more often caused by broken busbars, snapped lead wires, water ingress, or corrosion at solder joints.
Testing both open-circuit voltage and short-circuit current helps distinguish the two.
Degraded panels often show near-normal voltage but reduced current, while failed panels typically show abnormal voltage or near-zero current.
Is it safe to mix a new high-efficiency panel with an older charge controller?
It depends on how much higher the panel’s current capability is compared to the original design.
Most simple garden-light controllers can tolerate modest current increases of around 30–50%.
Significantly higher current panels may overheat linear charging components or stress blocking diodes, particularly in sealed housings with limited heat dissipation.
If upgrading panel output, it is best to also verify battery compatibility and observe controller temperatures during peak sun conditions.
Why do some repaired solar lights work in summer but fail in winter?
This behavior is usually caused by reduced energy margins in cold and low-sun conditions.
Cold temperatures lower battery capacity and increase internal resistance, while winter sun angles and shorter days reduce charging time.
If a repair leaves little reserve—such as pairing a small panel with a high-drain LED—the system may operate in summer but fall below operating thresholds in winter.
Winter-capable designs require extra panel capacity and a healthy battery to maintain reliability.
When is replacing the entire light more practical than replacing the panel?
Full replacement is usually more practical when multiple components are near end-of-life.
Corroded controller boards, degraded LED optics, brittle housings, or failed sealing surfaces often make panel-only replacement a temporary fix.
Panel replacement is most worthwhile when the enclosure, LED, and electronics remain mechanically sound and only the solar input has degraded.
