

Why Are My Solar Lights Not Charging?
Clean the Solar Panel to Improve Charging Performance
Check the Solar Light’s Location and Sun Exposure
Replace the Rechargeable Battery When It Becomes Weak
Check the Power Switch and Light Settings
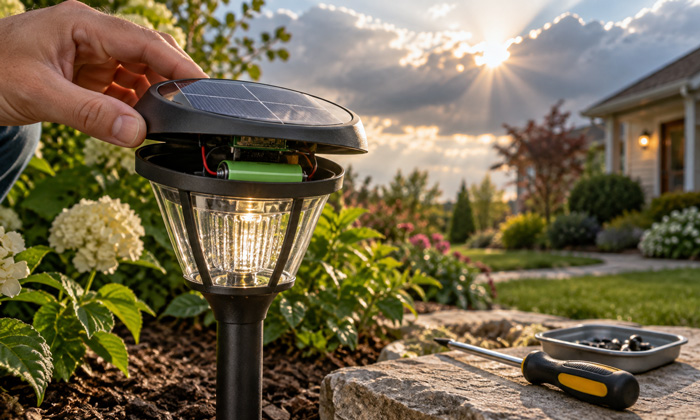
Inspect Internal Connections and Possible Damage
Reset and Recharge the Solar Light Properly
Protect Solar Lights to Prevent Future Charging Problems
When Should You Replace a Solar Light?
FAQs
Solar lights are a popular choice for outdoor lighting because they are affordable, energy-efficient, and easy to install. They use solar panels to absorb sunlight during the day, store electricity in rechargeable batteries, and automatically illuminate outdoor areas at night. However, many homeowners eventually face a common issue: solar lights that won’t charge or stop working after a short period.
When solar lights fail to charge properly, the cause is usually related to the solar panel, rechargeable battery, sunlight exposure, internal connections, or the light’s control system. Fortunately, most charging problems can be diagnosed and fixed without replacing the entire unit.
This guide explains why solar lights stop charging and provides practical solutions to restore their performance.
Why Are My Solar Lights Not Charging?
The charging process of a solar light depends on several components working together. The solar panel collects energy from sunlight, the charging circuit transfers that energy to the rechargeable battery, and the battery stores power for nighttime use. If any part of this process fails, the light may not work correctly.
One of the most common reasons solar lights stop charging is insufficient sunlight. Even if the light is placed outdoors, nearby trees, walls, fences, or buildings can block direct sunlight and reduce charging efficiency. Solar panels need several hours of strong sunlight each day to maintain enough battery power.
Another frequent cause is dirt or debris covering the solar panel. Dust, pollen, rain residue, and other outdoor particles can prevent sunlight from reaching the photovoltaic cells. Over time, this reduces the amount of energy the panel can generate.
Battery problems are also extremely common. Rechargeable batteries inside solar lights gradually lose their ability to store energy after repeated charging cycles. A weak battery may still allow the light to turn on briefly, but it will not hold enough power to operate throughout the night.
Clean the Solar Panel to Improve Charging Performance
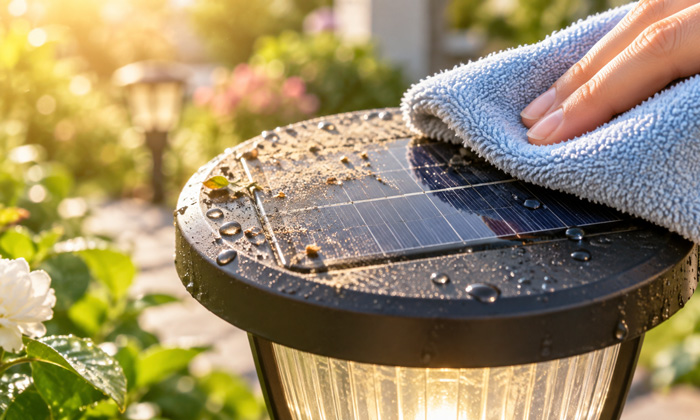
A dirty solar panel is one of the easiest problems to fix. Since solar lights are installed outdoors, their panels are constantly exposed to dust, weather, and natural debris. Even a small amount of buildup can significantly reduce charging efficiency.
To clean the solar panel, use a soft cloth with warm water and gently wipe away dirt from the surface. Avoid rough materials or strong cleaning chemicals because they may scratch the protective coating and reduce the panel’s ability to absorb sunlight.
After cleaning, place the solar light in an area with direct sunlight and allow it to charge for a full day. If poor charging was caused by a dirty panel, the light should gradually return to normal operation.
Regular cleaning every few months can help maintain solar panel performance and extend the lifespan of outdoor solar lights.
Check the Solar Light’s Location and Sun Exposure
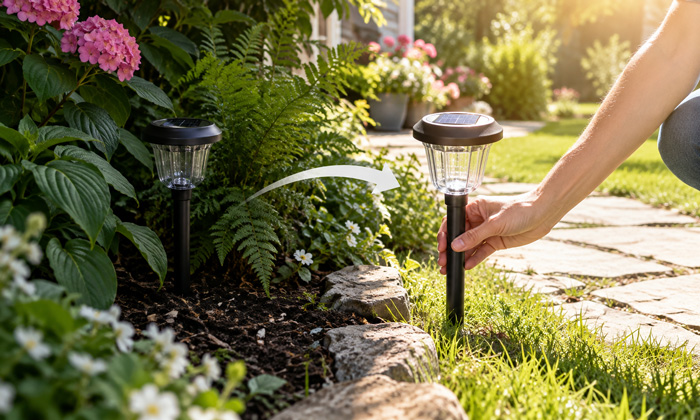
Proper placement is essential for solar lights to work efficiently. A solar panel cannot charge effectively if it receives limited sunlight during the day.
Many solar lights are installed in locations that appear bright but do not receive enough direct sunlight. For example, a garden area under a tree may have daylight but still provide insufficient solar energy because the panel remains partially shaded.
If your solar light is not charging, move it to a more open location where sunlight reaches the panel for several hours. South-facing areas often receive stronger sunlight in many regions, although the best position depends on your local environment.
Weather conditions can also affect charging performance. Several cloudy or rainy days may leave the battery with insufficient power. Allowing the solar light to receive direct sunlight for one or two full days can often restore normal operation.
Replace the Rechargeable Battery When It Becomes Weak
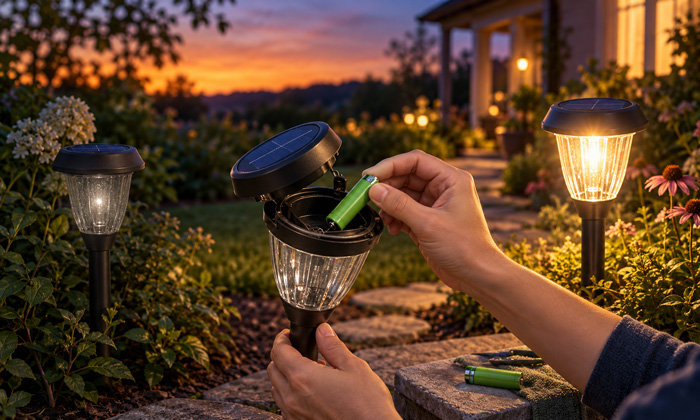
The rechargeable battery is one of the most important parts of a solar light system. Over time, batteries naturally lose their ability to store energy. Most solar light batteries last between one and three years depending on usage, weather exposure, and battery quality.
A failing battery often causes symptoms such as reduced brightness, shorter operating time, or a complete failure to turn on at night even after a sunny day.
When replacing the battery, make sure the new battery matches the original specifications. Solar lights typically use rechargeable NiMH or NiCd batteries, and using the wrong type can prevent proper charging or damage the device.
The battery compartment should also be inspected during replacement. Corrosion, moisture, or damaged contacts can interrupt the connection between the battery and the solar light circuit.
Check the Power Switch and Light Settings

Some solar lights appear to have charging problems simply because the power switch is turned off or the operating mode is incorrect.
Before assuming there is a hardware problem, check the switch position and confirm that the light is set to operate normally. Many new solar lights include a protective battery tab that must be removed before use.
The light sensor should also be checked. Solar lights use a small sensor to detect darkness and automatically turn the LED light on at night. If the sensor is covered by dirt or blocked by another object, the light may not activate even when the battery is fully charged.
A simple test is to cover the solar panel with your hand during the daytime. If the light turns on, the sensor is likely working correctly.
Inspect Internal Connections and Possible Damage
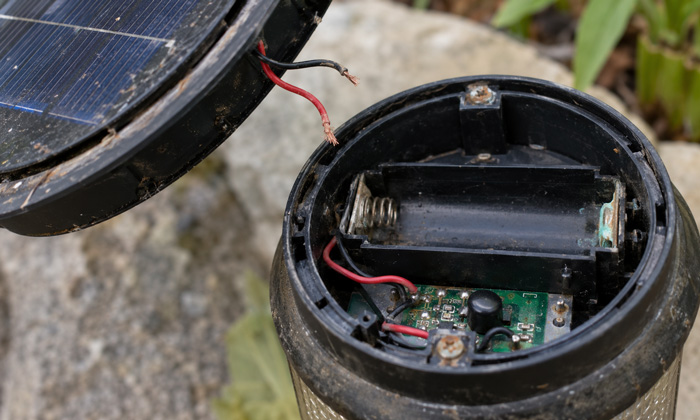
Outdoor solar lights are designed to withstand normal weather conditions, but long-term exposure to rain, humidity, and temperature changes can affect internal components.
Loose wires, corroded battery contacts, and water damage can interrupt the charging process. Carefully open the battery compartment and inspect the internal parts if basic troubleshooting does not solve the issue.
Common problems include:
- Corroded battery terminals caused by moisture exposure.
- Loose wires connecting the solar panel and battery.
- Water entering the housing and damaging electronic components.
Small amounts of corrosion can sometimes be cleaned with a soft brush or cotton swab. However, severe electrical damage may require replacing the light because repairing low-cost solar lights is often not economical.
Reset and Recharge the Solar Light Properly
Sometimes a solar light stops working because the battery has been completely drained. This often happens after long periods of cloudy weather, winter storage, or when the light has not been used for an extended period.
To recharge a completely drained solar light, turn it off if the model has a switch and place it in direct sunlight. Allow the battery to charge continuously for at least one full sunny day before testing it again.
Some solar lights may require several charging cycles before the battery reaches normal capacity. Avoid judging performance immediately after a long period without sunlight.
See also: How to Reset Solar Lights?
Protect Solar Lights to Prevent Future Charging Problems
Proper maintenance can prevent many solar light charging issues. Keeping the solar panel clean, installing lights in suitable locations, and checking batteries regularly can greatly improve reliability.
The most effective maintenance habits include:
- Cleaning solar panels regularly.
- Removing leaves, snow, and dirt from the light surface.
- Keeping solar lights away from permanent shade.
- Protecting the housing from excessive moisture.
Taking a few minutes to maintain solar lights can help prevent repeated charging problems and extend their useful life.
When Should You Replace a Solar Light?
Although many solar light problems can be repaired, some units are damaged beyond practical repair. If the solar panel is cracked, the circuit board has failed, or water has severely damaged the internal electronics, replacement may be the better option.
Replacing only the battery or cleaning the panel is usually worthwhile for a relatively new solar light. However, older models with multiple failing components may cost more to repair than purchasing a new unit.
Before replacing a solar light, check whether the problem is caused by a simple issue such as a dirty panel or worn battery.
FAQs
How long does it take for solar lights to fully charge?
Most solar lights need around 6 to 8 hours of direct sunlight to reach a full charge, although charging time depends on the solar panel size, battery capacity, weather conditions, and sunlight intensity.
During cloudy seasons or shorter winter days, solar lights may require longer charging periods.
See alsao: How Long Does It Take for Solar Lights to Charge?
Can solar lights be charged with artificial light?
Solar lights may receive a small amount of energy from artificial light sources such as LED lamps or indoor lighting, but the charging efficiency is extremely limited compared with sunlight. Artificial light usually cannot provide enough energy to fully recharge the battery, so solar panels are designed to work primarily with natural sunlight.
See also: Can You Charge Solar Panels with Artificial Light?
Why do solar lights turn off quickly after charging?
Solar lights that turn off shortly after sunset often have reduced battery capacity, an aging rechargeable battery, or insufficient energy stored during the day.
A battery that cannot hold a full charge will cause shorter operating times even when the solar panel appears to work normally.
Why are my solar lights not working after replacing the battery?
If solar lights still do not work after installing a new battery, the problem may be related to incorrect battery installation, damaged battery contacts, a faulty charging circuit, or a malfunctioning light sensor. Check that the battery is installed correctly and that all connections are clean and secure before replacing other components.
How often should solar light batteries be replaced?
Most solar light batteries need replacement every 1 to 3 years depending on usage, battery quality, and outdoor conditions.
Regular inspection helps identify when reduced brightness, shorter runtime, or charging problems are caused by battery aging.
