

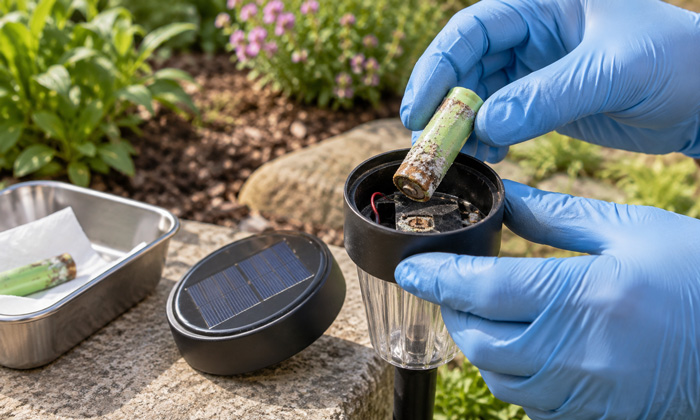
How to Identify a Leaking Solar Light Battery
Stop Using the Solar Light Immediately
Protect Yourself Before Handling the Battery
Identify the Battery Type
Remove the Leaking Battery Carefully
Inspect the Battery Compartment Before Cleaning
Clean Loose Battery Residue First
Cleaning Corroded Battery Contacts
Determine Why the Battery Leaked
Do Not Install a New Battery Into a Wet Light
Test the Solar Light After Battery Replacement
Preventing Future Battery Leakage
FAQs
Solar lights are designed to operate outdoors with minimal maintenance, but their rechargeable batteries do not last forever. Over time, heat, moisture, age, overcharging, manufacturing defects, or internal chemical deterioration can cause a battery to leak. When this happens, the problem should not be ignored. A leaking battery can damage the solar light’s contacts, circuit board, housing, and charging system. In some cases, the leaked material can also irritate skin or eyes.
Dealing with a leaking solar light battery requires a careful approach. The damaged battery should be removed safely, the battery compartment should be inspected and cleaned, and the underlying cause should be identified before a replacement battery is installed.
This guide explains how to handle a leaking solar light battery safely and how to determine whether the solar light can still be repaired.
How to Identify a Leaking Solar Light Battery
A leaking solar light battery is not always easy to notice because the battery is usually installed beneath the solar panel or inside the light housing. In many cases, the first warning signs are poor charging performance, reduced lighting time, dim output, or a solar light that stops working completely. When you open the battery compartment, check for white powder or crusty deposits around the battery terminals, green or bluish corrosion on metal contacts, brown or rusty residue, or any wet or oily substance near the battery. A swollen, distorted, cracked, or damaged battery casing is another common sign of battery leakage.
Stop Using the Solar Light Immediately
If you notice battery leakage, do not continue operating or charging the solar light.
Move the unit away from children, pets, food preparation areas, and combustible materials. If the light has an ON/OFF switch, switch it off before opening the battery compartment.
Do not repeatedly turn the light on to check whether it still works. A leaking or internally damaged rechargeable battery may behave unpredictably during charging.
Solar lights charge their batteries whenever the panel receives sufficient sunlight. Leaving a damaged battery installed can therefore expose it to repeated charging cycles and potentially accelerate deterioration.
The safest approach is to remove the defective battery before attempting any further troubleshooting.
Protect Yourself Before Handling the Battery
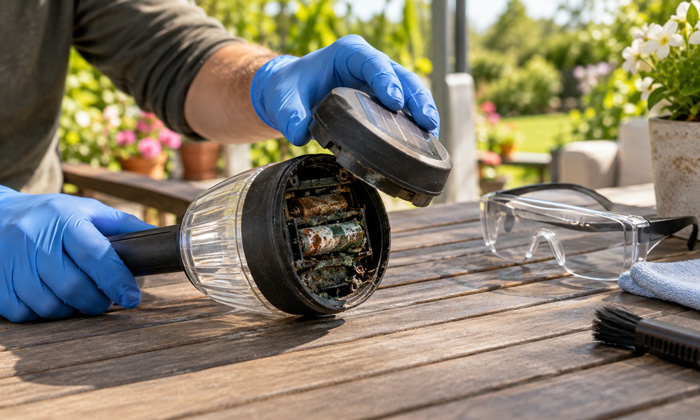
Battery leakage should be handled carefully because battery electrolyte can irritate the skin, eyes, and respiratory system.
Before opening the light, put on suitable protective gloves. Disposable nitrile gloves are generally preferable because they create a barrier between your skin and battery residue.
Eye protection is also advisable if there is significant corrosion or powder inside the compartment. Dried battery residue can break apart easily during cleaning.
Work in a well-ventilated location.
Avoid touching your face while handling the damaged battery, and wash your hands thoroughly afterward even if gloves were used.
If leaked material contacts your skin, rinse the affected area thoroughly with plenty of clean water. If it reaches the eyes, flush them continuously with clean water and seek appropriate medical advice.
Identify the Battery Type
Before cleaning the battery compartment or selecting a replacement, determine what type of battery the solar light uses.
Common rechargeable batteries in solar lights include:
- Nickel-metal hydride batteries, usually marked NiMH
- Nickel-cadmium batteries, usually marked NiCd
- Lithium-ion batteries, often marked Li-ion
- Lithium iron phosphate batteries, commonly marked LiFePO4
Many traditional garden lights use AA or AAA NiMH batteries rated around 1.2 volts. Some older models use NiCd batteries. More powerful solar lights increasingly use lithium-ion or LiFePO4 cells.
Battery chemistry matters because different battery types have different voltage characteristics, charging requirements, and safety risks.
Do not assume that any rechargeable battery of the same physical size is suitable.
For example, an AA-size 1.2 V NiMH cell and a lithium-based cell may look similar in size but have very different electrical characteristics. Installing an incompatible battery can damage the charging circuit or create a safety hazard.
Check the label on the original battery and the markings inside the battery compartment whenever possible.
Remove the Leaking Battery Carefully
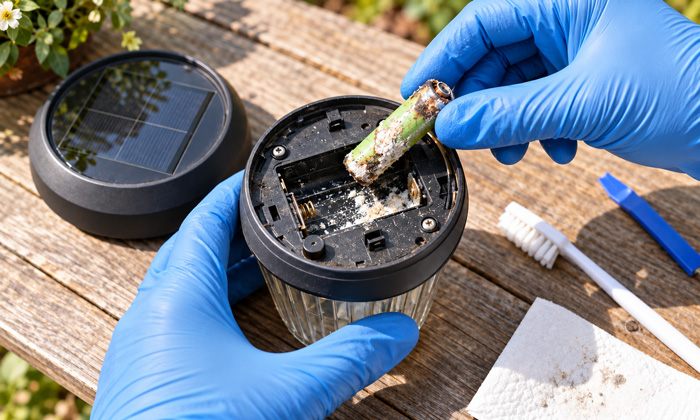
Open the battery compartment slowly so that loose corrosion does not scatter.
If the battery can be removed easily, lift it out without crushing, puncturing, or squeezing it.
Avoid using sharp metal tools directly against a damaged battery.
If corrosion has bonded the battery to the terminals, do not apply excessive force. A swollen or weakened battery casing can rupture if it is pried aggressively.
Instead, gently loosen visible corrosion around the contacts using a small nonmetallic tool or disposable brush.
If the battery is severely swollen, split, unusually hot, smoking, hissing, or visibly unstable, stop handling it. Lithium-based batteries in particular require greater caution when damaged.
A seriously compromised battery should be isolated from combustible materials and handled according to local battery disposal or hazardous-waste guidance.
Inspect the Battery Compartment Before Cleaning
Once the defective battery has been removed, examine the interior of the solar light carefully.
Look for damage to:
- Battery springs
- Contact plates
- Wiring
- Solder joints
- Plastic battery holders
- Circuit boards
- Switches
- Seals
- Solar panel connections
A small amount of terminal corrosion can often be cleaned successfully.
Severe corrosion is more problematic. If the battery electrolyte has reached the circuit board, wiring, charging controller, or LED driver, the light may have suffered permanent electrical damage.
Also check whether moisture has entered the enclosure.
Water droplets, mineral marks, rust, or dirt inside the housing may indicate that the battery leak was not the original problem. Water intrusion may have contributed to corrosion or battery failure.
Clean Loose Battery Residue First
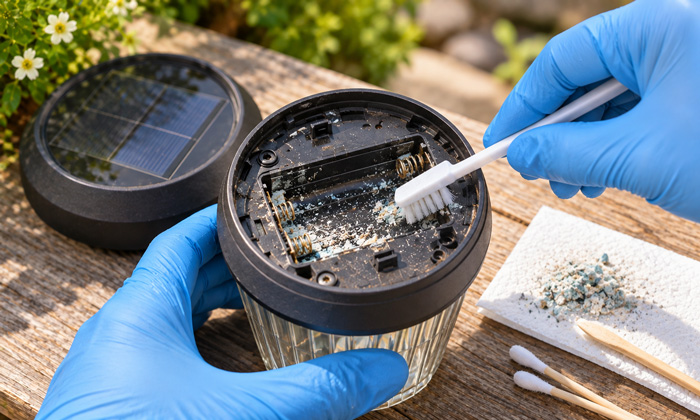
Before applying any cleaning liquid, remove loose residue from the compartment.
Use a disposable cotton swab, small brush, wooden stick, or similar nonmetallic cleaning tool.
Do not blow directly into the compartment. Blowing can spread fine residue toward your face or into the surrounding area.
Work slowly and remove as much loose material as possible.
If the corrosion is extensive, place the solar light over disposable paper or another protected surface so that residue can be collected and discarded safely.
Cleaning Corroded Battery Contacts
Battery contacts must be clean enough to provide reliable electrical conductivity.
The exact chemistry of leaked material can vary depending on the battery type, so aggressive household chemicals should not be used indiscriminately.
For mild surface contamination, begin with careful mechanical cleaning. A cotton swab or soft brush can remove loose deposits.
For stubborn corrosion on metal contacts, a small amount of appropriate contact-cleaning solution or isopropyl alcohol can help remove remaining contamination after loose residue has been cleared.
Use very little liquid. Solar lights often contain unsealed electronics directly beneath the battery compartment, so flooding the housing can create additional problems.
Apply the cleaner to a swab rather than pouring it into the light.
Gently clean:
- Spring terminals
- Flat battery contacts
- Contact tabs
- Nearby metal surfaces
Replace the swab as it becomes contaminated.
After cleaning, allow the battery compartment to dry completely before installing another battery.
Determine Why the Battery Leaked
Replacing the battery without identifying the cause may result in another failure.
Several conditions can contribute to battery leakage.
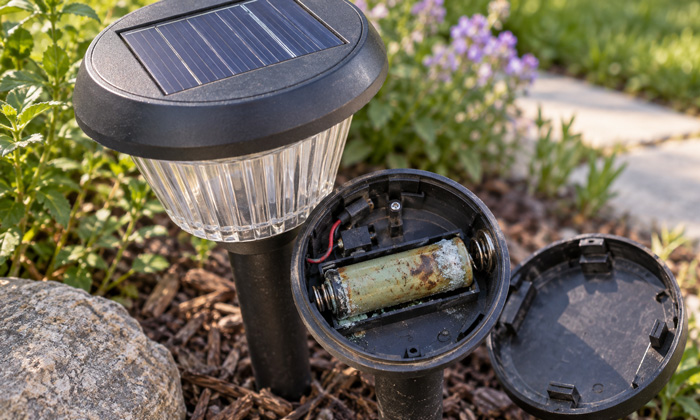
Battery Age
Rechargeable batteries have a limited cycle life.
A solar light may charge and discharge its battery every day. After hundreds of cycles, battery capacity decreases and internal deterioration increases.
Old batteries are more likely to develop leakage, swelling, self-discharge, or charging problems.
If the battery has been installed for several years, age is a likely cause.
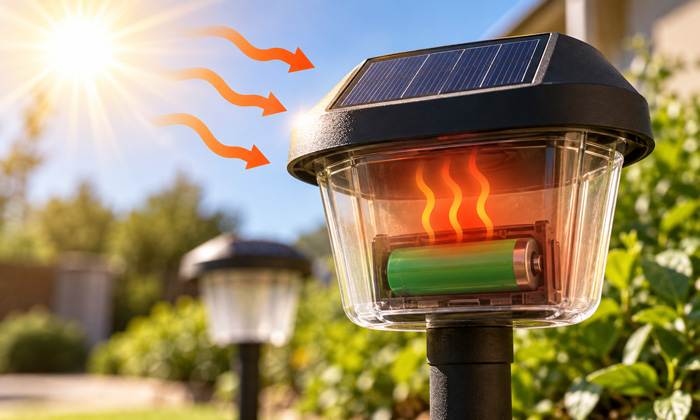
Excessive Heat
Solar lights are exposed to direct sunlight by design.
The solar panel benefits from sunlight, but the battery may experience high temperatures inside a sealed housing. Heat accelerates chemical aging and can shorten rechargeable battery life.
Dark-colored housings and poorly ventilated designs can become especially hot during summer conditions.
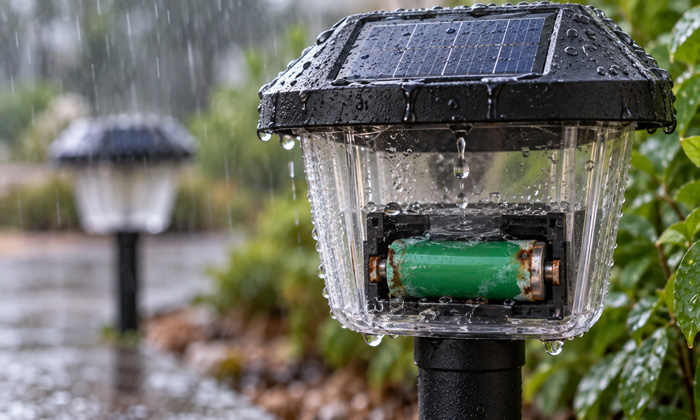
Water Intrusion
Outdoor solar lights depend heavily on seals.
Cracked housings, loose screws, damaged gaskets, degraded sealant, or poorly fitted battery covers can allow rainwater to enter.
Moisture can corrode battery terminals and increase electrical leakage currents. It can also damage the charging circuit, which may then charge the battery incorrectly.
If water intrusion is evident, the sealing problem should be corrected before the light is returned outdoors.
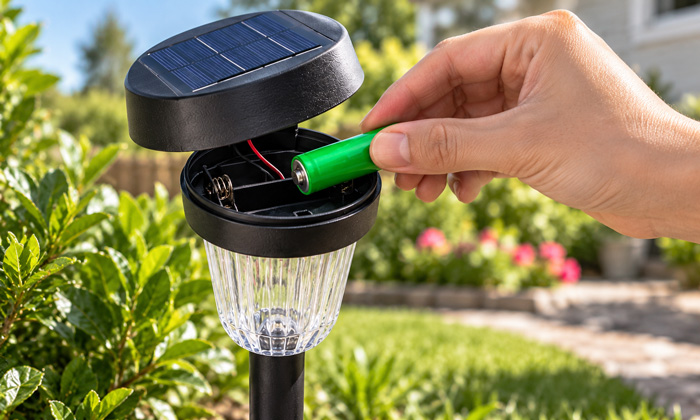
Incorrect Replacement Battery
Using the wrong battery chemistry or voltage can damage both the battery and the charging circuit.
A solar light designed for a 1.2 V NiMH cell should not automatically be fitted with a higher-voltage lithium cell simply because it physically fits the compartment.
Similarly, replacing a rechargeable battery with a standard disposable alkaline battery is not appropriate in a solar light that attempts to recharge the cell.
Always match the replacement battery to the original electrical specification.
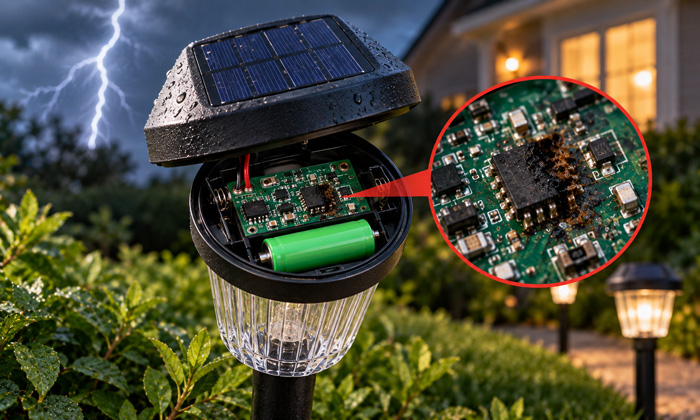
Charging Circuit Failure
A defective charging controller can expose the battery to unsuitable charging conditions.
This is less common in simple low-cost solar lights, but it can occur after:
- Water damage
- Lightning or surge exposure
- Component failure
- Reverse battery installation
- Severe corrosion
If multiple new batteries fail unusually quickly in the same light, the charging circuit should be considered suspect.
Do Not Install a New Battery Into a Wet Light
Before installing the replacement battery, make sure the entire battery compartment is completely dry.
This is especially important if alcohol or another cleaning solution was used.
Moisture around battery contacts can cause:
- Corrosion
- Leakage current
- Charging problems
- Short circuits
- Unstable operation
Check under springs and around wiring openings where liquid may remain trapped.
Only install the new battery after all cleaned areas have dried.
Test the Solar Light After Battery Replacement
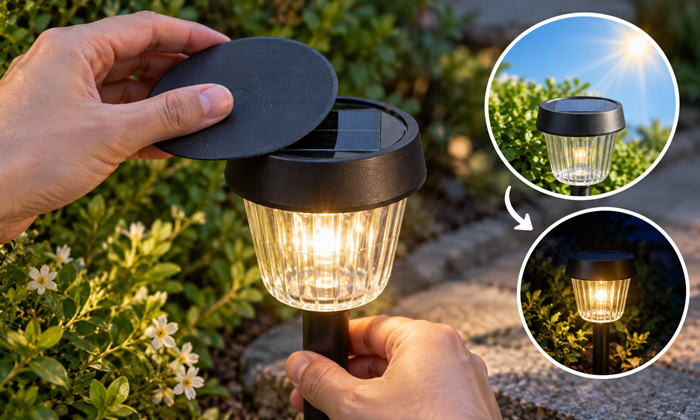
Once the new battery is installed, switch the solar light on.
Keep in mind that many solar lights do not illuminate while the solar panel is exposed to bright light. A light sensor tells the circuit to turn the LED on only when it becomes dark.
To test the lamp during the day, cover the solar panel completely with an opaque object.
If the LED turns on, the basic lighting circuit is functioning.
However, this does not prove that the solar charging system is working correctly.
Place the light in strong sunlight for several hours and test it again after dark. If the battery charges and the light operates normally, the repair was probably successful.
Preventing Future Battery Leakage
Battery leakage cannot always be prevented, but proper maintenance can significantly reduce the risk.
Inspect outdoor solar lights periodically, especially after long periods of rain or extreme heat.
Keep the solar panel and housing clean so that cracks and seal damage can be noticed early.
Check the battery compartment occasionally for early signs of corrosion.
Replace aging rechargeable batteries before they become severely deteriorated.
Do not mix old and new batteries in solar lights that use multiple cells.
Use replacement batteries of the correct chemistry and voltage.
Make sure battery compartment covers are tightened correctly without damaging seals.
If a rubber gasket has become brittle, cracked, or deformed, replace it where possible.
Lights that are stored for extended periods should be handled according to the manufacturer's storage instructions. In some designs, removing the battery during long-term storage can reduce the risk of leakage and corrosion.
FAQs
Can a leaking solar light battery damage the solar panel?
A leaking battery usually does not damage the solar panel directly because the panel and battery are separate components.
However, severe corrosion inside the light can affect wiring or connections between the panel and charging circuit, which may reduce charging performance or stop the light from working.
Can battery leakage cause a solar light to flicker at night?
Yes. Battery leakage can create poor electrical contact, increased resistance, or unstable voltage inside the light.
These problems may cause the LED to flicker, turn on and off intermittently, or produce inconsistent brightness even when the battery still holds some charge.
Is battery leakage in a solar garden light harmful to plants or soil?
Leaked battery chemicals should not be allowed to remain in garden soil.
If battery residue has escaped from the light, remove the contaminated material carefully and follow local disposal guidance. Damaged batteries should never be buried, composted, or left where rainwater can carry residue into surrounding soil.
Can battery residue continue causing corrosion after the battery is removed?
Yes. Residue left on terminals, wiring, or metal contacts can continue attracting moisture and promoting corrosion even after the leaking battery has been removed.
This is why the battery compartment should be cleaned thoroughly rather than simply replacing the battery.
Why does a solar light battery leak more often after long periods of storage?
Long storage periods can allow an aging rechargeable battery to self-discharge and deteriorate internally, especially when the light is stored in hot, humid, or poorly ventilated conditions.
Batteries left installed for months without regular charging cycles may also be more likely to develop corrosion, swelling, or leakage.
