
1. Why Cleaning Garden Lights Matters
2. Safety First: Power, Water, and Electricity
3. What You’ll Need (Simple Cleaning Kit)
4. Identify Your Garden Light Type
5. Step-by-Step: The Basic Cleaning Method (Works for Most Lights)
6. How to Clean Cloudy Lenses and Covers (Plastic vs. Glass)
7. Removing Mineral Stains and Hard-Water Spots
8. Cleaning Metal Fixtures: Stainless Steel, Aluminum, Brass, and Copper
9. Cleaning String Lights and Decorative Outdoor Lights
10. Troubleshooting: When Cleaning Isn’t Enough
11. A Simple Maintenance Schedule
FAQs
Garden lights do more than make a yard look beautiful—they improve safety, highlight landscaping, and extend the time you can enjoy outdoor spaces. But because they live outside year-round, garden lights collect dust, pollen, mud splashes, hard-water stains, insect debris, and oxidation. Over time, that grime reduces brightness, changes the color of the light, and can even shorten the life of fixtures and bulbs.
The good news: cleaning garden lights is usually simple, inexpensive, and can make a dramatic difference in how your outdoor lighting performs. This guide walks you through everything—from choosing the right cleaning method for different materials to preventing future buildup—so your garden lights stay bright and reliable.
1. Why Cleaning Garden Lights Matters
Many people only notice garden lights when they stop working or look dull. Regular cleaning prevents small problems from turning into expensive repairs.
Key benefits of cleaning:
- Brighter illumination: Dirt and clouded lenses block light output.
- Better appearance: Clean fixtures instantly look more “maintained” and upscale.
- Longer lifespan: Moisture trapped under grime can accelerate corrosion and electrical issues.
- Fewer bugs: Some residues attract insects; clean lights are less likely to become bug magnets.
A simple cleaning routine—especially before and after harsh weather seasons—goes a long way.
2. Safety First: Power, Water, and Electricity
Before you touch any outdoor light fixture, treat it like a potential electrical hazard.
Always:

1. Turn off the power.
-
For plug-in lights, unplug them.
-
For wired landscape lighting, turn off the transformer or the circuit.
-
For solar lights, switch them off if they have a power switch.
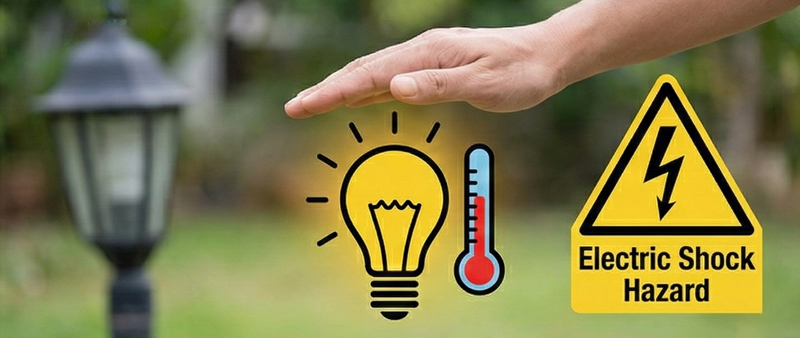
2. Let lights cool down if they were recently on.
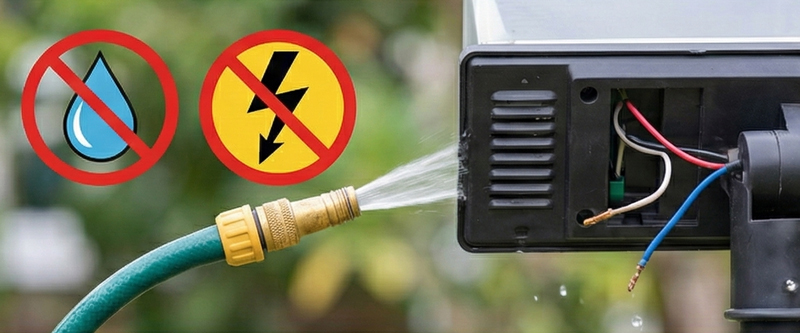
3. Avoid spraying water directly into vents, seams, bulb sockets, or wiring connections.
4. Wear gloves if fixtures have sharp edges or corrosion.
If you see cracked housings, exposed wires, or signs of melting, don’t clean and reuse—repair or replace first.
3. What You’ll Need (Simple Cleaning Kit)
You don’t need special products. In fact, gentle tools are usually best.
Basic supplies:
- Soft microfiber cloths
- A soft brush or old toothbrush
- Warm water
- Mild dish soap
- A bucket or bowl
- Cotton swabs (for tight areas)
- White vinegar (for mineral stains)
- Baking soda (for stubborn grime on non-delicate surfaces)
- Glass cleaner (optional, for glass lenses only)
- Stainless-steel cleaner (optional, for stainless fixtures)
Avoid:
- Abrasive scouring pads (they scratch lenses and finishes)
- Harsh solvents unless the manufacturer approves them
- High-pressure washers (they force water into seals and wiring)
4. Identify Your Garden Light Type
Different garden lights require slightly different cleaning methods. Start by knowing what you’re cleaning:
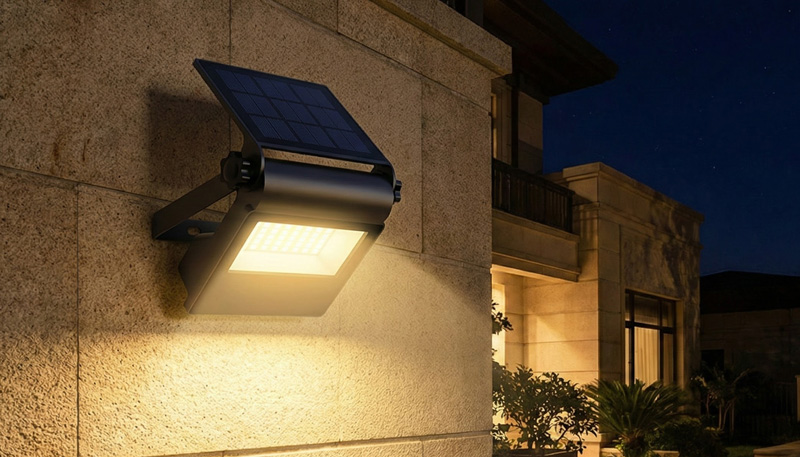
Often plastic lenses, small solar panels, and integrated battery compartments.
Figure 1. Lumetro LM-SP04 model.
Low-voltage landscape lights
Metal or composite housings, wired to a transformer for stable outdoor lighting.

String / decorative lights
Many small bulbs with plastic sockets, commonly used for ambience and decoration.
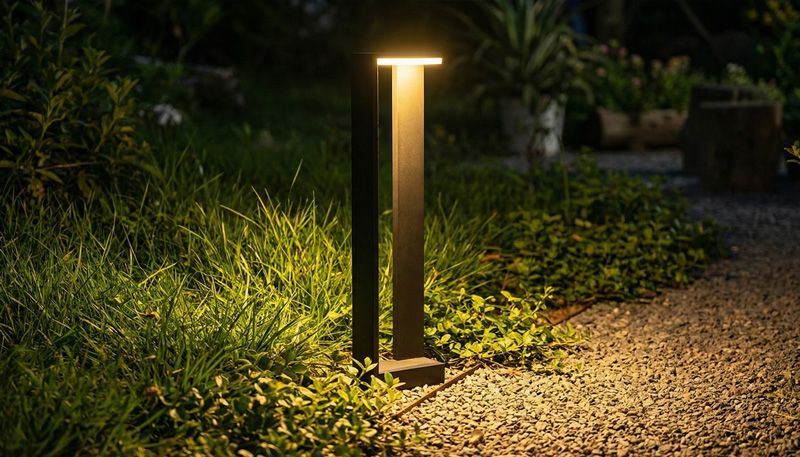
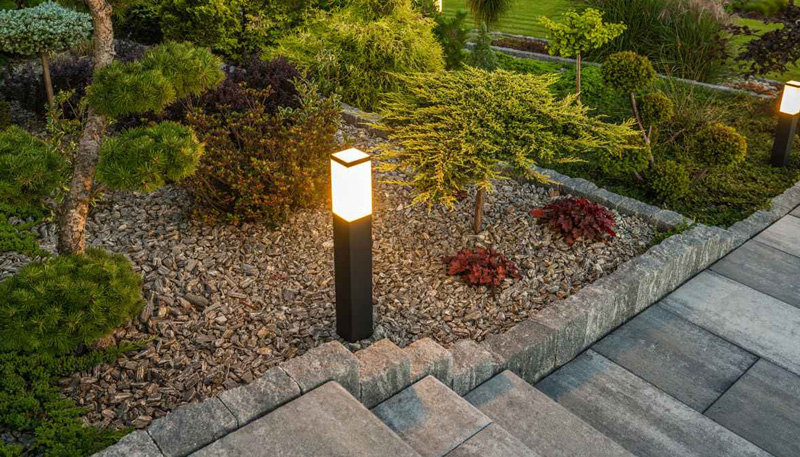
Pathway lights and bollards
Installed close to the ground and often exposed to mud splashes and debris.
Figure 2. Lumetro LM-CP9915 Model.
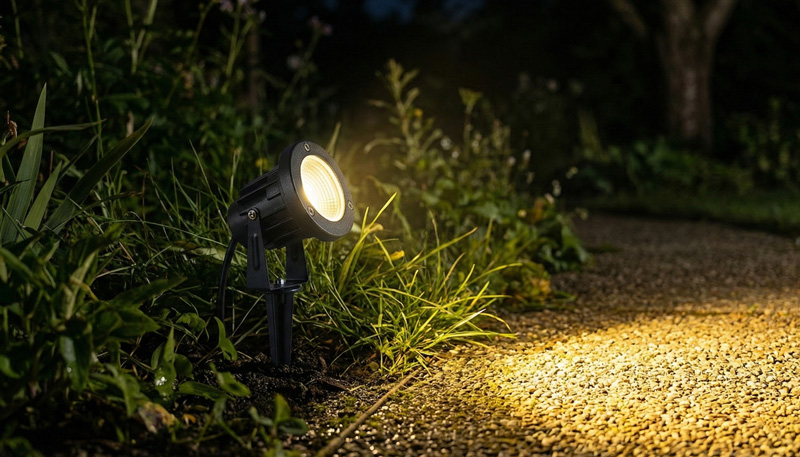
Spotlights and uplights
Usually angled upward, prone to collecting water spots and dust on the surface.
Figure 3. Lumetro LM-C0206A Model.
Also check materials: plastic, glass, stainless steel, aluminum, copper, brass, or painted finishes. Your cleaning choices should match the material to avoid damage.
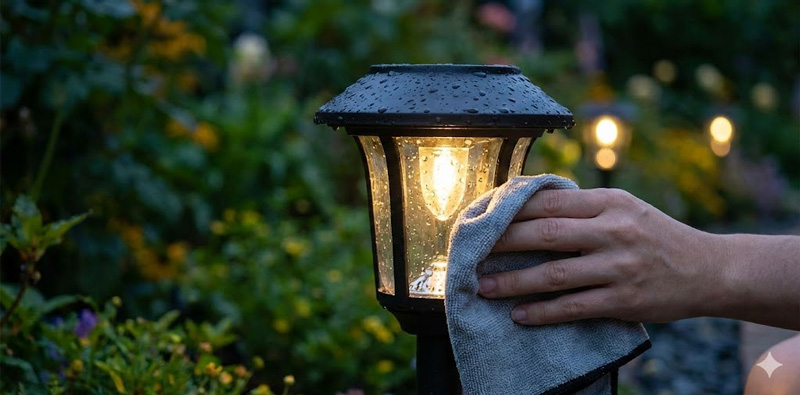
5. Step-by-Step: The Basic Cleaning Method (Works for Most Lights)
This method is safe for most fixtures and should be your default routine.
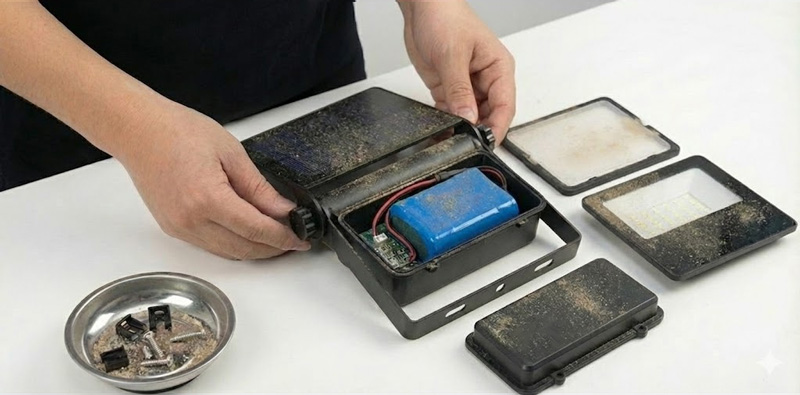
Step 1: Power off and disassemble gently
Turn off power and remove any detachable parts:
- Lenses or covers
- Decorative caps
- Bulbs (only if needed)
Place small parts in a bowl so you don’t lose screws or clips.
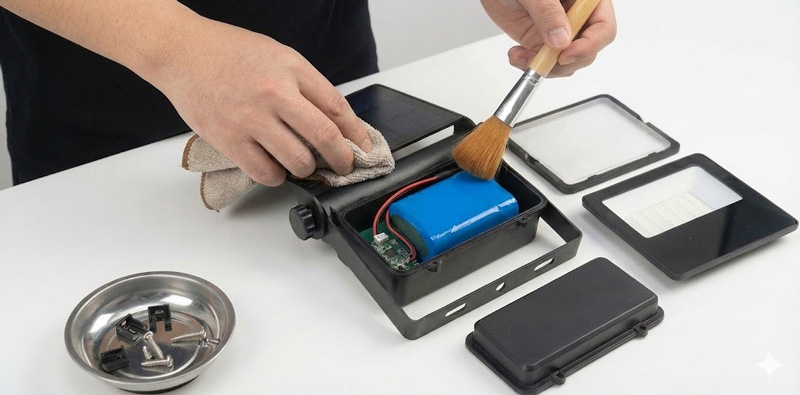
Step 2: Dry dust first
Use a dry microfiber cloth or soft brush to remove loose dust, cobwebs, and grit. This prevents scratching when you wipe with water.
Step 3: Wash with soapy water
Mix warm water with a few drops of dish soap.
- Dip a cloth into the solution and wring it out well (damp, not dripping).
- Wipe the fixture body, lens, and any exposed surfaces.
- Use a toothbrush for seams, ridges, and textured areas.
Step 4: Rinse carefully
Instead of blasting with a hose, use:
- A clean damp cloth to “rinse” soap off, or
- A gentle pour of clean water on removable lens pieces
Keep water away from sockets, battery compartments, and wiring joints.
Step 5: Dry thoroughly
This step is crucial:
- Dry with a clean microfiber cloth.
- Let parts air-dry fully before reassembly.
- Ensure no moisture remains around bulb bases or seals.
Reassemble and restore power only when everything is dry.
6. How to Clean Cloudy Lenses and Covers (Plastic vs. Glass)
A cloudy lens is one of the biggest reasons lights look dim, even when bulbs still work perfectly.
If the lens is glass
Glass is durable and can handle more cleaning options.
- Use soapy water first.
- Follow with glass cleaner if needed.
- For hard-water spots, use a 1:1 mix of vinegar and water, then rinse and dry.
If the lens is plastic
Plastic scratches easily and can haze if exposed to harsh chemicals.
- Use only mild soap and water.
- For stubborn mineral residue, use diluted vinegar briefly, then rinse immediately.
- Never use abrasive pads or strong solvents.
Extra tip: If plastic lenses are severely oxidized (yellowed or chalky), they may need plastic polish designed for outdoor plastics. If polishing doesn’t restore clarity, replacement lenses may be the best option.
7. Removing Mineral Stains and Hard-Water Spots
Sprinklers and rain can leave white or cloudy deposits, especially on lights near irrigation zones.
Vinegar method (gentle and effective):
- Mix equal parts white vinegar and water.
- Apply with a cloth or sponge to the stained area.
- Let sit for 2–5 minutes (don’t leave it too long on coated finishes).
- Wipe clean, then rinse with plain water.
- Dry completely.
For very stubborn deposits on non-painted metal surfaces, you can make a paste of baking soda and water, apply gently, and rinse well—but avoid this on glossy painted finishes and soft plastics.
8. Cleaning Metal Fixtures: Stainless Steel, Aluminum, Brass, and Copper
Outdoor metals can stain, dull, or corrode over time.
Stainless steel
- Clean with soapy water first.
- Wipe in the direction of the grain if visible.
- Dry fully to prevent water spots.
- Optional: apply stainless-steel cleaner for a polished finish.
Aluminum (often powder-coated)
- Stick to mild soap and water.
- Avoid vinegar or abrasive cleaners on coated finishes unless you’re sure it’s safe.
- Check for chalky residue—this can be coating oxidation.
Brass and copper
These metals naturally develop patina. Some people love the aged look; others want shine.
- If you want to keep patina: wash gently with soap and water only.
- If you want to brighten: use a metal polish made for brass/copper, keeping it away from electrical parts and seals.
Important: Polishes can remove protective coatings and change the fixture’s look permanently. Test on a small area first.
9. Cleaning String Lights and Decorative Outdoor Lights
String lights can collect dust and bugs, and sometimes develop sticky film from humidity and outdoor cooking smoke.
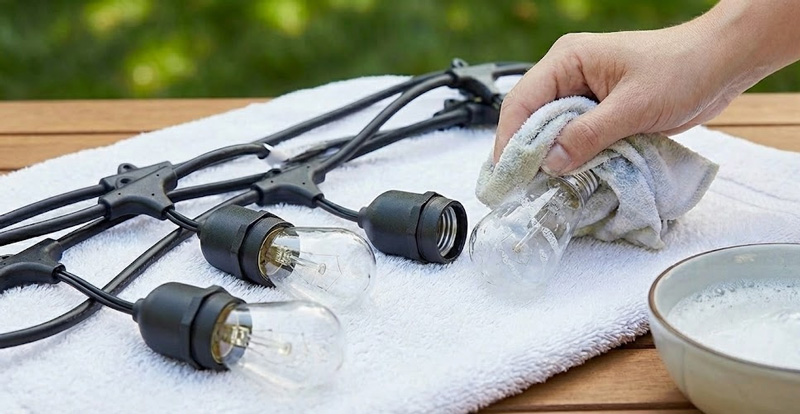
Best approach:
- Unplug the lights.
- Lay them out on a towel or hang them where you can reach safely.
- Wipe each bulb with a damp cloth (soapy water if needed).
- Use a cotton swab around socket edges.
- Dry thoroughly before plugging back in.
Never submerge string lights unless the manufacturer explicitly states they are designed for it.
10. Troubleshooting: When Cleaning Isn’t Enough
If lights still look dim or uneven after cleaning:
- Bulb issue: Bulbs lose brightness as they age (even LEDs can slowly fade).
- Voltage drop: Long runs of low-voltage cable can reduce brightness at the end of the line.
- Water ingress: Moisture inside the lens can cause fogging and corrosion.
- Solar battery decline: Old rechargeable batteries often cause weak light output.
- Dirty connectors: Corrosion at wire connectors can reduce performance.
If you notice frequent flickering, tripped circuits, or visible wire damage, it’s worth consulting an electrician or a landscape lighting professional.
11. A Simple Maintenance Schedule
If you want an easy plan:
Monthly (quick check):
- Wipe visible dust from lenses.
- Remove cobwebs and leaves.
Every 6 months (deep clean):
- Wash lenses and housings.
- Remove mineral stains.
- Check seals, screws, and fixture stability.
- For solar lights: clean panels and check batteries.
After heavy weather:
- Clear mud splashes on pathway lights.
- Check for standing water in fixtures.
- Confirm everything still points where you want.
FAQs
How often should garden lights be professionally serviced rather than just cleaned?
Routine cleaning is sufficient for most homeowners, but professional servicing is recommended every 2–3 years for wired landscape lighting systems.
Professionals can test voltage consistency, inspect underground cable insulation, reseal fixtures, and identify early electrical faults that routine cleaning cannot detect.
This is particularly important for large properties or systems that have been installed for more than five years.
Can frequent cleaning damage outdoor light fixtures over time?
Yes. Over-cleaning or improper cleaning can shorten the lifespan of outdoor fixtures.
Excessive disassembly, repeated moisture exposure, or frequent use of chemical cleaners may degrade seals, finishes, and lens coatings.
A balanced approach—light surface cleaning as needed and deeper cleaning a few times per year—is safer and more effective for long-term durability.
Why do some garden lights appear dim even when the fixtures are clean?
Clean fixtures do not always guarantee optimal brightness.
Common non-cleaning-related causes include:
- Aging LED chips with gradual lumen depreciation
- Transformer capacity no longer matching system expansion
- Incompatible or low-output replacement bulbs
- Internal driver degradation in integrated LED fixtures
In these cases, replacing components—not additional cleaning—is the correct solution.
Is it normal for outdoor light seals to fail even with regular maintenance?
Yes. Rubber gaskets and silicone seals naturally age due to UV exposure, temperature cycling, and humidity.
Even with proper cleaning, seals may harden or crack after several years.
Replacing worn seals is considered normal maintenance and helps prevent internal condensation and corrosion.
Do cleaner garden lights improve energy efficiency, or only appearance?
Cleaner fixtures can indirectly improve energy efficiency.
Dirty lenses reduce light output, which often leads users to compensate by installing higher-wattage bulbs or adding more fixtures.
Clean, unobstructed lights deliver maximum output at the original power level, helping maintain proper illumination without increasing energy consumption.
