
How Solar Lights Work
The Most Common Reason: Not Enough Sunlight
Dirty Solar Panels Can Block Charging
The Rechargeable Battery May Be Dead or Weak
The Power Switch Might Be Off
The Light Sensor May Be Confused
Moisture and Water Damage
The Solar Panel May Be Positioned Incorrectly
The Protective Film Was Never Removed
The LED Bulb or Internal Circuit May Be Faulty
Battery Contacts May Be Corroded or Loose
Cold Weather Can Reduce Performance
Nearby Objects May Be Casting More Shade Than You Realize
New Solar Lights Sometimes Need a Full Initial Charge
Cheap Quality Can Lead to Early Failure
How to Troubleshoot Solar Lights Step by Step
How to Keep Solar Lights Working Longer
When You Should Replace Instead of Repair
FAQs
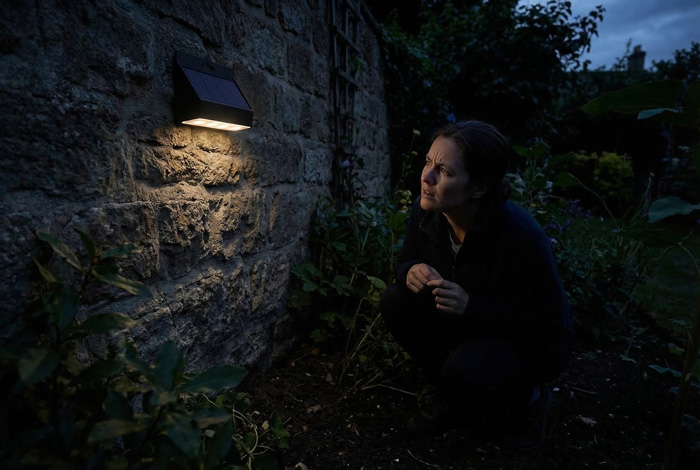
Solar lights are one of the simplest and most affordable ways to brighten gardens, pathways, patios, and driveways without increasing electricity bills. They are easy to install, environmentally friendly, and generally low-maintenance. Yet many people become frustrated when their solar lights suddenly stop working, grow dim, or fail to turn on at all. If you have ever looked outside after sunset and wondered, Why aren’t my solar lights working? you are not alone.
The good news is that most solar light problems are not permanent. In many cases, the issue can be traced to a few common causes, such as dirty panels, worn-out batteries, poor placement, or faulty sensors. Once you understand how solar lights function and what tends to go wrong, troubleshooting becomes much easier.

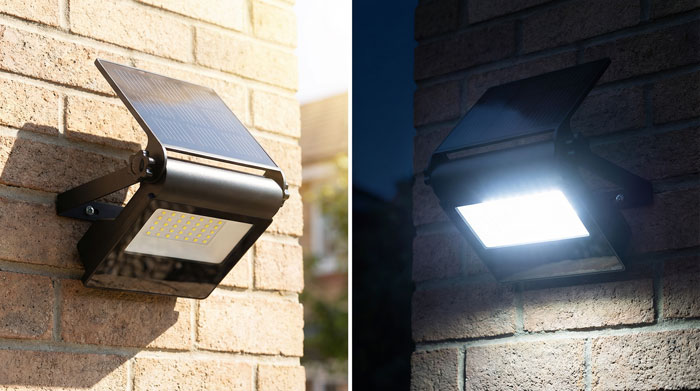
Before troubleshooting, it helps to understand the basic parts of a solar light. Most solar lights contain four essential components: a solar panel, a rechargeable battery, an LED bulb, and a light sensor.
During the day, the solar panel absorbs sunlight and converts it into electricity. That electricity is stored in the rechargeable battery. At night, the light sensor detects darkness and signals the LED bulb to turn on, using the stored energy from the battery.
Because solar lights rely on this cycle of charging and discharging every day, any disruption in the process can prevent them from working properly. If the panel cannot absorb enough sunlight, the battery cannot store enough power. If the battery is weak, the bulb may be dim or fail to light up. If the sensor malfunctions, the light may not know when to switch on.
In other words, when a solar light fails, the problem usually lies in one of these linked components.
The Most Common Reason: Not Enough Sunlight
One of the biggest reasons solar lights stop working is surprisingly simple: they are not getting enough direct sunlight.
Many people place solar lights in spots that look bright during the day but are actually shaded for much of the time. Trees, fences, roofs, walls, and even large plants can block sunlight. In some cases, the solar panel receives only partial light, which is not enough to fully charge the battery.
Seasonal changes can make this issue worse. A spot that gets full sun in summer may become shaded in autumn or winter as the angle of the sun changes. Shorter daylight hours in colder months also reduce charging time, which can make lights weaker or shorter-lasting at night.
Weather matters too. Several cloudy or rainy days in a row can prevent batteries from reaching full charge. This does not necessarily mean the lights are broken. They may simply need one or two bright days to recover.
If your solar lights are not working well, start by checking their location. Ideally, they should receive at least six to eight hours of direct sunlight per day. If possible, move them away from shaded areas and into a sunnier position.
Dirty Solar Panels Can Block Charging

Another very common cause is dirt. Because solar lights stay outdoors, dust, pollen, bird droppings, leaves, and grime can gradually build up on the solar panel. Even a thin layer of debris can reduce the amount of sunlight reaching the panel.
When this happens, the light may still work, but its performance will decline. It may glow weakly, turn off early, or stop functioning altogether. Many people assume the light has reached the end of its life when it really just needs cleaning.
Fortunately, this is one of the easiest problems to fix. Gently wipe the solar panel with a soft cloth and a little water. If the panel is especially dirty, use mild soap, but avoid harsh chemicals or abrasive materials that could scratch the surface. Cleaning the panel regularly can significantly improve performance.
It is also important to keep the surrounding area clean. Fallen leaves, grass clippings, or snow can cover the panel and block sunlight completely. A quick visual check every few days can prevent this problem.
The Rechargeable Battery May Be Dead or Weak
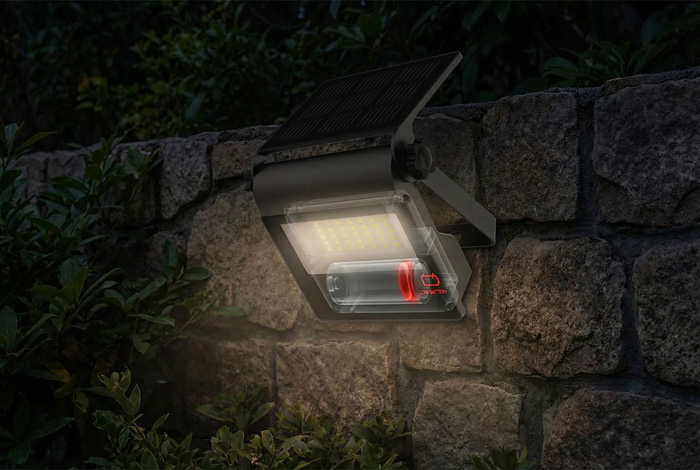
The battery is often the most vulnerable part of a solar light. Over time, rechargeable batteries lose their ability to hold a charge. Even if the solar panel is working perfectly, an old battery may not store enough energy to power the light at night.
Most solar lights use rechargeable AA or AAA batteries, often NiMH or NiCd types. These batteries do not last forever. Depending on quality and usage, they may need replacement every one to three years. Cheap solar lights may use lower-quality batteries that wear out even sooner.
A weak battery can cause several symptoms. The light may turn on for only a short time, appear much dimmer than before, or fail to turn on at all. If your solar light used to work well but now performs poorly, the battery is one of the first things you should inspect.
Replacing the battery is often a simple and inexpensive solution. Open the battery compartment, check the battery type, and install a matching rechargeable replacement. Be sure to use rechargeable batteries designed for solar devices. Standard non-rechargeable batteries are not suitable and may damage the light.
After replacing the battery, place the light in direct sun for a full day before testing it again.
This may sound obvious, but it is surprisingly easy to overlook. Many solar lights have an on/off switch, especially new ones or decorative models. If the switch is off, the light will not function no matter how much sunlight it receives.
Sometimes the switch gets turned off during storage, cleaning, transport, or installation. In other cases, moisture or wear may affect the switch, causing a poor connection.
If your solar light is not working, check the switch first. Turn it off and back on again to make sure it is set correctly. For new solar lights, remember that many units need to be switched on before their first use. Some people install them straight out of the box without realizing this step is required.
A quick switch check can save a lot of unnecessary troubleshooting.
The Light Sensor May Be Confused

Solar lights are designed to turn on automatically when it gets dark. They do this through a light sensor, also called a photocell. If the sensor detects too much light, it will assume it is still daytime and keep the light off.
This means nearby artificial lighting can interfere with solar lights. Porch lights, streetlights, garage lights, and even indoor lights shining through a window can confuse the sensor. As a result, the solar light may never activate, or it may turn on late and operate inconsistently.
To test whether the sensor is the problem, cover the solar panel or sensor area with your hand or a dark cloth. If the light turns on, the sensor is likely working, but external light is preventing normal operation.
The solution is usually to reposition the solar light so it is less exposed to nearby nighttime lighting. Creating a darker environment around the sensor often restores proper function.
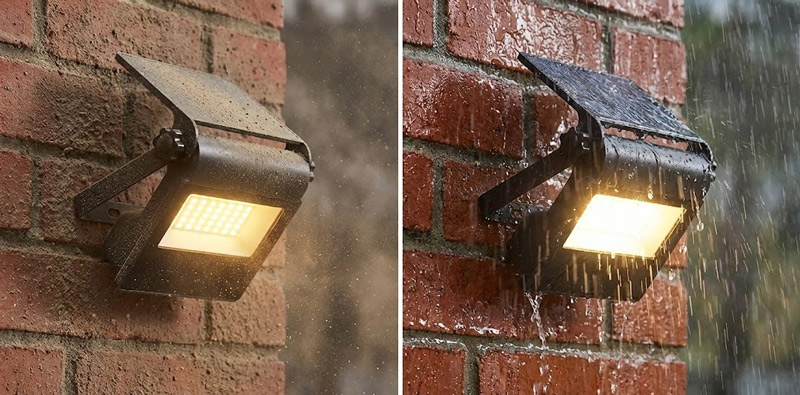
Although solar lights are made for outdoor use, they are not always fully waterproof. Over time, rain, humidity, sprinklers, and condensation can allow moisture to enter the housing. Once water gets inside, it can corrode metal contacts, damage wiring, or affect the battery compartment.
Signs of water damage include rust, fogging inside the light cover, flickering, or sudden total failure. In some cases, the light may work only intermittently because moisture disrupts the electrical connections.
If you suspect water damage, open the unit if possible and let it dry completely in a warm, dry place. Remove the battery during this process. Check for corrosion around battery contacts and gently clean it if needed. If the damage is minor, the light may recover after drying and cleaning.
To prevent future problems, inspect the seals and casing regularly. Better-quality solar lights usually offer stronger weather resistance, while very cheap models may fail sooner after heavy rain or extreme conditions.
The Solar Panel May Be Positioned Incorrectly
Even if the light is placed in a sunny area, the solar panel itself may not be angled properly. If it does not face the sun effectively, it cannot collect maximum energy.
Some solar lights have fixed panels, while others allow you to adjust the angle. If the panel is adjustable, tilt it toward the area that gets the most direct sunlight during the day. In many cases, small changes in angle can noticeably improve charging performance.
Improper orientation is especially important in winter, when the sun stays lower in the sky. A panel that worked fine in summer may become less efficient if it remains at the same angle year-round.
Paying attention to panel direction and tilt can help your lights charge faster and shine longer.
The Protective Film Was Never Removed
This is a common issue with brand-new solar lights. Some products come with a thin protective plastic film covering the solar panel to prevent scratches during shipping. If that film is not removed before use, it blocks sunlight and reduces charging.
Because the film is often clear, some people do not even notice it. They install the lights, wait for nightfall, and assume the product is defective.
If your new solar lights are not working, inspect the panel carefully. If there is any protective film, peel it off and place the light in direct sunlight for a full charge cycle.
This simple detail is easy to miss but can make all the difference.
The LED Bulb or Internal Circuit May Be Faulty
Sometimes the issue is not the battery or the solar panel, but the light’s internal electronics. LED bulbs usually last a long time, but they can still fail. Wiring can loosen, circuits can wear out, and manufacturing defects can occur.
If you have already cleaned the panel, replaced the battery, checked the switch, and tested the sensor, yet the light still does not work, the internal components may be damaged. This is especially possible if the light has been dropped, exposed to severe weather, or purchased at a very low price.
Unfortunately, repairing internal circuits is not always practical, especially for inexpensive solar lights. In many cases, replacement is more cost-effective than repair. However, for higher-end models, checking the warranty or contacting the manufacturer may be worthwhile.
Battery Contacts May Be Corroded or Loose
Even when the battery itself is good, the metal contacts inside the battery compartment may be dirty, rusted, or bent. If the battery is not making a solid connection, the light cannot operate normally.
Corrosion often appears as a white, green, or rusty deposit around the contacts. This can interrupt the flow of electricity and prevent charging or lighting.
If you notice corrosion, clean the contacts carefully using a dry cloth or a cotton swab. In more stubborn cases, a small amount of vinegar or baking soda solution may help, but be sure the area is completely dry before reinstalling the battery.
Loose contacts can sometimes be bent gently back into position. Once the connection is restored, the light may begin working again.
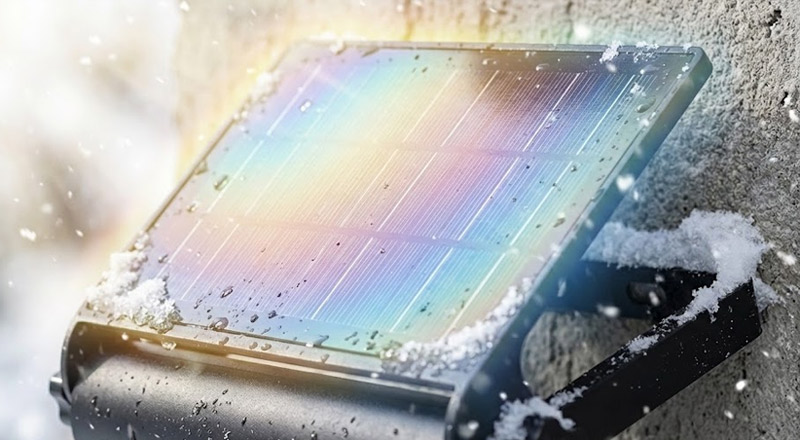
Cold Weather Can Reduce Performance
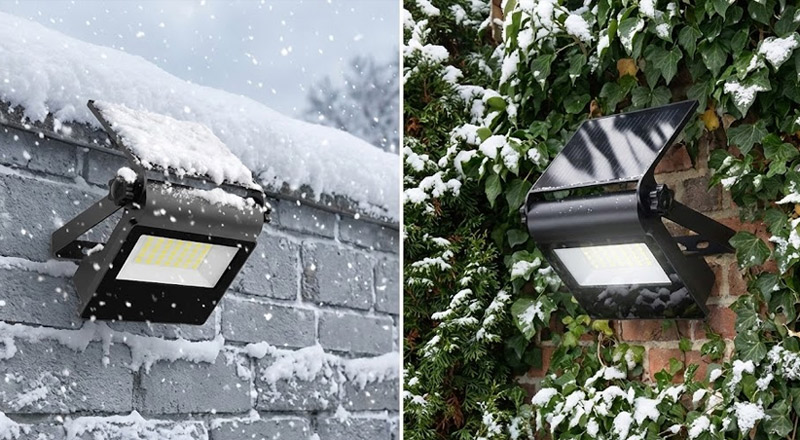
Solar lights often perform worse in winter, and temperature is one reason why. Cold weather affects battery efficiency, making it harder for batteries to charge fully and deliver power effectively. Even when the lights are not technically broken, they may seem weaker or run for fewer hours on cold nights.
Snow and frost create additional problems by covering the solar panel and blocking sunlight. If you live in a region with harsh winters, some decline in solar light performance is normal.
Regularly clearing snow, adjusting panel angle, and replacing aging batteries can help, but expectations should still be realistic. Solar lights generally work best during seasons with long, bright days.
Nearby Objects May Be Casting More Shade Than You Realize
Not all shade problems are obvious. A solar light may receive direct sunlight for part of the day but be shaded during the most important hours. Shadows move constantly, and objects such as tree branches, parked cars, patio furniture, or garden decorations may interfere with charging more than expected.
To evaluate the location properly, observe the area at different times of day. A spot that appears sunny in the morning may be shaded in the afternoon, or vice versa. Because charging efficiency depends on total sun exposure, even intermittent shade can reduce performance.
If needed, test the light in a completely open area for a day or two. If it works better there, the original location was likely the problem.
New Solar Lights Sometimes Need a Full Initial Charge
Many solar lights do not work at their best right away. When first purchased, they may need one or two full sunny days to charge properly before they can operate normally at night.
If a brand-new solar light fails on the first evening, it does not always mean it is defective. It may simply not have had enough time to build up a full charge. Manufacturers often recommend placing new lights in direct sunlight before expecting full performance.
Patience matters here. Test the light only after it has had an adequate initial charge.
Cheap Quality Can Lead to Early Failure
Not all solar lights are made to the same standard. Budget products may look attractive at first, but they often use weaker batteries, lower-quality panels, thinner plastic, and less reliable waterproofing. As a result, they may fail quickly or perform poorly compared with better-made alternatives.
If you repeatedly experience problems with low-cost solar lights, the issue may be product quality rather than maintenance. Inexpensive models may still be useful for temporary decoration, but they are often less dependable for long-term outdoor use.
Investing in a more durable, well-reviewed solar light can save money and frustration over time. Higher-quality lights usually charge more efficiently, last longer at night, and withstand weather better.
How to Troubleshoot Solar Lights Step by Step
When solar lights stop working, it helps to follow a simple process rather than guessing randomly.
First, check whether the switch is turned on. Next, inspect the solar panel for dirt, debris, or protective film. Then evaluate the location and make sure the panel receives enough direct sunlight during the day. After that, test the sensor by covering it to simulate darkness.
If the light still does not work, open the battery compartment and inspect the battery. Replace it if it appears old or weak. While doing so, examine the battery contacts for corrosion or looseness. Also check for signs of moisture inside the housing.
If none of these steps solves the problem, the internal electronics may have failed. At that point, replacing the unit may be the most practical solution.
Approaching the problem in order makes troubleshooting faster and more effective.
How to Keep Solar Lights Working Longer
Prevention is often easier than repair. To extend the life of your solar lights, clean the panels regularly and keep them free from dirt, leaves, and snow. Place them where they can receive strong, direct sunlight every day. Replace rechargeable batteries when performance begins to decline. Protect the lights from excessive moisture when possible, and inspect them after storms or extreme weather.
It is also a good idea to bring delicate solar lights indoors during long periods of freezing weather if the manufacturer recommends it. Seasonal maintenance can greatly increase how long the lights last.
Simple habits make a big difference. Solar lights may be low-maintenance, but they are not no-maintenance.
When You Should Replace Instead of Repair
There comes a point when repair is no longer worth the effort. If the housing is cracked, the internal wiring is damaged, the light is heavily corroded, or multiple components have failed, replacement may be the smarter choice.
This is particularly true for inexpensive solar lights, where the cost of parts and time can exceed the value of the product. On the other hand, if the problem is only a dirty panel or dead battery, repair is often quick and cheap.
The key is to judge whether the issue is minor and reversible or a sign of permanent wear.
How long do solar lights usually last?
Most solar lights last between 2 and 5 years, depending on build quality, battery type, weather exposure, and maintenance.
Although the LED itself may last much longer, the rechargeable battery and outdoor housing usually determine the product’s real service life.
Can solar lights charge on cloudy days?
Yes, solar lights can still charge on cloudy days, but charging efficiency is much lower than in direct sunlight.
After several overcast days in a row, the lights may run for fewer hours at night or appear dimmer than usual.
Do solar lights need direct sunlight or just daylight?
Solar lights perform best in direct sunlight rather than general daylight.
They may still collect some energy in bright indirect light, but full sun is typically needed for a complete charge and reliable nighttime performance.
Is it normal for solar lights to get dimmer over time?
Yes, gradual dimming is normal as rechargeable batteries age and solar panels lose efficiency after long-term outdoor exposure.
However, sudden dimming may indicate a battery issue, panel obstruction, or internal component failure.
Are all rechargeable batteries suitable for solar lights?
No. Solar lights are designed for specific battery chemistries and capacities, such as NiMH or NiCd.
Using the wrong battery type can reduce performance, shorten lifespan, or damage the unit.
