
Start With the Purpose of the Garden
Use Layers of Light Instead of One Bright Fixture
Avoid Overlighting the Garden
Choose Warm Light for a Comfortable Atmosphere
Highlight Only the Best Garden Features
Use Uplighting to Add Height and Drama
Try Downlighting for a Natural Effect
Keep Path Lighting Subtle
Illuminate Steps and Changes in Level Carefully
Use Walls and Fences to Make the Garden Feel Larger
Use Light to Create Depth
Hide Fixtures Whenever Possible
Choose Fixtures That Match the Scale of the Space
Use String Lights Selectively
Consider Lighting Under Benches and Raised Features
Take Advantage of Reflected Light
Pay Attention to Glare
Design the Garden View From Indoors
Use Plant Lighting to Reveal Texture
Be Careful With Water Features
Choose Proper Outdoor-Rated Equipment
Consider Low-Voltage Garden Lighting
Use Solar Lights Strategically
Add Controls and Timers
Avoid Too Many Lighting Styles
Test the Lighting Before Permanent Installation
Leave Room for Plants to Grow
Maintain the Lighting Regularly
Keep Light From Spilling Beyond the Garden
Build the Lighting Scheme Gradually
FAQs
Lighting a small outdoor garden requires a different approach from lighting a large yard. In a compact space, every fixture is noticeable, every beam affects multiple elements, and excessive brightness can quickly make the garden feel harsh or cluttered. The goal is therefore not to install as many lights as possible, but to use a limited number of carefully positioned fixtures to create depth, improve visibility, highlight attractive features, and make the garden comfortable after sunset.
A successful small-garden lighting scheme usually combines several layers of light rather than relying on one bright source. Paths need enough illumination for safe movement, seating areas need soft functional light, plants benefit from selective accent lighting, and boundaries can be treated strategically to make the space appear larger. By controlling brightness, direction, fixture size, color temperature, and placement, even a very small garden can feel sophisticated and spacious at night.
Start With the Purpose of the Garden
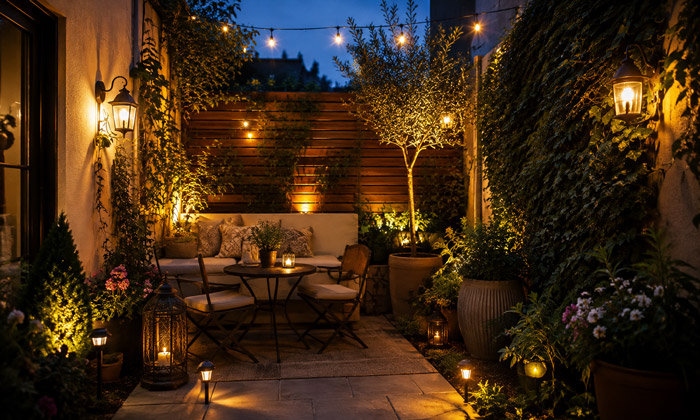
Before choosing fixtures, consider how the garden is actually used after dark. Lighting should support those activities instead of simply illuminating the entire area.
A small garden used mainly for dining needs different lighting from one designed for quiet relaxation. A narrow courtyard may require clear pathway lighting, while a compact planted garden may benefit more from subtle accent lights placed among foliage.
Think about the main nighttime functions of the space:
- walking between the house, gate, and seating areas;
- dining or entertaining outdoors;
- relaxing on a bench, patio, or small deck;
- highlighting plants, sculptures, water features, or architectural details;
- improving visibility near steps and changes in level;
- creating an attractive view from inside the home.
Once these priorities are clear, lighting becomes much easier to plan. Instead of trying to illuminate every square foot, you can concentrate on the locations that genuinely need light.
Use Layers of Light Instead of One Bright Fixture
One of the most common mistakes in small outdoor spaces is installing a single powerful light and expecting it to serve every purpose. A bright wall-mounted floodlight may technically illuminate the garden, but it often creates glare, deep shadows, and a flat appearance.
Layered lighting produces a much more attractive result.
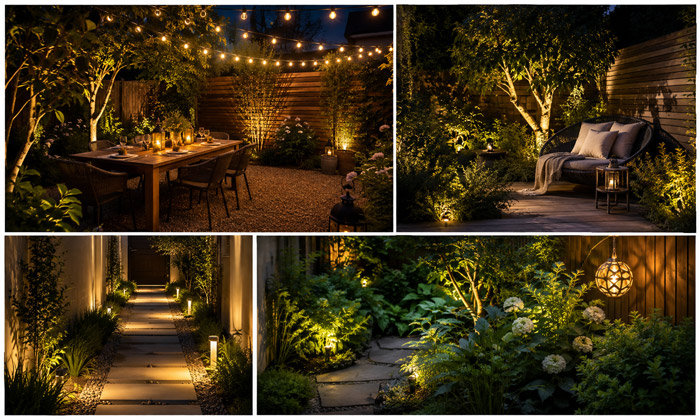
A useful outdoor lighting plan normally includes three types of illumination: ambient, task, and accent lighting.
Ambient lighting provides the general glow that establishes the atmosphere of the garden. In a small space, this might come from a dimmed wall light, discreet string lighting, or soft illumination reflected from a wall.
Task lighting is positioned where people need to see clearly. Steps, pathways, gates, outdoor kitchen surfaces, and dining tables are typical examples.
Accent lighting highlights selected features such as a specimen tree, textured wall, planter, sculpture, or ornamental grass.
The important principle is restraint. A small garden rarely needs multiple fixtures in every category. One soft ambient source, several carefully placed functional lights, and two or three accents may be enough to transform the entire space.
Avoid Overlighting the Garden
More light does not necessarily make a garden more attractive or safer. Excessive illumination can destroy the atmosphere, reduce contrast, create glare, and make a compact garden appear smaller.
Darkness should remain part of the design.
Instead of trying to eliminate every shadow, allow darker areas to exist between illuminated features. This creates visual rhythm and makes highlighted plants or surfaces appear more dramatic.
For example, illuminating three carefully selected plants usually looks better than placing a light beneath every plant along a border. Likewise, a softly illuminated path can be easier on the eyes than a row of extremely bright fixtures.
Begin with lower-output fixtures whenever possible. It is generally easier to increase brightness later than to correct an outdoor lighting scheme that feels excessively intense.
Dimmers, adjustable fixtures, and smart lighting controls are particularly useful because they allow light levels to change depending on the situation.
Choose Warm Light for a Comfortable Atmosphere
Color temperature has a major effect on how a garden feels at night.
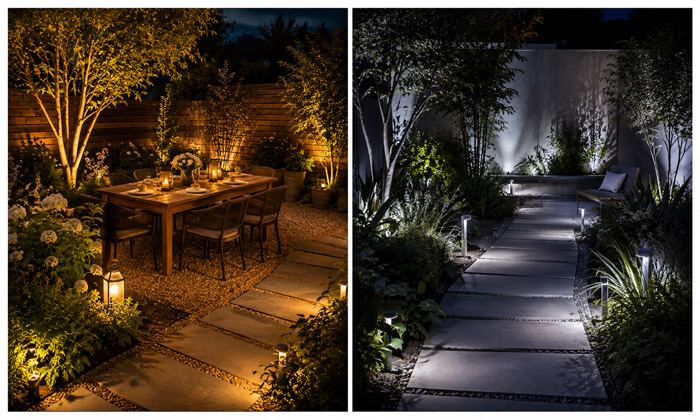
Warm white lighting generally works particularly well in residential gardens. Light around 2700K produces a soft, inviting appearance similar to traditional incandescent lighting. It complements timber, brick, natural stone, terracotta, and many types of foliage.
Slightly warmer temperatures can create an especially intimate atmosphere around seating areas.
Cooler white lighting may be useful in certain contemporary designs, but excessive blue-white light can make a small garden feel clinical or overly bright. It can also create a stronger visual contrast with surrounding darkness.
Consistency is equally important. Using fixtures with dramatically different color temperatures in a compact garden can make the design appear disconnected.
Choose a primary color temperature and use it throughout most of the space. Minor variations can be introduced deliberately, but they should support the design rather than appear accidental.
Highlight Only the Best Garden Features
Small spaces benefit from strong visual hierarchy. Rather than lighting everything equally, identify a few focal points.
Suitable features might include:
- a small ornamental tree;
- a sculptural planter;
- an attractive wall;
- a fountain;
- a piece of garden art;
- an architectural doorway;
- a cluster of textured plants;
- a pergola or trellis.
Selective lighting directs attention toward these features and away from less attractive areas.
For instance, placing a narrow-beam uplight beneath a small tree can transform it into a nighttime focal point. Illuminating a textured brick wall from below can reveal shadows and surface details that are barely noticeable during the day.
The number of focal points should remain limited. If everything is highlighted, nothing truly stands out.
Use Uplighting to Add Height and Drama
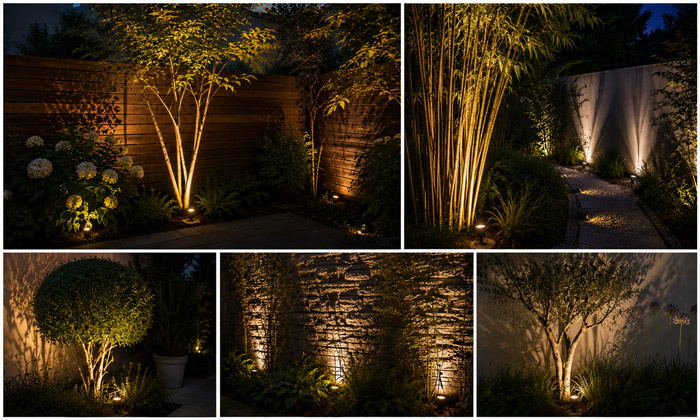
Uplighting involves positioning a fixture low to the ground and directing the beam upward. It is particularly effective in small gardens because it emphasizes vertical elements and can make the space feel taller.
Small trees, tall grasses, bamboo, architectural shrubs, columns, and textured walls are excellent candidates for uplighting.
Fixture placement matters. A light positioned directly beneath a plant creates a very different effect from one placed farther away. Moving the fixture even a short distance can alter the shadows dramatically.
Experiment before permanently installing the lights. Temporary nighttime testing makes it easier to determine whether a beam should be narrow, broad, strong, or subtle.
Avoid uplighting every vertical element. One or two well-lit specimens often provide greater visual impact than a garden filled with upward beams.
See also: How Do You Choose the Right Lights for Lighting an Outdoor Tree?
Try Downlighting for a Natural Effect
Downlighting places the light source above the area being illuminated and directs light downward. When used carefully, it can resemble natural moonlight.
Fixtures can sometimes be mounted beneath eaves, on pergolas, in trees, or on suitable architectural structures.
Downlighting is especially useful for illuminating:
- seating areas;
- garden paths;
- patios;
- steps;
- planting beds.
The advantage is that the source itself can often be concealed. People experience the illuminated surface rather than staring directly at the fixture.
For a natural result, avoid making every downlight perfectly symmetrical. Slight differences in angle and intensity can create softer shadows and a more organic appearance.
Keep Path Lighting Subtle
Paths need enough light for safe movement, but they should not resemble airport runways.
A common mistake is placing identical path lights at equal intervals along both sides of a walkway. In a small garden, this repetitive arrangement can dominate the landscape.
Instead, consider staggering fixtures or using alternative light sources such as recessed step lights, low-level wall lights, or discreet fixtures hidden among planting.
Focus illumination on important points:
- corners;
- steps;
- changes in level;
- narrow passages;
- entrances and exits.
If surrounding plants or walls receive some illumination, they may provide enough reflected light to make the pathway visible without requiring a fixture every few feet.
Illuminate Steps and Changes in Level Carefully
Small gardens often contain compact decks, raised beds, sunken patios, or short flights of steps. These changes in level should remain clearly visible after dark.
Step lighting should reveal the edge and surface without shining directly into people's eyes.
Recessed lights mounted into risers can work well. Small fixtures positioned to one side of a step are another option. Lighting beneath a floating step or bench can also provide subtle orientation lighting.
Avoid very bright fixtures close to ground level. Because people encounter these lights within their direct field of vision, even a relatively small amount of glare can be uncomfortable.
The ideal result is clear visibility of the walking surface while the fixture itself remains visually unobtrusive.
Use Walls and Fences to Make the Garden Feel Larger
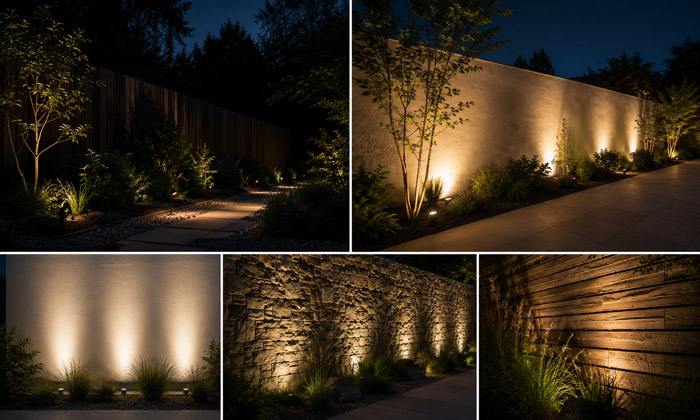
Boundaries have enormous visual importance in small gardens. At night, thoughtful lighting can change how those boundaries are perceived.
An unlit fence can disappear into darkness, creating a sense of depth. Alternatively, softly illuminating an attractive wall can turn it into an architectural feature.
Wall washing spreads relatively even illumination across a surface. This approach is useful when the wall itself deserves attention.
Grazing places the light closer to the surface so shadows emphasize texture. Brick, rough stone, timber slats, and textured concrete can look especially dramatic when grazed with light.
Be selective. Lighting every boundary can visually define the exact size of the garden and sometimes make it seem smaller. Allowing certain edges to disappear into darkness often produces a greater impression of space.
Use Light to Create Depth
A compact garden can feel larger when the eye is encouraged to travel from foreground to background.
Lighting is one of the most effective tools for achieving this effect.
Instead of concentrating every fixture near the house, place at least one illuminated focal point toward the far end of the garden. A softly lit tree, sculpture, wall, or planter can draw the eye outward and make the distance feel greater.
Create multiple visual layers.
The foreground might contain subtle path lighting. A plant group in the middle distance could receive a soft accent. A brighter focal point could appear farther away.
This gradual progression creates depth that would be lost if the entire garden were illuminated uniformly.
Hide Fixtures Whenever Possible
In a well-designed garden, people should notice the lighting effect before they notice the equipment producing it.
This principle is especially important in small gardens because fixtures are physically closer to the viewer.
Use planting, walls, raised beds, steps, benches, and architectural features to conceal fixtures where practical. Small adjustable spotlights can sometimes be positioned behind low vegetation so that only the beam is visible.
Recessed fixtures are another useful option in compact contemporary spaces.
However, fixtures should never be hidden so completely that maintenance becomes difficult. Outdoor lights need occasional cleaning and may eventually require adjustment or replacement.
Aim for visual discretion without sacrificing accessibility.
Choose Fixtures That Match the Scale of the Space
Large decorative fixtures can overwhelm a tiny courtyard or narrow garden.
Compact fixtures generally integrate more naturally into small landscapes. Low-profile path lights, miniature spotlights, recessed wall lights, and slim architectural fixtures can provide plenty of illumination without becoming dominant objects.
Scale also applies to decorative lighting.
A huge pendant may look impressive above a large terrace but disproportionate over a small two-person dining table. Several oversized lanterns can make a narrow patio feel crowded.
Fixtures should support the landscape rather than compete with it.
Use String Lights Selectively
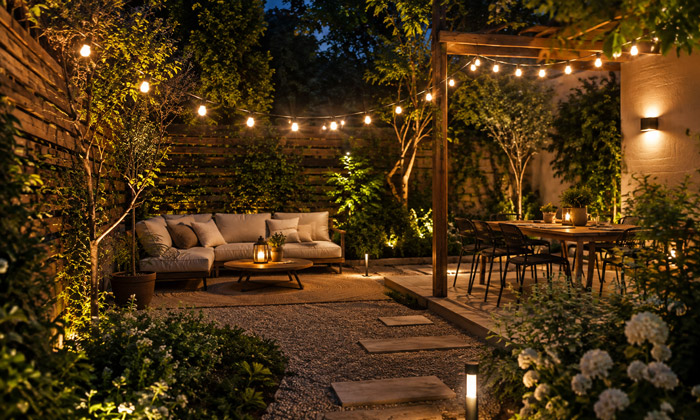
String lights can create a warm, relaxed atmosphere, particularly around patios, pergolas, fences, and compact entertaining areas.
However, they should not automatically become the primary lighting source.
Too many exposed bulbs can create visual clutter in a small garden. They can also produce more brightness than expected when installed across a limited area.
Use string lights to define a specific zone, such as a seating or dining area. Keep the arrangement simple and intentional.
Pair them with subtle pathway or accent lighting rather than trying to illuminate the entire garden with strings of bulbs.
Consider Lighting Under Benches and Raised Features
Integrated lighting can be especially useful when floor space is limited.
LED lighting placed beneath a built-in bench, raised planter, floating step, or countertop can produce a soft glow while keeping fixtures out of sight.
This technique works particularly well in modern gardens because it visually separates structures from the ground.
Under-bench lighting can also provide practical illumination around seating areas without placing bright fixtures at eye level.
The effect should remain subtle. If the light source becomes clearly visible or creates a continuous line of intense brightness, the installation can look more commercial than residential.
Diffusers and concealed channels can help produce smoother illumination.
Take Advantage of Reflected Light
Direct illumination is not always necessary.
In small spaces, light reflected from pale walls, paving, or architectural surfaces can provide gentle ambient illumination.
A fixture aimed at a wall, for example, may create a softer result than one aimed directly into the garden. The illuminated wall becomes a large secondary light source.
This is especially useful near dining and seating areas because reflected light tends to feel less harsh.
Surface color matters. Pale materials reflect considerably more light than dark surfaces, so fixture output should be adjusted accordingly.
Pay Attention to Glare
Glare is one of the most noticeable lighting problems in compact outdoor areas.
Because viewing distances are short, poorly shielded fixtures can shine directly into people's eyes. A light that seems acceptable from one position may become uncomfortable when someone sits down nearby.
After installing or temporarily positioning each fixture, inspect it from several viewpoints:
- from the seating area;
- from the garden entrance;
- from windows inside the house;
- while walking along the path;
- from neighboring viewpoints when relevant.
Adjust the angle or shielding whenever the bulb or intense LED source is directly visible.
Fixtures with louvers, hoods, recessed light sources, and directional shielding can significantly reduce glare.
Design the Garden View From Indoors
Outdoor lighting is not only for people physically sitting in the garden.
In many homes, the garden is visible through windows or glass doors for hours every evening. Lighting can therefore extend the perceived interior space outward.
Look through important windows after dark and identify where illuminated features would be most effective.
A beautifully lit tree or planting composition can act almost like a living artwork beyond the glass.
At the same time, avoid pointing lights toward the house. Reflections on windows can make it difficult to see outside and may create unnecessary glare indoors.
Well-positioned garden lights should draw the eye outward rather than reflecting back at the viewer.
Use Plant Lighting to Reveal Texture
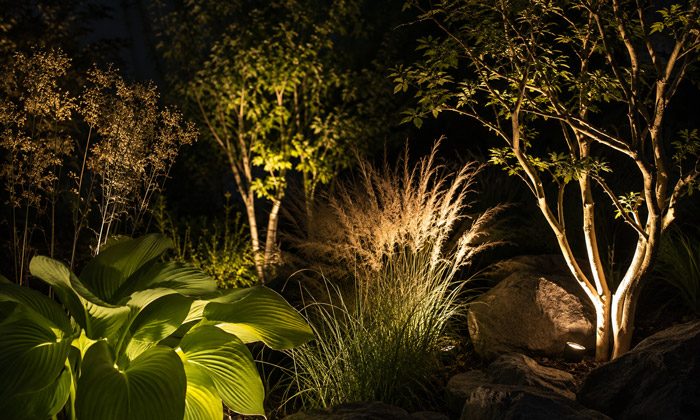
Plants can look completely different under artificial lighting.
Broad leaves, ornamental grasses, textured bark, sculptural branches, and fine foliage interact with light in distinctive ways.
Side lighting can reveal the texture of grasses and foliage. Backlighting can create dramatic silhouettes and make translucent leaves glow. Uplighting can emphasize branching structure.
Instead of choosing plants only because they are large or colorful, consider their nighttime texture.
A modest clump of ornamental grass may become more visually interesting under directional light than a large shrub with dense, uniform foliage.
Seasonal changes should also be considered. A deciduous tree may lose its leaves but reveal attractive branches during winter, while evergreen planting provides consistent structure throughout the year.
Be Careful With Water Features
Small fountains, ponds, and reflecting pools can become striking nighttime focal points.
Whenever possible, light the movement or reflective qualities of the water rather than simply illuminating the surrounding structure.
A carefully positioned light can highlight ripples or create reflections on a nearby wall.
Underwater fixtures can also produce attractive effects when the equipment is specifically designed and rated for submerged use.
Avoid extremely bright illumination. Water surfaces can reflect intense light directly toward viewers, increasing glare.
Subtle lighting usually creates a more sophisticated result.
Choose Proper Outdoor-Rated Equipment
Garden lighting must withstand environmental exposure.
Fixtures, cables, connectors, transformers, and other electrical components should be appropriate for their installation conditions. Equipment exposed to rain, irrigation, dust, or possible temporary immersion requires suitable protection.
The required rating can depend on the exact location and local electrical standards.
Outdoor connections also need proper weather protection. Indoor extension cords, exposed connectors, and improvised installations should not be treated as permanent garden-lighting solutions.
Where mains-voltage wiring, buried cable, wet-location electrical work, or other regulated installation is involved, use qualified professional installation according to applicable local requirements.
Consider Low-Voltage Garden Lighting
Low-voltage systems are widely used for landscape lighting because they are suitable for many path lights, spotlights, and accent fixtures.
A typical system uses a transformer to reduce the supply voltage before distributing power to the garden fixtures.
Low-voltage lighting can be particularly convenient in small landscapes where multiple compact fixtures need to be distributed around planting beds.
System capacity still needs to be planned properly. Transformer size, cable length, fixture load, connections, and voltage drop can affect performance.
Leaving some spare capacity can also make future additions easier.
See also: Low Voltage Pathway Lights vs. High Voltage Lighting: Which Is Better for Outdoor Use?
Use Solar Lights Strategically
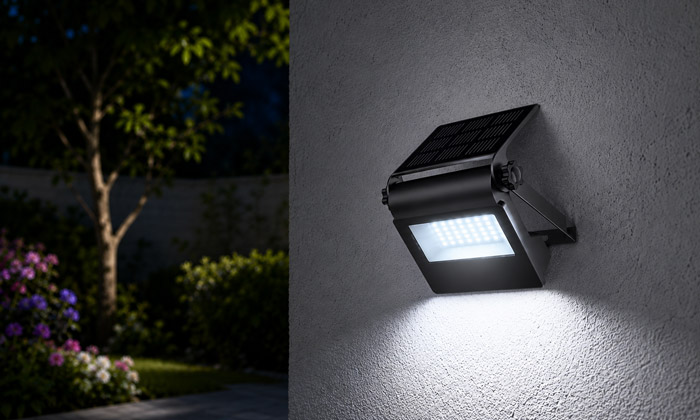
Solar lighting can be useful in locations where running electrical cable would be inconvenient, but performance varies significantly between products and locations.
Solar fixtures depend on sufficient daytime sunlight to charge their batteries. A heavily shaded garden may therefore produce disappointing results, especially during shorter winter days.
Rather than relying on inexpensive solar lights for all garden illumination, consider using them selectively where consistent brightness is less important.
They may work well as decorative accents or gentle orientation lights.
For important steps, entrances, or frequently used paths, a more predictable lighting source may be preferable.
Add Controls and Timers
Outdoor lights do not need to operate at full brightness throughout the night.
Timers, photocells, motion sensors, smart switches, and dimming controls can make a small garden more practical and energy-efficient.
For example, decorative lighting might turn on automatically around sunset and switch off later in the evening. Security or access lighting can remain sensor-controlled.
A dimming system can also change the character of the garden. Brighter settings may be useful during an outdoor dinner, while lower levels can create a calmer atmosphere afterward.
If multiple lighting zones are installed, separate controls provide even greater flexibility. Path lighting, planting accents, and dining-area lighting do not always need to operate simultaneously.
Avoid Too Many Lighting Styles
Compact gardens benefit from visual consistency.
Mixing traditional lanterns, contemporary stainless-steel spotlights, colorful decorative bulbs, industrial wall lights, and multiple different LED temperatures in one small area can quickly create clutter.
Choose a simple design language.
Fixtures do not necessarily have to be identical, but their materials, shapes, finishes, and color temperatures should feel coordinated.
In many cases, darker finishes are easier to conceal among foliage, while finishes that match architectural details can integrate naturally with walls and structures.
The lighting effect should remain the main attraction.
Test the Lighting Before Permanent Installation
Outdoor lighting is difficult to judge accurately during daylight.
Whenever possible, temporarily position adjustable fixtures and evaluate them after sunset before making final installation decisions.
Move a spotlight forward or backward. Change its angle. Reduce its brightness. Observe how shadows fall onto nearby surfaces.
Something that appears insignificant on a plan may become visually dominant at night.
Testing is particularly valuable in small gardens because minor adjustments can have a large effect. Moving a light only a short distance may eliminate glare, reveal more plant texture, or dramatically improve the balance of the composition.
Leave Room for Plants to Grow
A garden is not static.
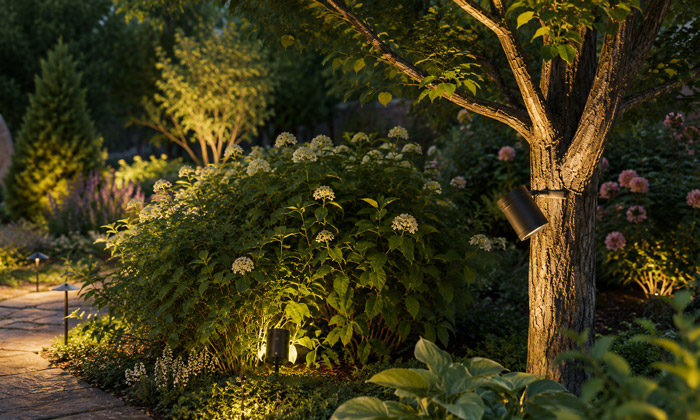
Plants can eventually block lights, absorb beams, or grow directly over fixtures that were perfectly positioned when first installed.
Consider the mature size of nearby planting when choosing fixture locations.
Lights positioned immediately beside young shrubs may disappear completely after several growing seasons. Tree-mounted fixtures and cables also require particular care because trunks and branches change over time.
Designing for future growth reduces maintenance and helps the lighting scheme remain effective as the landscape matures.
Maintain the Lighting Regularly
Even a well-designed system will gradually lose effectiveness without maintenance.
Outdoor fixtures collect dirt, mineral deposits, fallen leaves, spider webs, and plant debris. Lenses can become cloudy, reducing light output and altering beam quality.
Plants may also grow across fixtures or redirect light unexpectedly.
Periodically:
- clean fixture lenses;
- remove vegetation blocking beams;
- check fixture alignment;
- inspect exposed components for damage;
- confirm timers and controls are operating correctly;
- review whether plants have outgrown the original lighting arrangement.
A small amount of maintenance can keep the garden looking intentionally designed rather than neglected.
Keep Light From Spilling Beyond the Garden
Good garden lighting should illuminate the intended area rather than neighboring properties or the night sky.
Choose directional fixtures and aim them carefully. Shielding can help keep beams within the garden.
This is especially important in small urban spaces where homes may be close together.
A fixture aimed horizontally across a narrow garden can easily shine through a neighbor's window. Angling the same light toward a plant or surface may produce a better visual effect while reducing unwanted spill.
Controlling light direction also improves efficiency because the available illumination is being used where it contributes to the design.
Build the Lighting Scheme Gradually
Small gardens rarely require a large lighting installation all at once.
Begin with essential areas: entrances, steps, paths, and primary seating spaces.
Then add a few accent lights to important plants or architectural features.
After living with the lighting for several evenings, evaluate what is missing. You may discover that additional fixtures are unnecessary because reflected light and existing accents already provide enough illumination.
This gradual approach helps prevent overlighting and makes it easier to understand how each fixture contributes to the overall composition.
FAQs
What CRI is best for outdoor garden lighting?
A CRI of 80 or higher is suitable for most residential gardens, while CRI 90+ provides more accurate color rendering for flowers, foliage, natural stone, and decorative features.
Higher CRI lighting is especially useful when plant color and material texture are important parts of the nighttime design.
What beam angle should be used for landscape lighting?
Narrow beam angles around 10–25 degrees work well for highlighting slender trees, sculptures, and architectural details.
Medium beams around 25–40 degrees suit shrubs and small planting groups, while wider beams are better for broad walls, hedges, and larger landscape features.
How can outdoor garden lighting attract fewer insects?
Use warm-spectrum LEDs with lower amounts of blue and ultraviolet light, keep brightness moderate, and avoid leaving unnecessary fixtures on throughout the night.
Positioning lights away from doors and seating areas can also reduce insect activity where people gather.
Which materials are best for outdoor lighting fixtures in humid or coastal gardens?
Marine-grade stainless steel, solid brass, copper, and high-quality powder-coated aluminum are commonly chosen for demanding outdoor environments.
Coastal gardens require particular attention to corrosion resistance because salt, moisture, and airborne contaminants can rapidly damage lower-quality finishes.
Can artificial garden lighting affect plant growth?
Yes. Strong artificial light operating for long periods can interfere with the natural light-dark cycles of some plants, potentially affecting flowering, dormancy, and seasonal growth patterns.
Avoid directing intense light continuously onto sensitive plants and use timers to maintain regular periods of darkness.
See also: What Impact Do Garden Lights Have on Plants and Animals?
