
Table of Contents
- Walk Your Property After Dark Before Choosing Fixtures
- Match Each Light to the Surface It Needs to Reach
- Plan for Snow, Runoff, and Bare Branches
- Choose Power Based on How Much You Rely on the Light
- An Example Layout for a Front Walk and Raised Patio
- What Does Landscape Lighting Cost in Batavia, IL?
- Check the Finished Lighting After Dark
- FAQs
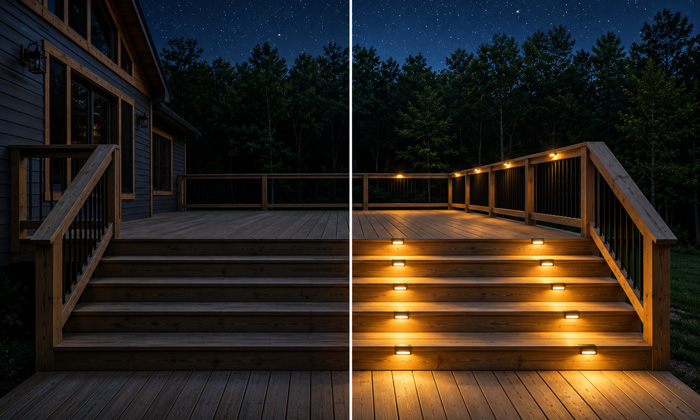
A yard can look bright from the street and still have a step you can barely see from the back door. That’s a useful place to start planning landscape lighting. Stand at the top of the step and look down. If the patio and the stair tread appear to blend together, a small light aimed across the step will do more for that spot than a brighter fixture across the yard.
For a Batavia, IL home, start with the routes people use after dark, then decide what you want the yard to look like from the patio, the street, and inside the house. That order helps you spend on fixtures that solve a specific problem and gives you a way to judge whether the finished installation works.
Walk Your Property After Dark Before Choosing Fixtures
Take the same route a guest would take from the driveway to the front door. Leave your existing porch and garage lights on. Pay attention to the places where you slow down, look at your feet, or reach for your phone flashlight. Those moments tell you where another light would help.
- From the driveway, find the first place a visitor needs to choose a direction. On a curved walk, that may be where it leaves the driveway or bends behind a planting bed.
- From the top and bottom of the steps, check whether you can see the edge of each tread and the surface you’ll land on. A light that works while you’re walking up may cast a shadow across the same tread when you’re coming down.
- From a patio chair, look across the yard at seated eye level. A tree spotlight that’s comfortable to walk past can shine straight into your eyes once you sit down.
- From the kitchen or living room, look at the garden through the window. A single tree or planting bed can give you a pleasant view after dark. A visible fixture pointed toward the glass can make it harder to see the rest of the yard.
Mark the places that need attention on a simple sketch. Write down the problem at each location, such as “the walk disappears behind the hydrangeas” or “the bottom step blends into the patio.” That gives you a more useful brief for a lighting installer than a list of fixture styles.
Match Each Light to the Surface It Needs to Reach
Choose the surface you want to see first. Then look at where the fixture can sit, where its beam will land, and who could see the light source from that position. A fixture can look well placed on a daytime plan and still send light into a window or across a seating area.
| Area | Fixture or technique to consider | What to check after dark |
|---|---|---|
| Front walk or garden path | Shielded path lights that direct light onto the walking surface | Can a guest see the turn and where the pavement ends? |
| Porch or patio steps | Recessed step lights or shielded lights aimed across the treads | Can you distinguish the step edges from both directions? |
| Patio seating or dining | Shielded wall lights, downlights, or light reflected off a nearby wall | Is there enough light to see faces or food without a bright source in view? |
| Mature tree or specimen planting | A directional accent light sized to the target | Does the beam land on the trunk or canopy? Where does it go through gaps in the branches? |
| Brick, stone, or siding | A soft wall wash for broad coverage or a closer beam to reveal texture | Does the beam stop where you want it to, especially around windows and rooflines? |
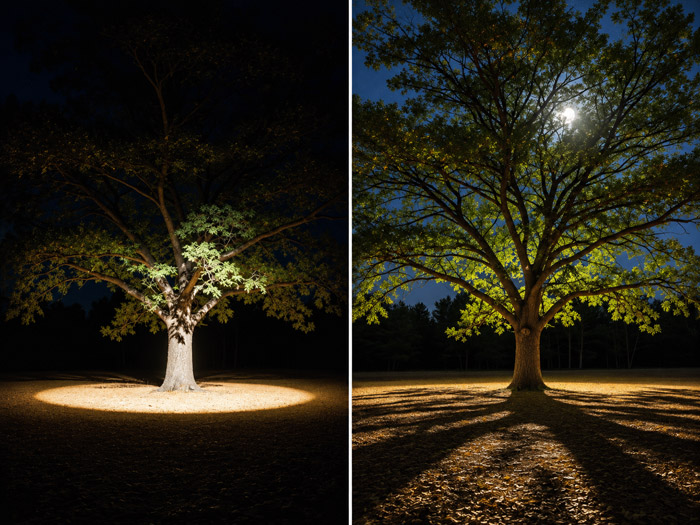
The choice between uplighting and downlighting can change how the whole yard feels. An uplight may bring out the branching pattern of a maple. A shielded downlight can make the ground below it easier to see. Try the effect from the patio and the house before settling on a fixture. If you can see the light source from either spot, try a shield, a different position, or a lower output. Use fixture shielding and careful aiming to keep light on the surface you intend to illuminate.
Plan for Snow, Runoff, and Bare Branches
Batavia sits along the Fox River, and the city notes that much of its runoff reaches the river through local creeks and watersheds. On your property, the detail that matters is where water actually collects. Walk the yard after a heavy rain or during snowmelt. A planting bed that looks like a good place for a flush fixture in July may hold water in March.
City of Batavia Public Works. (n.d.). Water resources information. City of Batavia.
Mark where you put the snow. A low fixture beside the driveway may land right where the snowblower throws snow or where you pile it after shoveling. Move the fixture to the far side of the bed if you can still get the beam onto the walk. At a busy stair or entry, consider mounting the light to a suitable vertical surface, clear of the shovel’s path.
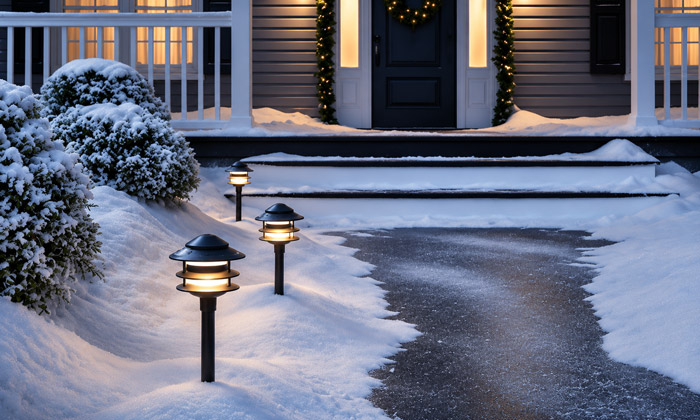
Match the fixture to the exposure. When comparing weather-resistant outdoor fixtures, Check the manufacturer’s mounting instructions and the fixture’s damp- or wet-location marking for the intended location. A fixture beneath a covered porch faces different conditions from one in a bed that receives sprinkler spray and snowmelt. If water routinely sits at the proposed location, a raised fixture in a better-drained position may be easier to live with.
Recheck tree lighting after leaf fall. A dense summer canopy can catch light that travels through bare branches in November. Look at the tree again from the sidewalk, patio, and closest windows. You may get a better winter effect by bringing the beam down onto the trunk and lower branches.
Choose Power Based on How Much You Rely on the Light
A single property can use both solar and low-voltage outdoor lighting. Let the way you use each area guide the choice.
Wired low-voltage lighting makes sense for a shaded front approach, outdoor steps, or a side entrance you use every evening. The system runs from a transformer, so it can operate on a predictable schedule regardless of how much sunlight reached the garden that day. Ask the installer to confirm equipment compatibility and whether the plan leaves room for a later addition.
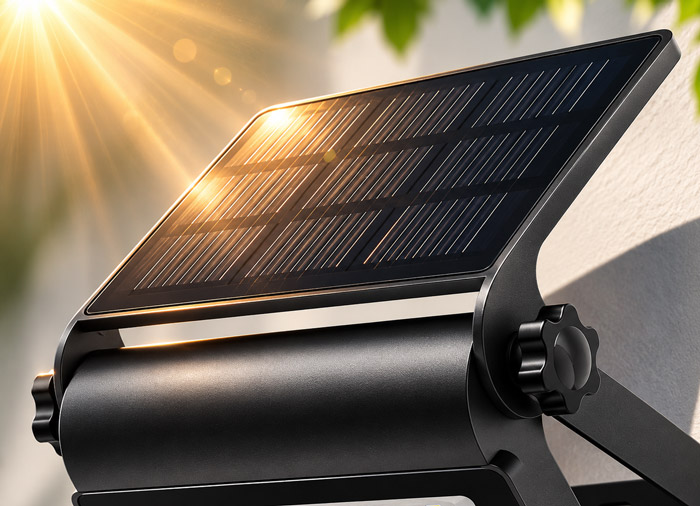
Place the solar panel where it gets direct sunlight during the day so the battery can power garden accent lighting after dark.
Solar fixtures can work well in an open garden bed where you want an accent and the panel receives sufficient direct sunlight. Assess the proposed location at different times of day. A spot that looks sunny when you leave for work may spend much of the afternoon in the shadow of the house. If you’re considering solar for a route you rely on, try one fixture in that exact position and check how it performs after several cloudy days.
Think about which lights you’ll want together. You might use the front approach every evening, the patio only when someone is outside, and the tree accent for a few hours after dusk. If the system supports separate controls, decide how to group those lights before the layout and quote are finalized.
An Example Layout for a Front Walk and Raised Patio
Consider an illustrative Batavia yard with an L-shaped front walk, a porch light above the door, a mature maple near the bend, and a back patio that drops two steps to the lawn.
Start where the route changes. Put the first two trial lights where the walk leaves the driveway and where it turns toward the porch. Stand in the driveway and follow the route with your eyes. If the porch light already shows the landing and threshold clearly, spend the next fixture on any part of the walk that still disappears from view.
Test the back steps from the top landing. The lawn may look bright while the top tread is lost in shadow. Try a shielded fixture that sends light across the steps. Walk down, turn around, and come back up. Then sit in the chair closest to the steps to make sure the same fixture is comfortable from there.
Add the maple once the walking routes work. Try a modest accent on the trunk and lower branches, then look at it from the kitchen and patio. If the maple already gives the yard a clear focal point, leave the surrounding beds darker. The tree’s shape will stand out, and you’ll have fewer fixtures to work around when the beds need attention.
In this layout, the walkway lights, step lights, and tree accent each have a different job. That makes it easier to phase the work. You can finish the routes you use every day, then decide after a few evenings whether the patio seating area or garden needs more light.
What Does Landscape Lighting Cost in Batavia, IL?
A broad budgeting reference for professionally installed residential landscape lighting is $2,000 to $6,000. For a Batavia home, get a site-specific quote. The difference between two proposals may come down to how the installer reaches the fixtures, whether existing equipment can be reused, and what the crew restores afterward.
| Project scope | What the layout might cover | What can change the quote |
|---|---|---|
| Front entry | Driveway-to-door walk, front steps, and porch approach | Distance to a suitable power source and whether wiring needs to cross an existing walk |
| Front yard | Entry route plus one tree, planting bed, or section of the façade | Cable routing around roots, fixture optics, and access to planting areas |
| Front and back yard | Front approach, rear steps, seating or dining area, and selected accents | Longer runs, separate controls, work around existing hardscape, and surface restoration |
Compare two quotes using the same sketch. An eight-fixture quote may include lifting and resetting pavers, restoring disturbed beds, and returning after dark to adjust the beams. Another eight-fixture quote may cover the lights and installation while pricing that work separately. Ask each installer to identify the fixture models, transformer and controls, wiring and surface work, nighttime aiming, and warranty coverage for both equipment and labor. Then compare the totals for the same completed scope.
If you’re planning a new patio or walkway, bring up lighting before the hardscape goes in. You can decide where step fixtures belong, where future cable routes could go, and how you’ll reach the equipment for service. If you’re working in phases, price the entry and steps as the base project and ask for the garden accents as separate line items.
Check the Finished Lighting After Dark
Schedule the final walkthrough after sunset. At that point, a small adjustment to the aim can make a bigger difference than adding another fixture.
Walk the front approach with the porch light on, the way a visitor would see it. Descend the patio steps, then sit at the table and look toward the brightest fixture. Go inside and check the view through the windows. If an area still feels dark, look for a nearby source in your line of sight before asking for more output. Shielding or redirecting that source may make the area easier to see.
Keep a copy of the final fixture locations, model numbers, transformer information, and control settings. A photo of each position during installation can help you find a fixture later when plants have grown around it or you’re planning work on a bed. After the first major change in the yard, such as leaf fall, snow clearing, or a round of pruning, take another short walk to see what needs adjusting.
FAQs
1. How far apart should landscape path lights be?
Set up two lights at their intended mounting height and check how far each one gives you usable light along the actual path. If each fixture lights roughly three feet in either direction along the walk, six feet is a reasonable trial spacing. Bring them closer if the midpoint is too dim. On a wide walk, check the far edge as well as the center. Fixture height, beam spread, and the width of the pavement all affect the result.
2. Is 2700K or 3000K better for landscape lighting?
Start with 2700K or 3000K based on the materials you’re lighting and the fixtures you already have. At 2700K, light looks warmer and often suits brick, wood, and relaxed seating areas. At 3000K, the white looks a little cleaner and may suit pale stone or contemporary finishes. Try both against the actual material at night. If the porch, path, and façade are visible together, check how those lights look side by side. Evaluate brightness separately from color temperature.
3. How much electricity does low-voltage landscape lighting use?
Ten 4-watt fixtures running five hours a night use about 6 kWh over 30 days at the fixtures, before transformer losses or standby draw. At an illustrative electricity rate of $0.16 per kWh, that’s about $0.96 for the fixture load. To estimate your own cost more closely, multiply the system’s actual input power in kilowatts by its monthly run time and the per-kWh rate on your bill.
U.S. Energy Information Administration. (n.d.). Measuring electricity.
4. Why did one section of my landscape lighting stop working?
If several lights in one area go out together while the rest still work, start by noting which fixtures are affected and whether they share a control zone or cable run. A zone setting or a problem on the shared run can affect several fixtures at once. If just one light is out, the landscape lighting troubleshooting steps are different. Give your installer the locations of the affected lights and mention any recent digging, hardscape work, or changes to the system.
5. Do I need a permit for landscape lighting in Batavia, IL?
It depends on the electrical work involved. Batavia’s residential alteration guidance exempts certain fixture replacements in the same location when they require no new wiring. For a new landscape lighting system, describe the proposed work to the city’s Building Division before installation, especially if the plan calls for a new outdoor receptacle, a new circuit, or hardwired equipment.
