

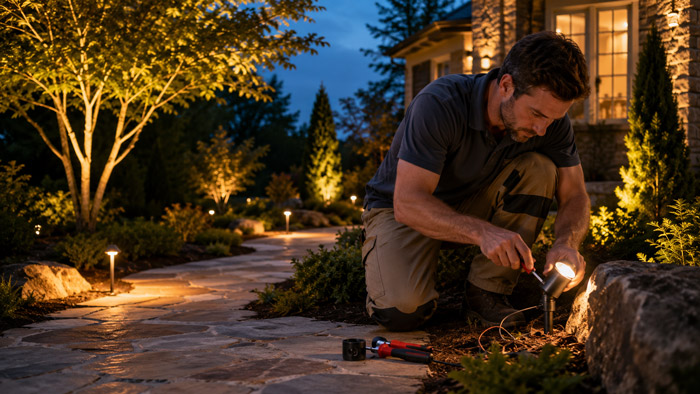
Start With Safety Before Troubleshooting
Understand the Main Parts of a Landscape Lighting System
Diagnose the Problem by Symptom
Fixing a System Where All Landscape Lights Are Out
Fixing One Landscape Light That Is Not Working
Fixing Dim Landscape Lights
Fixing Flickering Landscape Lights
Fixing Lights That Burn Out Too Quickly
Fixing a Transformer That Keeps Tripping
Fixing Landscape Lighting After Rain
Fixing Cut or Damaged Landscape Lighting Wire
Fixing Corroded Fixtures and Connectors
Fixing Landscape Lighting Timers and Photocells
Fixing Poor Lighting Results After Repairs
Fixing Path Lights
Fixing Spotlights and Uplights
Fixing Well Lights and In-Ground Lights
Fixing Hardscape, Step, and Wall Lights
Fixing Color Temperature Mismatch
Fixing Overloaded or Poorly Planned Systems
Repair or Replace: How to Decide
Essential Tools and Materials for Landscape Lighting Repair
Preventive Maintenance for 2026 and Beyond
FAQs
Landscape lighting should make a property safer, more useful, and more attractive after dark. When it works well, it highlights pathways, trees, steps, walls, gardens, patios, and architectural features without drawing attention to the fixtures themselves. When it fails, the problems are usually obvious: lights flicker, sections go dark, fixtures lean, bulbs burn out too quickly, timers stop working, or the entire system loses power.
The good news is that most landscape lighting problems follow predictable patterns. A low-voltage outdoor lighting system is made up of a transformer, cable runs, fixtures, lamps or integrated LEDs, connectors, controls, and the outdoor environment around them. When one part fails, the symptoms usually point toward the cause.
This 2026 guide explains how to diagnose and fix common landscape lighting problems in a practical, safe, and organized way. It focuses on low-voltage landscape lighting, which is the most common type used around homes because it typically operates at 12 volts from a transformer rather than full household line voltage. Some systems, however, include 120-volt fixtures, outlets, or hardwired controls. If you find line-voltage wiring, damaged household electrical circuits, repeated breaker trips, or anything you cannot clearly identify, stop and contact a licensed electrician.
Start With Safety Before Troubleshooting
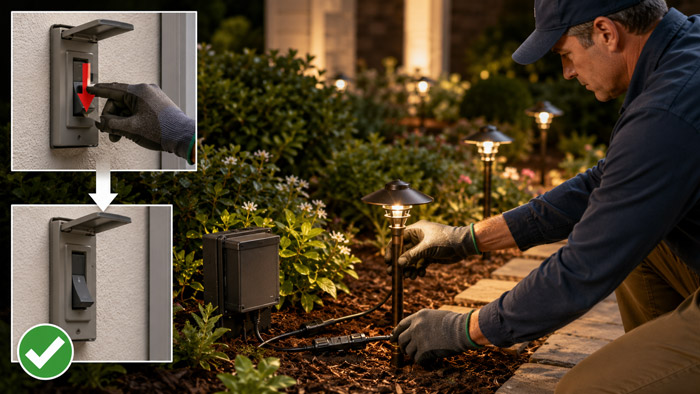
Before touching fixtures, wiring, transformers, or connectors, turn the lighting system off. If the transformer is plugged into an outdoor outlet, unplug it. If the system is hardwired, turn off the correct breaker. Never assume a system is safe simply because the lights are not working.
Low-voltage landscape lighting is safer than line-voltage lighting, but it is not risk-free. Transformers are connected to household power on the primary side, outdoor outlets should be properly protected, and damaged wiring can still overheat or short. Many low-voltage lighting systems are covered by electrical code rules, including voltage limits and requirements for listed equipment; NEC Article 411 is commonly referenced for lighting systems operating at 30 volts or less.
Use basic protective steps:
Wear gloves when handling corroded fixtures or old wire. Avoid working during rain or when the ground is saturated. Do not open a transformer while it is energized. Do not bury ordinary indoor wire outdoors. Do not use tape as a permanent waterproof splice. Do not bypass a tripping GFCI outlet, breaker, or transformer protection device.
A safe repair is not just about getting the lights back on. It is about making sure the system will continue working through rain, irrigation, heat, freezing temperatures, soil movement, pests, and seasonal yard maintenance.
Understand the Main Parts of a Landscape Lighting System
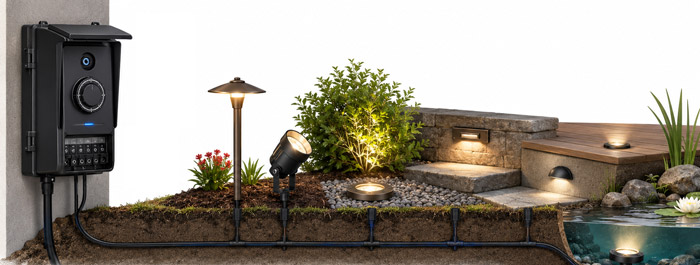
Before fixing anything, it helps to know what each part does.
- The transformer converts household power into low-voltage power for the lighting circuit. Many modern transformers include timers, photocells, astronomical clocks, Wi-Fi controls, or multiple voltage taps.
- The low-voltage cable carries power from the transformer to each fixture. Common landscape lighting cable is designed for outdoor and direct-burial use. Cable size matters because long runs and undersized wire can cause voltage drop.
- The fixtures hold the light source and direct the beam. Path lights, spotlights, well lights, step lights, hardscape lights, deck lights, and underwater-rated pond lights all have different repair concerns.
- The lamp or LED module creates the light. Some fixtures use replaceable LED lamps, while others have integrated LEDs built into the fixture body.
- The connectors join fixtures to the main cable. These are among the most common failure points because they sit underground or near wet soil.
- The controls determine when the system turns on and off. Controls may include a mechanical timer, digital timer, photocell, smart plug, app-based controller, motion sensor, or smart transformer.
A lighting failure can happen in any of these areas. The fastest way to fix the system is to identify whether the problem affects one fixture, one cable run, several fixtures, or the entire system.
Diagnose the Problem by Symptom
The best repair process starts with the symptom. Do not begin by replacing random parts. Instead, narrow the issue.
- If all lights are out, look first at the power source, transformer, outlet, breaker, GFCI, timer, photocell, and transformer output.
- If one light is out, check the lamp, socket, fixture connection, corrosion, water intrusion, and the short branch wire from the fixture to the main cable.
- If several lights on one side are out, suspect a cut cable, failed splice, overloaded run, loose connection, or voltage drop near the middle of that cable path.
- If lights are dim at the end of a run, suspect voltage drop, undersized cable, too many fixtures on one run, a weak connection, or an overloaded transformer tap.
- If lights flicker, suspect loose connections, moisture, failing lamps, incompatible LED lamps, unstable voltage, or failing controls.
- If the system trips a GFCI or breaker, suspect water intrusion, damaged cable, a failed transformer, a shorted fixture, or a line-voltage issue. Do not keep resetting it without finding the cause.
This symptom-first approach prevents wasted time and unnecessary replacement costs.
Fixing a System Where All Landscape Lights Are Out
When the entire lighting system is dark, begin at the source.
Check whether the transformer has power. Look for a display, indicator light, humming sound, or manual on/off function. Make sure the transformer is plugged in and the outlet is working. Test the outlet with another device or a plug-in tester if you have one.
Next, check the GFCI. Outdoor outlets are commonly GFCI-protected, and the reset may be on the outlet itself, in the garage, on another exterior outlet, or at the electrical panel. If the GFCI resets and trips again immediately, do not ignore it. That usually means moisture, a short, or a fault somewhere in the system.
Then check the transformer settings. Many “dead system” calls are caused by a timer set incorrectly after a power outage, a photocell covered by dirt or mulch, a smart control disconnected from Wi-Fi, or an astronomical timer set to the wrong location or time zone.
If the transformer is receiving power but no lights turn on, test the transformer output with a multimeter set to AC voltage for a traditional magnetic or AC low-voltage transformer. Many landscape lighting systems should show output around 12 volts, though multi-tap transformers may provide 12, 13, 14, or 15 volts to compensate for voltage drop. If there is no output and the transformer is properly powered, the transformer may have failed or its internal protection may be tripped.
Also inspect the secondary terminals where the landscape cable connects to the transformer. Loose terminal screws, corroded wire ends, and overheated connections can shut down an entire system. Turn power off, remove the cable, cut back badly corroded copper, strip fresh wire, and reconnect it tightly.
Fixing One Landscape Light That Is Not Working
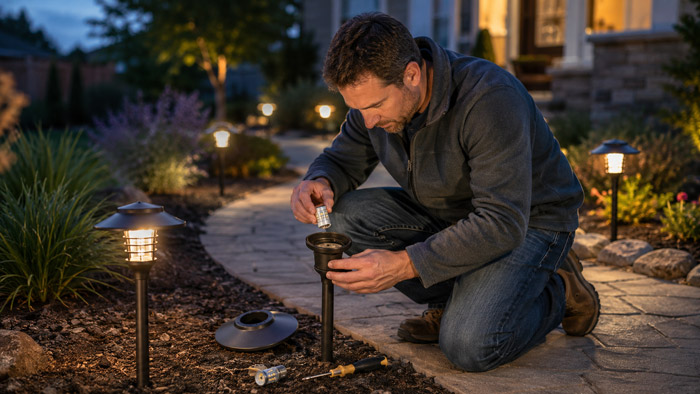
A single dead fixture is usually easier to diagnose.
Start with the lamp or LED source. If the fixture uses a replaceable lamp, swap in a known working lamp of the same voltage and appropriate wattage. If the light works, the old lamp failed. LED lamps last far longer than incandescent lamps, and the U.S. Department of Energy notes that residential LEDs use far less energy and can last much longer than traditional incandescent lighting, but outdoor heat, moisture, poor-quality lamps, and voltage problems can still shorten LED life.
If the new lamp does not work, inspect the socket. Look for green corrosion, white mineral deposits, burned contacts, loose pins, or water inside the fixture. Clean light corrosion with the power off, but replace the socket or fixture if the contacts are badly damaged.
Next, check the fixture connection to the main cable. Many older systems use pierce-point connectors that puncture the cable insulation. These often fail after years underground because soil movement, corrosion, and moisture weaken the contact. For a lasting repair, replace weak connectors with waterproof, gel-filled, direct-burial connectors rated for outdoor low-voltage lighting.
If the fixture has an integrated LED and receives proper voltage but does not illuminate, the LED module or driver has likely failed. Some integrated fixtures allow module replacement; others require replacing the whole fixture. When replacing, match brightness, beam spread, color temperature, finish, and mounting style so the repaired fixture does not look out of place.
Dim landscape lighting is often caused by voltage drop. Voltage drop happens when power is lost along the cable run before reaching the fixture. The longer the run, the smaller the cable, and the higher the total wattage on the run, the more voltage drop becomes a problem.
Signs of voltage drop include fixtures near the transformer looking normal while fixtures farther away look weak, yellow, or inconsistent. This is especially common on older halogen systems, but it can still affect LED systems when cable runs are poorly planned or connections are weak.
To fix dim lights, measure voltage at the fixture while the system is on. Compare the reading near the transformer with the reading at the farthest fixture. If the farthest fixture is significantly lower, the system needs correction.
Common fixes include moving the farthest fixtures to a higher voltage tap if the transformer supports it, splitting one long run into two shorter runs, using heavier-gauge cable, reducing the wattage load, converting old halogen lamps to quality LEDs, or creating a hub-style wiring layout where multiple fixtures are fed from a central point.
Do not simply raise voltage without checking every fixture on the run. Too much voltage at closer fixtures can shorten lamp life or damage LED components. The goal is balanced voltage, not maximum voltage.
Fixing Flickering Landscape Lights
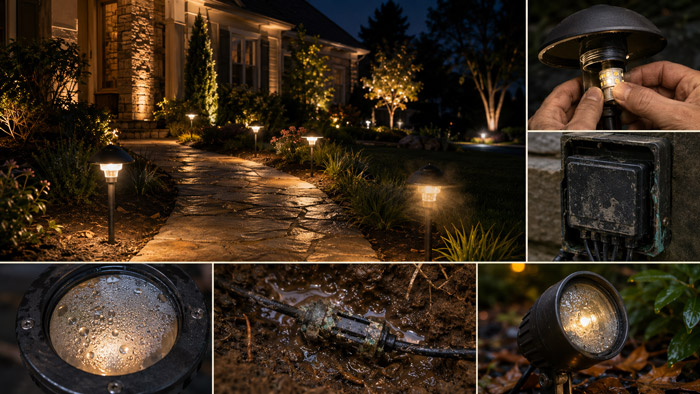
Flickering is one of the most common and annoying landscape lighting problems. It can be caused by something simple, such as a loose lamp, or something more serious, such as a failing transformer or water-damaged connection.
Start with the affected fixture. Turn the system off, reseat the lamp, check the socket, and inspect the connector. If the fixture flickers when you gently move the wire, the connection is loose or corroded.
If several fixtures flicker together, look upstream. A loose transformer terminal, failing splice, overloaded circuit, or unstable timer can affect multiple lights at once. Moisture inside a splice can also create intermittent contact, especially after rain or irrigation.
LED flicker may also come from incompatible lamps and transformers. Some older magnetic transformers work well with LEDs, while others may behave poorly when the total load becomes too low after replacing halogen lamps with LEDs. If flicker began after an LED retrofit, check the transformer’s minimum load requirements and verify that the lamps are designed for landscape lighting use.
Do not ignore flickering. It often gets worse over time and may point to a connection that is heating, arcing, or allowing water into the circuit.
Fixing Lights That Burn Out Too Quickly
If lamps fail too often, the problem is usually not the lamp alone.
Check voltage at the fixture. Lamps exposed to excessive voltage can burn out prematurely. This is especially common when a fixture close to the transformer is connected to a higher voltage tap intended for a longer run.
Check for water intrusion. A fixture that repeatedly fills with water may destroy lamps, sockets, or LED modules. Replace cracked lenses, hardened gaskets, missing O-rings, and damaged seals. Make sure the fixture is not installed where irrigation sprays directly into it every night.
Check heat buildup. Lamps with too much wattage can overheat small fixtures. LED retrofit lamps must fit properly and allow heat to dissipate. A sealed fixture that traps heat around a poor-quality LED can shorten its life.
Check lamp quality. Cheap LED lamps may shift color, flicker, or fail early outdoors. For critical fixtures, use lamps rated for enclosed or damp/wet outdoor conditions as appropriate.
If one fixture repeatedly destroys lamps while nearby fixtures are fine, replace the socket or fixture. If many lamps fail across the system, check transformer voltage and wiring layout.
Fixing a Transformer That Keeps Tripping
A transformer may shut down because of overload, short circuit, overheating, internal failure, or a fault in the lighting cable.
First, calculate the system load. Add the wattage of every fixture connected to the transformer. A transformer should not be pushed to its maximum rating in normal use. Many installers leave capacity for startup behavior, voltage stability, and future fixture additions.
If the transformer is overloaded, reduce wattage, split the system between multiple transformers, or upgrade to a properly sized transformer. Modern LED conversions often reduce load dramatically, which is one reason LEDs are now the standard choice for most landscape lighting repairs and upgrades.
If the load is not too high, disconnect all low-voltage cable runs from the transformer, then reconnect one run at a time. If the transformer trips only when a specific run is connected, the problem is on that run. Walk the cable path and inspect for cuts from edging, shovels, aerators, animals, irrigation work, or root movement.
Also check fixtures on the problem run. A water-filled well light, crushed path light, or corroded underwater fixture can short the system.
If the transformer trips with no secondary wires connected, the transformer itself may be faulty or the primary power source may be the issue. At that point, replacement or professional diagnosis is usually the best option.
Fixing Landscape Lighting After Rain
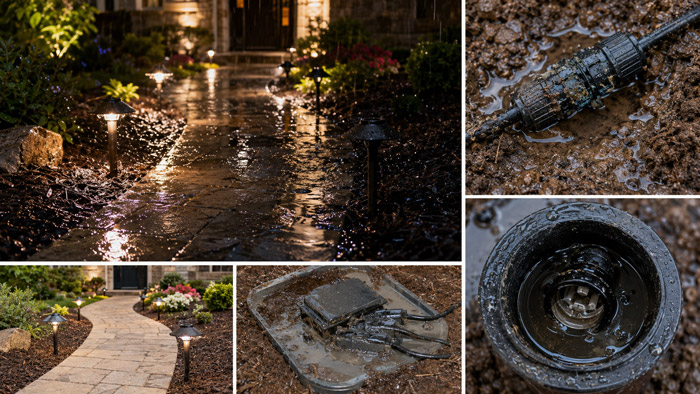
Rain exposes weak landscape lighting repairs. If the system works during dry weather but fails after rain, moisture is almost always involved.
Check low points first. Well lights, in-ground fixtures, fixtures near downspouts, and lights in poorly drained beds are the most likely to collect water. Remove lenses and inspect for moisture, mud, insects, corrosion, or mineral deposits.
Inspect every underground splice in the affected area. Non-waterproof wire nuts, electrical tape, cracked connectors, and old pierce connectors often fail after storms. Replace them with outdoor-rated waterproof connectors designed for direct burial.
Look at the cable path. If a cable lies in a drainage channel, mulch pocket, or irrigation trench, it may be sitting in water for long periods. Low-voltage cable can be direct-buried when rated for that use, but connections still need protection.
For fixtures that repeatedly flood, raising the fixture, improving drainage, replacing it with a better-sealed model, or changing the lighting method may be smarter than repairing the same failure again.
Fixing Cut or Damaged Landscape Lighting Wire
Cut wire is common after planting, edging, trenching, sprinkler repairs, fence work, or seasonal yard cleanup.
If a section of lights suddenly goes out after landscaping work, inspect the area where work was done. Look for exposed copper, sliced insulation, pulled cable, or loose fixtures. Turn the system off before handling the wire.
To repair a cut low-voltage cable, expose enough cable on both sides to work comfortably. Cut away damaged sections. Strip clean copper. Use waterproof direct-burial splice connectors sized for the wire gauge. Avoid twisting wires together and wrapping them in tape. Tape alone will fail underground.
After repairing the splice, test the system before reburying. Once confirmed, place the splice where it will not be under constant mechanical stress. Mark the cable location on a property diagram or take photos so future digging is safer.
If the cable is damaged in many places, replacing the run may be better than adding multiple splices.
Fixing Corroded Fixtures and Connectors
Outdoor lighting lives in a harsh environment. Moisture, fertilizer, soil salts, mulch acids, irrigation overspray, and freeze-thaw cycles all contribute to corrosion.
Corrosion often appears as green or white deposits on copper, brass, sockets, screws, and connectors. A small amount can sometimes be cleaned, but corrosion inside a socket or sealed LED fixture usually means replacement is coming soon.
When repairing corrosion, identify why it happened. A fixture buried too deeply in mulch will trap moisture. A path light hit by sprinklers every night will fail faster. A connector sitting in wet soil will corrode sooner if it was not designed for direct burial.
Use corrosion-resistant fixtures where possible. Brass, copper, and high-quality powder-coated aluminum generally perform better than thin, low-cost metal fixtures in demanding outdoor conditions. For coastal or high-salt environments, fixture material matters even more.
A good repair also restores the fixture position. Straighten leaning lights, remove mulch from around stems, clean lenses, and aim beams correctly.
Fixing Landscape Lighting Timers and Photocells
Control problems are often mistaken for wiring problems.
A mechanical timer can lose time after a power outage or become stuck because of worn pins. A digital timer can lose programming. A photocell can fail if it is covered by dirt, blocked by plants, placed too close to another light, or installed where headlights trigger it. Smart controls can fail because of Wi-Fi changes, app updates, router replacement, or incorrect sunrise/sunset settings.
To troubleshoot controls, bypass them temporarily if the transformer allows manual operation. If the lights work manually, the lighting circuit is probably fine and the control needs adjustment or replacement.
For photocells, clean the sensor and test it by covering it during daylight. For timers, confirm current time, on/off schedule, day settings, and battery backup. For smart systems, check Wi-Fi signal strength near the transformer and confirm the app schedule.
In 2026, many homeowners prefer astronomical timers or smart transformers because they adjust automatically with sunset and sunrise. However, simpler controls are often more reliable when Wi-Fi is weak or the homeowner wants minimal maintenance.
See also: Everything You Need to Know About Landscape Lighting Timer
Fixing Poor Lighting Results After Repairs
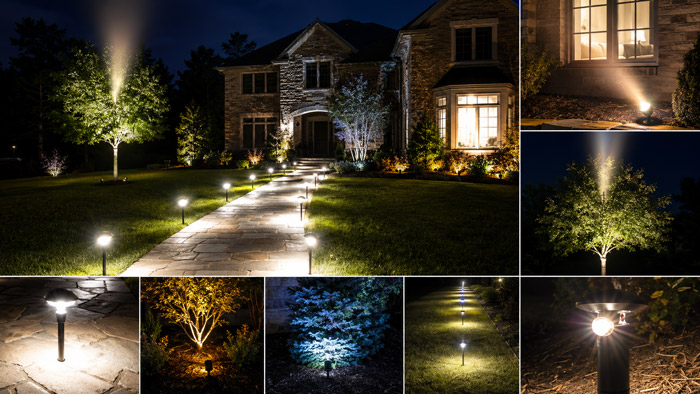
A technically working system can still look bad. Repairs should restore both function and design.
Common design problems include path lights that are too bright, spotlights aimed into windows, tree lights aimed too high, uneven color temperatures, exposed glare, and fixtures placed in straight lines without purpose.
After fixing electrical problems, walk the property at night. Look from the driveway, street, front door, patio, and inside windows. Adjust beam angles so light falls on the intended surface, not into people’s eyes. Lower brightness where glare is obvious. Replace mismatched lamps so the color temperature is consistent.
Responsible outdoor lighting also matters. DarkSky International recommends using outdoor light only where needed, directing it carefully, keeping brightness low, using controls, and choosing warmer color light where possible. Its approved luminaire guidelines also reference warm color temperature limits, including nominal 3000 K maximum for many approved outdoor luminaires.
For most residential landscapes, warm white light between about 2700 K and 3000 K looks natural and comfortable. Cooler white light can make plants and stone look harsh and may increase glare.
Path lights fail in predictable ways because they are exposed to foot traffic, pets, lawn equipment, mulch, and irrigation.
If a path light is out, check the lamp, socket, and connector first. If it leans, remove it, reset the stake, and compact the soil around it. If the stake is broken, replace the stake rather than forcing the fixture into unstable soil.
If path lights are too bright, use lower-lumen lamps or fixtures with better shielding. A path light should softly reveal the walking surface, not create a row of glowing dots. If the fixture shines sideways into the eyes, replace the shade or choose a better-shielded model.
If several path lights fail along one walkway, inspect the main cable where edging tools may have cut it. Walkways are common damage zones because cable is often installed close to borders.
Fixing Spotlights and Uplights
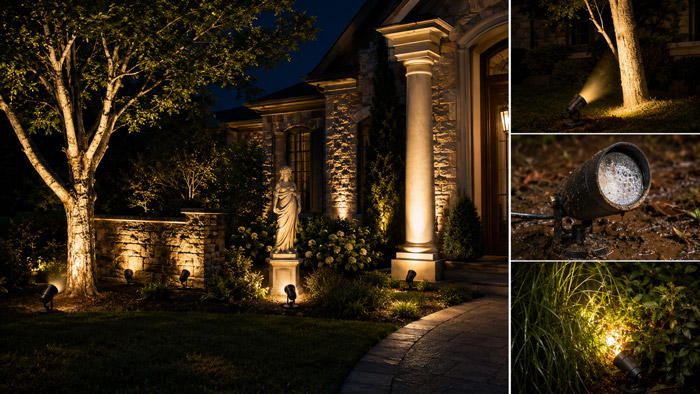
Spotlights and uplights are used for trees, walls, columns, statues, and architectural details. Their most common issues are bad aiming, water intrusion, and plant growth blocking the beam.
- If the light is weak, clean the lens first. Dirt, hard water deposits, and mulch film can reduce output. Then check voltage and lamp condition.
- If the beam no longer hits the intended feature, adjust the fixture at night. Tree growth changes the target over time, so a spotlight that looked good two years ago may now need a new angle or location.
- If the fixture is installed in a lawn, make sure it is not constantly hit by mowers or buried by grass. If it is installed in a bed, keep mulch below the lens and body vents. Do not bury the fixture body deeper than intended.
For uplighting trees, avoid overlighting the canopy or sending light into the sky. A tighter beam, lower output, or better shield can improve the effect while reducing wasted light.
Fixing Well Lights and In-Ground Lights
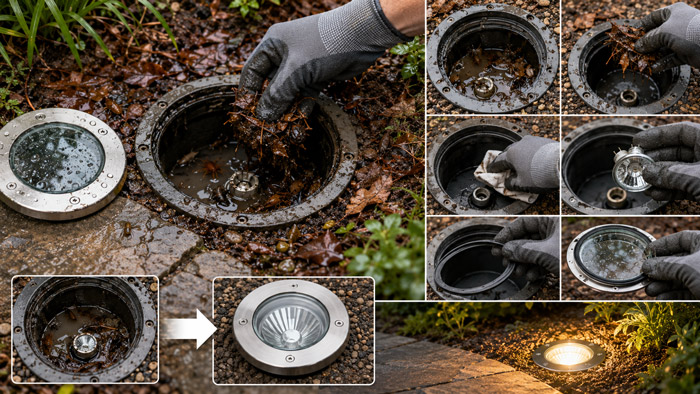
Well lights and in-ground fixtures are more vulnerable to drainage problems than above-ground lights.
If a well light is out, check whether it is full of water, mud, leaves, or insects. Remove debris, dry the fixture, inspect the lamp and socket, and check the gasket or lens. If water has repeatedly entered the fixture, replacement is often better than another temporary repair.
In-ground fixtures should be installed with drainage in mind. A fixture sitting in compacted clay or a low spot will become a small water bucket. If the location cannot drain, consider replacing the well light with an above-ground spotlight.
Also check heat. Some in-ground fixtures require proper airflow or correct lamp wattage. Installing a lamp that is too powerful can damage the fixture or surrounding materials.
Fixing Hardscape, Step, and Wall Lights
Hardscape lights are often installed under capstones, along retaining walls, on steps, or beneath outdoor kitchen counters. These fixtures can be harder to repair because wiring may be hidden behind masonry, pavers, or wall blocks.
If a hardscape light fails, start by checking the transformer and nearby connections. Many hardscape lighting failures occur at accessible splices, not inside the wall.
If only one fixture is out and the connection is hidden, test the fixture if possible before disturbing the structure. Some hardscape fixtures have replaceable LED boards, while others require replacement of the entire unit.
For step lights, safety is the priority. A dark step or uneven stair lighting should be repaired quickly. Keep brightness low but consistent. The goal is to reveal elevation changes without glare.
Fixing Color Temperature Mismatch
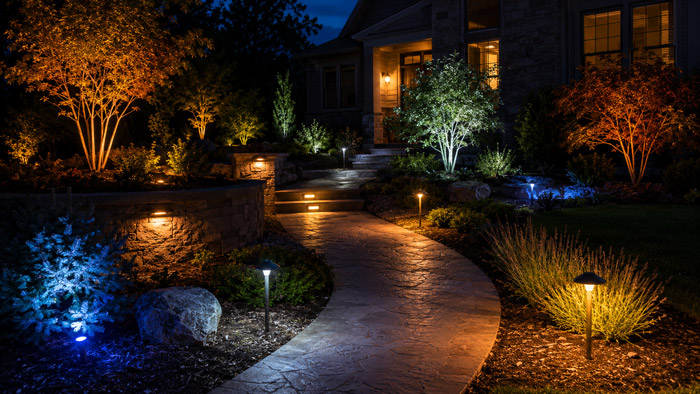
One of the most common problems after piecemeal repairs is mismatched light color. One fixture looks amber, another looks white, and another looks blue. This makes the landscape look patched together.
Color temperature is measured in Kelvin. Lower numbers look warmer; higher numbers look cooler. For most residential landscape lighting, 2700 K is warm and soft, while 3000 K is slightly cleaner but still comfortable. Above 4000 K often looks too cold for gardens, stone, and wood.
To fix mismatch, identify the color temperature of the existing system and replace lamps consistently. Do not mix brands and color temperatures casually. Even two lamps both labeled 3000 K may look slightly different if they have different color rendering quality.
If the property has both old halogen and new LED lamps, consider converting the entire system to one LED family for consistency.
See also: What Are CCT and CRI in Garden Lights?
Fixing Overloaded or Poorly Planned Systems
Older landscape lighting systems often grow over time. A few fixtures are added near the patio, then more along a path, then more around trees, until the original transformer and cable layout are no longer appropriate.
Symptoms of an overloaded or poorly planned system include dim far-end lights, frequent transformer shutdowns, inconsistent brightness, messy splices, and no clear wiring map.
Fixing this properly may require redesigning the wiring rather than replacing one part. Divide the system into logical zones: front entry, driveway, backyard, patio, trees, steps, and garden features. Each zone should have a manageable cable run and load.
Use the correct wire gauge for the distance and wattage. Use hub connections where helpful. Keep splices accessible when possible. Leave transformer capacity for future changes. Label each run inside the transformer.
A clean wiring plan makes future repairs much easier.
Repair or Replace: How to Decide
Not every failed fixture deserves repair. Sometimes replacement is the better long-term choice.
Repair makes sense when the fixture is high quality, the problem is a lamp or connector, the body is solid, the finish matches the system, and replacement parts are available.
Replacement makes sense when the fixture is corroded beyond cleaning, the socket is burned, the integrated LED failed and no module is available, the lens is cracked, the fixture fills with water repeatedly, or the fixture design causes glare.
For very old systems, a full LED upgrade may be smarter than replacing lamps one by one. LED lighting can greatly reduce energy use compared with incandescent technology, and outdoor LED products are now available in many forms, including reflector lamps, outdoor area lights, dimmable options, and controls.
The best decision balances cost, reliability, appearance, and maintenance.
Essential Tools and Materials for Landscape Lighting Repair
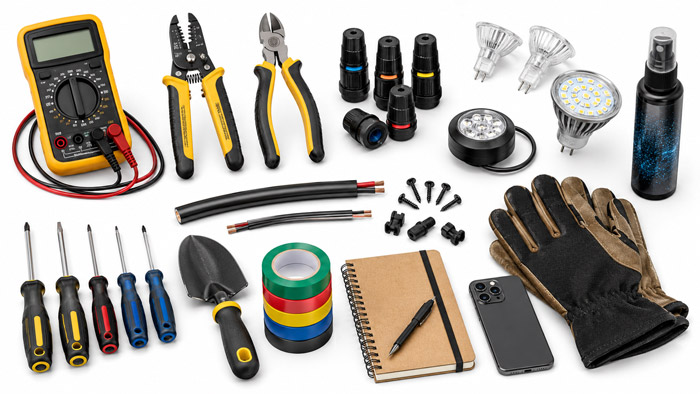
A basic repair kit should include a multimeter, wire strippers, cable cutters, waterproof direct-burial connectors, replacement lamps, corrosion cleaner, gloves, screwdrivers, a small shovel or hand trowel, electrical tape for temporary labeling, and a notebook or phone camera for documenting cable paths.
For more advanced work, useful tools include a clamp meter, tone tracer, extra low-voltage cable, spare fixture stakes, heat-shrink connectors rated for burial, and a transformer load chart.
Do not use indoor wire nuts underground. Do not use ordinary extension cord wire as permanent landscape cable. Do not bury splices that are not rated for wet or direct-burial conditions.
Preventive Maintenance for 2026 and Beyond
The best way to avoid emergency repairs is to maintain the system twice a year: once before the main outdoor season and once after heavy seasonal weather.
Clean fixture lenses. Remove mulch from around fixtures. Trim plants blocking beams. Straighten path lights. Check exposed cable. Inspect transformer terminals. Confirm timer settings. Test GFCI protection. Replace weak connectors before they fail. Check for irrigation overspray. Walk the property at night and adjust aiming.
Also update your system map whenever you add or move fixtures. A simple photo record of transformer connections, cable routes, and fixture locations can save hours later.
Landscape lighting is exposed every day to water, soil, roots, animals, insects, heat, cold, and yard tools. Maintenance is not optional if you want the system to last.
How much does professional landscape lighting installation cost in 2026?
Professional landscape lighting installation usually depends on fixture quality, property size, wiring complexity, transformer capacity, and design requirements.
Small residential projects may cost less, while custom systems with premium brass fixtures, smart controls, long cable runs, and multiple lighting zones can cost significantly more.
Is low-voltage landscape lighting better than solar landscape lighting?
Low-voltage landscape lighting is usually better for consistent brightness, longer run times, stronger performance, and professional design control.
Solar landscape lighting is easier to install and has no wiring cost, but it often depends heavily on sunlight exposure, battery quality, and weather conditions.
How far apart should landscape lights be placed?
Landscape light spacing depends on the area being illuminated. Path lights are often spaced to create soft, even guidance rather than a runway effect.
Accent lights should be placed based on the height, shape, and texture of the feature. Proper spacing prevents glare, dark gaps, and over-lighting.
What is the best lumen level for landscape lighting?
The best lumen level depends on the lighting purpose. Path lights usually need lower output, accent lights need moderate brightness, and large trees or architectural features may require stronger fixtures.
The goal is controlled visibility and visual balance, not maximum brightness.
Does landscape lighting increase home value?
Well-designed landscape lighting can improve curb appeal, outdoor usability, safety, and nighttime appearance, which may support perceived home value.
Buyers often notice lighting that highlights architecture, walkways, patios, gardens, and entry areas in a polished, functional way.
