

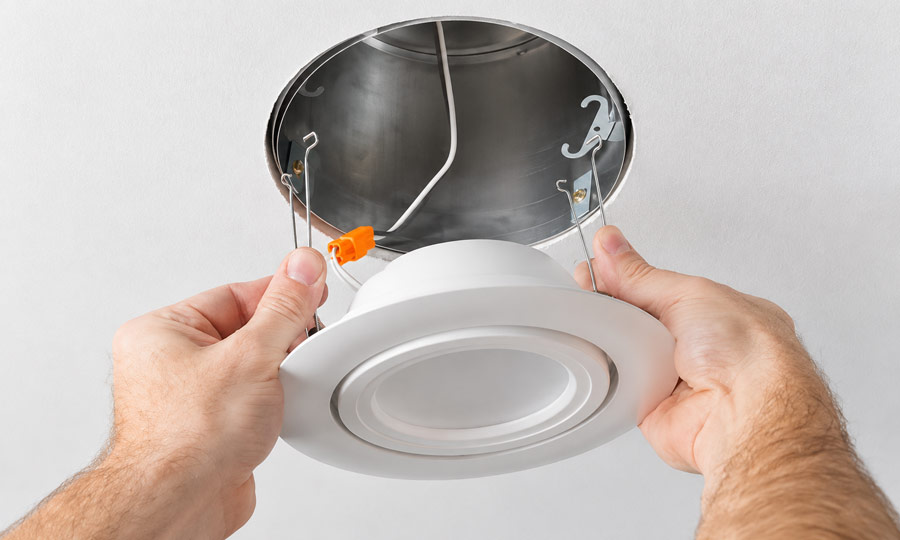
Identify Your Recessed Light Before Removing It
Prepare Your Tools and Make the Circuit Safe
How to Remove a Traditional Recessed Light Trim
How to Remove an LED Retrofit Module
How to Remove a Canless LED Recessed Light
How to Remove the Entire Recessed Light Housing
What if the Recessed Light Will Not Come Out?
What to Do After Removing the Light
FAQs
To remove a recessed light fixture from a ceiling, switch off its circuit breaker, verify that the power is off, identify the mounting mechanism, and release the trim or light module while supporting it. Disconnect the removable connector only after the fixture is safely lowered. Removing the entire metal housing requires additional steps that depend on how it is attached above the ceiling.
The key is to identify what you are removing: the bulb, the trim, the LED module, or the complete housing. These components do not all come out the same way.
Identify Your Recessed Light Before Removing It
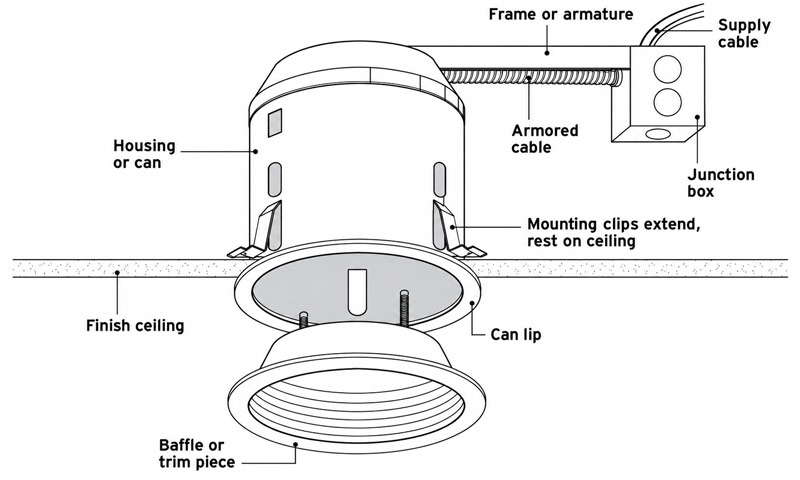
Cross-section of a traditional recessed lighting fixture, illustrating the main components including the metal housing, junction box, mounting clips, trim, and baffle installed in a finished ceiling.
A smooth ceiling light can conceal several different mounting systems. Start by checking the fixture’s instructions or model label whenever available.
| Fixture type | What you will usually find | Typical removal approach |
|---|---|---|
| Traditional recessed can | A separate bulb and decorative trim inside a metal housing | Remove the bulb and release the trim retainers |
| LED retrofit module | An LED light and trim fitted inside an existing can | Release the mounting springs or friction clips, then disconnect the adapter |
| Canless LED downlight | A shallow light held directly against the ceiling by spring arms | Lower the light, release the spring arms, and disconnect its lead |
| Remodel housing | A metal can secured to the finished ceiling with clamps or clips | Release the housing fasteners according to its instructions |
| New-construction housing | A housing and frame attached to ceiling framing | Access the structural fasteners, often from above |
An integrated LED light may have no replaceable bulb. Its visible face can be part of a removable module, so do not try to unscrew the diffuser as though it were a lamp.
If your only goal is to replace a failed bulb, you may be able to leave the trim and housing in place.
Prepare Your Tools and Make the Circuit Safe
For ordinary trim or module removal, gather:
- A stable stepladder.
- Safety glasses and gloves for sharp edges.
- A flashlight or headlamp.
- The correct screwdriver for the fixture’s fasteners.
- A thin plastic trim tool.
- Suitable voltage-testing equipment.
Switch off the circuit breaker supplying the light. Keep anyone else from restoring power while you work, and allow the fixture to cool.
A wall switch being off does not establish that the wiring is safe to touch. Likewise, a non-contact tester that stays silent is not sufficient proof that conductors are de-energized. Before touching wiring, a competent person should verify absence of voltage with an appropriately rated contact tester, checking the tester on a known live source before and after the test. If you cannot do this safely, have an electrician handle the electrical portion.
Gloves protect against cuts; ordinary work gloves do not provide electrical protection.
How to Remove a Traditional Recessed Light Trim
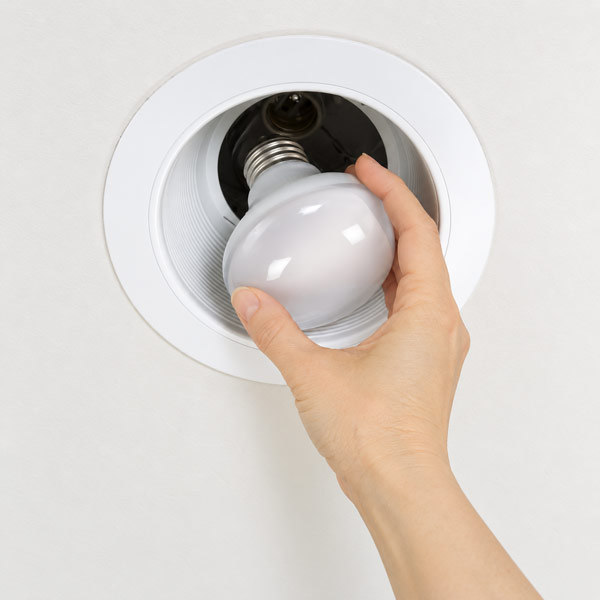
Remove the Bulb if Necessary
Once the power is isolated and the bulb has cooled, remove it using the method appropriate to its base.
A screw-base bulb normally turns counterclockwise. Other lamps may use a twist-lock base or retaining ring. Do not force a bulb simply because it does not unscrew.
For fixtures with an unfamiliar front opening, check the steps for changing a recessed spotlight bulb without clips before attempting to remove the entire fitting.
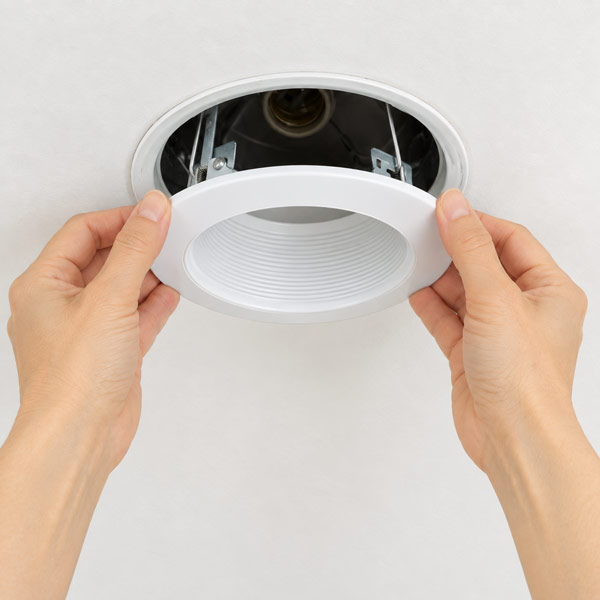
Separate the Trim from the Ceiling
Hold opposite sides of the trim and gently lower it just enough to inspect the retaining mechanism.
If paint has joined the trim to the ceiling, carefully separate that surface seam first. Avoid pushing tools deeply into the opening or levering against the drywall.
Stop if the trim does not move with controlled pressure. It may have screws, a locking mechanism, or a different service procedure.
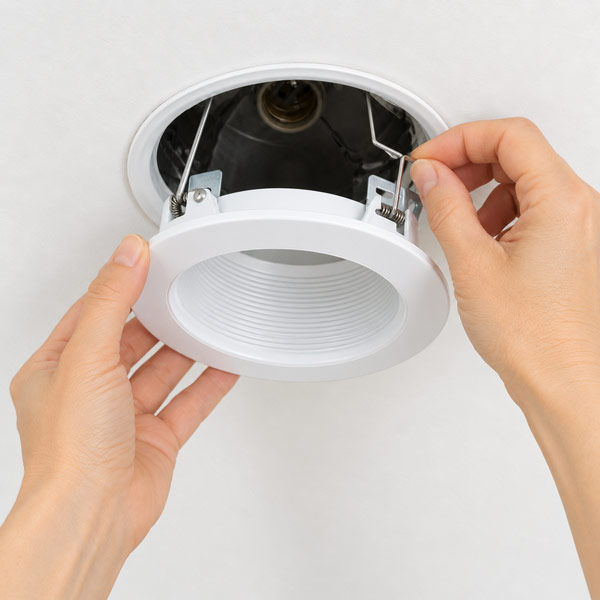
Release the Retainers
Support the trim throughout removal.
- V-shaped torsion springs: Squeeze the two arms together and guide their ends out of the receiving brackets.
- Hooked coil springs: Carefully unhook the ends from their attachment points without overstretching them.
- Friction clips: Lower the trim evenly so the clips slide out of the housing.
- Screw-fixed trim: Remove the specified retaining screws while holding the trim in place.
Releasing the trim does not necessarily release the housing. On many recessed fixtures, the permanent can stays in the ceiling.
How to Remove an LED Retrofit Module
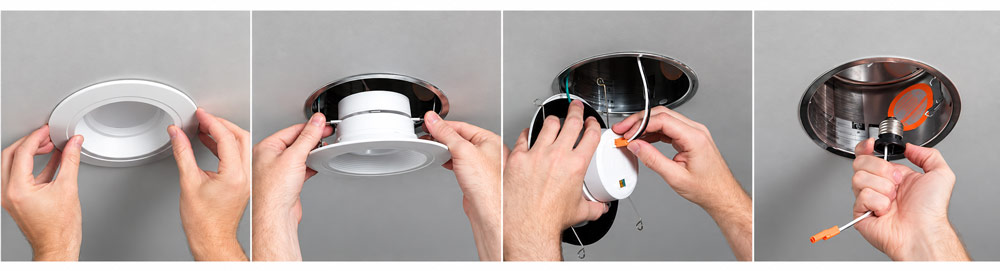
An LED retrofit module usually combines the trim and light source into one assembly inside an existing recessed can.
- With the circuit isolated, gently pull the module down far enough to see its mounting hardware.
- Release the torsion springs or friction clips.
- Keep supporting the module while locating its electrical connector.
- Release any connector latch and separate the connector by its body.
- If removing the screw-in socket adapter as well, unscrew the adapter without twisting its wires.
Never let the module hang from its cable.
A compatible replacement retrofit can often use the existing housing, avoiding unnecessary ceiling work. However, similar-looking connectors do not establish compatibility: use the replacement module, adapter, and housing combinations specified in the product instructions.
How to Remove a Canless LED Recessed Light
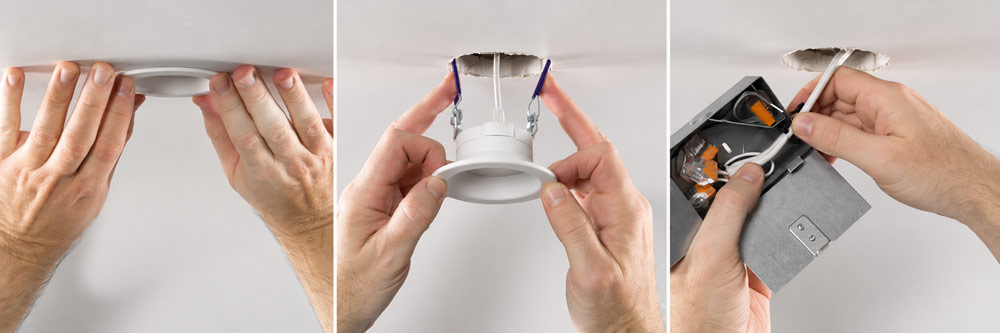
Canless downlights typically use spring-loaded arms that press against the upper surface of the ceiling. Those arms can snap back as they clear the opening.
Follow the fixture’s removal instructions, since some designs include locking or release features.
- Grip the outside rim and lower the light evenly.
- Expose the spring arms without dragging them through the drywall edge.
- Where the design allows, move the arms into their release position as you guide them through the opening.
- Keep your fingers out of the springs’ closing path.
- Support the light and disconnect its lead using the connector’s release mechanism.
Some connectors have a threaded collar that must be loosened before they separate. Pulling harder will not release a locked connector.
The light may connect to a separate driver or junction box above the ceiling. Do not pull that box out by its cable. Removing the light module alone does not disconnect the box from the household supply.
Use this tutorial as a visual companion for canless-light removal. Check that your fixture uses the same mounting arrangement before applying the demonstrated method.
How to Remove the Entire Recessed Light Housing
Complete housing removal is a different job from taking out a trim or LED module. It can involve fixed wiring, cable clamps, and structural fasteners.
Remodel Housings
A remodel housing is generally secured to the finished ceiling with clips or clamps accessible through the opening.
After removing the trim or module:
- Find the housing’s mounting fasteners.
- Support the housing.
- Release each fastener as directed in the installation instructions.
- Lower the housing only as far as the available cable slack permits.
There is no universal direction for releasing recessed-light clips. Some retract inward, while others use screws or a separate locking arrangement. Identify the mechanism before applying force.
If the housing remains tethered, stop and identify the attachment. Do not cut an unidentified wire or pull against a cable clamp.
New-Construction Housings
New-construction fixtures commonly have a frame or hanger bars secured to ceiling framing. Removing the inner can may expose service access while leaving the structural frame in place.
Complete removal may require attic access or a planned opening in the ceiling. Pulling harder from below can damage the ceiling without releasing the frame.
For fixed-wiring disconnection, have a qualified electrician verify the circuit, identify any cables supplying other lights, and disconnect the fixture without disturbing necessary through-connections. The fixture must remain supported throughout the work.
What if the Recessed Light Will Not Come Out?
Resistance is a reason to inspect the mounting system, not to increase force.
| What happens | What to check |
|---|---|
| The trim will not separate from the ceiling | Paint, caulk, retaining screws, or a locking trim |
| The trim lowers slightly and stops | Springs still engaged in their brackets |
| One side releases but the other stays tight | A second clip, spring, or screw |
| The LED module moves but remains attached | Its electrical connector or a safety tether |
| The housing stays fixed after the trim is removed | Housing clamps, frame fasteners, or hanger bars |
| The drywall begins to crumble | Stop; the fitting may be catching the opening or the ceiling may need repair |
Avoid rotating a whole fixture unless its instructions specify a twist-release action. Rotation can twist connected wiring.
For trimless recessed lighting, identify the serviceable insert before attempting removal. A plastered-in frame should not be treated like a removable decorative ring.
What to Do After Removing the Light
If you are installing a replacement, measure the actual ceiling opening and check the replacement’s mounting requirements. The visible trim diameter does not tell you the cutout size.
If you are permanently removing the light, resolve the wiring before repairing the ceiling:
- Do not leave loose conductors in the ceiling cavity.
- Keep retained connections inside an appropriate covered electrical enclosure.
- Preserve access to junction boxes that require access.
- Have an electrician determine how to maintain any supply feeding other fixtures.
Do not patch over an active junction box or simply tape loose wire ends and push them above the ceiling. Restore power only when the electrical work is complete, covers are fitted, and all remaining components are secure.
FAQs
1. Can I Replace a Recessed Light with a Pendant?
Yes, in suitable installations. A listed recessed-light conversion kit may allow a pendant to use an existing compatible can. Otherwise, an electrician can install an appropriately supported ceiling box.
Check the conversion kit’s housing requirements and load rating. The decorative trim and drywall alone should not support the pendant.
2. Why Does My Replacement Recessed Light Flicker?
Possible causes include an incompatible dimmer, a poor connection, or a faulty driver. If you are troubleshooting flickering lights, first note whether the problem affects one fitting or several, and whether it occurs only while dimming.
Flickering accompanied by buzzing, discoloration, unusual warmth, or a burning smell needs an electrician’s inspection. Stop using the affected light until the cause is resolved.
3. Can Insulation Touch a Replacement Recessed Light?
Only where the fixture’s rating and installation instructions permit it. IC-rated recessed lighting is designed for insulation contact under its specified installation conditions.
An LED light is not automatically IC-rated. Check the requirements for the housing, light module, and separate driver box. Non-IC equipment needs the clearances stated in its instructions.
4. Can I Use an Ordinary Recessed Light Above a Shower?
Choose a fixture specifically listed for the installation location. Where water spray can reach the light, use an assembly listed for wet locations.
A sealed-looking lens alone does not establish suitability. For a can-style fitting, check that the trim and housing are an approved combination for that location.
5. How Do I Match the Brightness of the Light I Removed?
Compare lumen output rather than matching wattage. Lumens describe light output, while watts describe electrical power consumption.
Start with the old lamp or fixture’s rated lumens, then compare beam spread and color temperature. Two recessed lights with the same lumen output can produce different results if one concentrates its light into a narrow beam.