

What Is Trimless Recessed Lighting?
Trimless vs. Trimmed vs. Canless Lighting
When Is Trimless Lighting Worth Choosing?
How to Choose Trimless Recessed Lights
How to Plan the Layout
What Does Installation Involve?
Maintenance and Replacement
FAQs
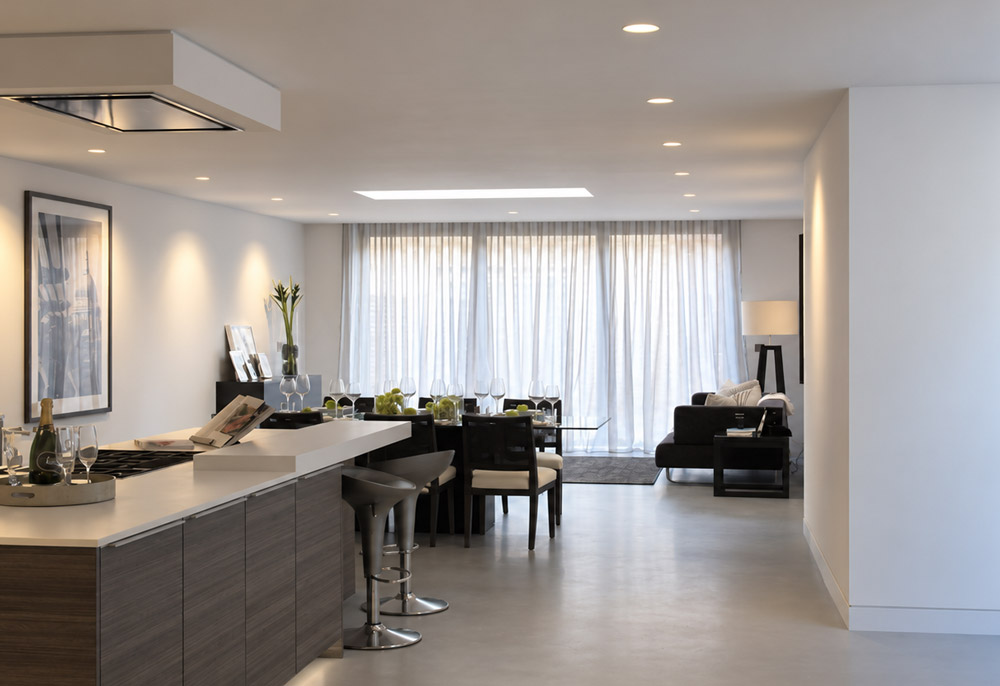
A clean ceiling can change the character of a room. Without visible rings around each downlight, cabinetry, artwork, and architectural details receive more attention.
Trimless recessed lighting creates this effect by concealing the fixture’s perimeter within the ceiling finish. Achieving it requires more than choosing a light that looks good in a product photograph. Ceiling construction, light distribution, installation quality, and future maintenance all influence the result.
What Is Trimless Recessed Lighting?
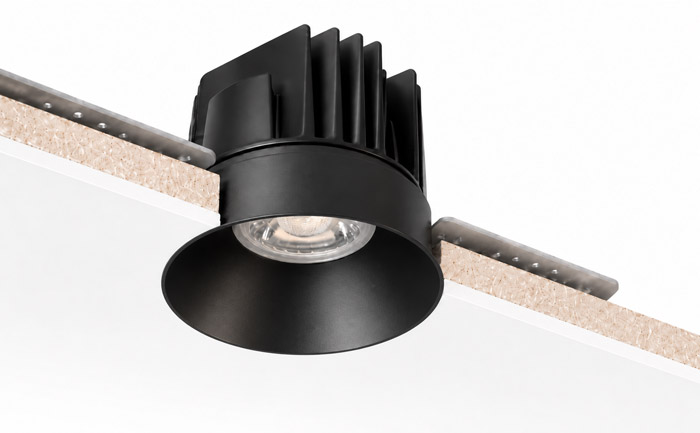
Trimless recessed lighting is a recessed fixture with no visible outer trim ring overlapping the finished ceiling. In a typical plaster-in or mud-in system, a mounting frame is secured at the opening, and its flange is concealed with the specified finishing material.
Once the ceiling is finished, the aperture remains visible, but the surrounding flange disappears. Depending on the design, you may still see a reflector, baffle, lens, or recessed light source inside the opening. “Trimless” describes the ceiling edge; it does not mean every component becomes invisible.
The complete assembly may include a housing, finishing frame, LED module, optical components, and driver. Some systems use replaceable lamps instead of dedicated LED modules. These components must be compatible with one another.
Trimless vs. Trimmed vs. Canless Lighting
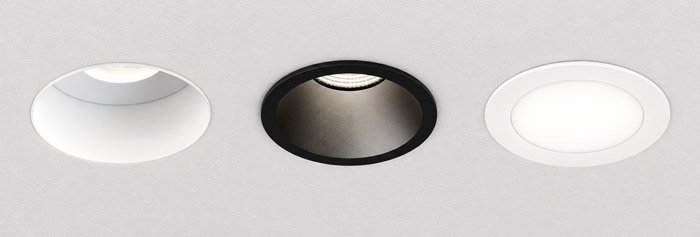
These terms describe different features. “Trimless” concerns the visible edge, while “canless” concerns the fixture’s construction above the ceiling.
| Feature | Trimless recessed lighting | Trimmed recessed lighting | Canless recessed lighting |
|---|---|---|---|
| Ceiling appearance | The outer flange is concealed | A visible ring overlaps the opening | May have a visible ring or a trimless finish |
| Construction | Can use several housing arrangements | Often uses a separate housing | Does not require a traditional recessed can |
| Ceiling finishing | Requires precise integration with the ceiling finish | The ring conceals the cut edge | Depends on the perimeter design |
| Renovation suitability | Usually involves finishing work | Often convenient for replacements | Depends on clearance, access, and mounting method |
A thin bezel is still a visible trim. Likewise, a slim canless downlight is not automatically a plaster-in fixture. Check the installation drawing rather than relying on product labels alone.
When Is Trimless Lighting Worth Choosing?
Trimless lighting makes sense when a continuous ceiling finish is an important part of the design. It can suit contemporary living spaces, galleries, corridors, and interiors with carefully aligned architectural details.
It is particularly practical to consider while ceilings are being built or refinished. Retrofitting a completed room may require opening, patching, sanding, and repainting around every fixture.
Its main benefit is visual integration. Removing the outer ring does not, by itself, make a light brighter, more efficient, or more comfortable. Those qualities depend on the light source, optics, driver, and placement.
How to Choose Trimless Recessed Lights

Start With the Ceiling
Before selecting an aperture size, confirm the available ceiling depth and the position of joists, pipes, ducts, and cables.
Request dimensions for the complete assembly, including the driver or connection enclosure. A shallow light module does not guarantee that every associated component fits the same space.
Also check the permitted ceiling thickness and substrate. A frame intended for plasterboard should not be assumed suitable for timber, concrete, or another finish.
Where insulation will contact the assembly, verify the appropriate insulation-contact rating and installation conditions. Airtightness is a separate specification. Manufacturers may list both, but neither should be inferred from the word “trimless.”

Match the Optics to the Lighting Task
Choose the lighting function before choosing the fixture’s appearance.
| Lighting task | Suitable design to investigate | Main consideration |
|---|---|---|
| General illumination | Fixed downlight with a suitable broad distribution | Balanced coverage |
| Focused task lighting | Downlight positioned over the work surface | Useful light without body shadows |
| Artwork or feature lighting | Adjustable downlight | Aiming range and beam control |
| Vertical surface illumination | Dedicated wall-wash optic | Even coverage from top to bottom |
An adjustable spotlight and a wall washer do different jobs. Tilting a standard beam toward a wall does not necessarily produce a smooth wash.

Choose Aperture Size Alongside Light Output
Smaller apertures create a discreet appearance, but diameter alone does not determine performance. Compare delivered lumens, beam distribution, shielding, and required installation depth.
For output comparisons, lumens describe the amount of visible light produced; watts describe electrical power consumption. When available, use the complete fixture’s delivered lumen rating rather than the LED chip’s output before optical losses.
Do not select a fixture simply because a certain aperture is described as ideal for a particular room. Ask whether its actual light distribution meets that room’s needs.

Understand Beam Angle
The beam angle helps describe how widely a directional light spreads. Narrower beams can emphasize individual objects, while broader distributions can cover larger areas.
Coverage also changes with distance. The same fixture produces a different footprint on a kitchen counter than on the floor below.
For a simplified illustration, a 40-degree beam travelling 2 metres to a perpendicular surface has a nominal beam diameter of approximately 1.46 metres:
Beam diameter ≈ 2 × distance × tan(beam angle ÷ 2)
This geometric estimate is not a spacing prescription. Light intensity varies within and beyond the nominal beam, so a photometric layout is more useful for judging uniformity.

Evaluate Glare Separately
A fixture can have a beautifully finished edge and still be uncomfortable to look at.
Examine how deeply the light source is recessed, how the reflector or baffle shields it, and whether the source will be visible from normal viewing positions. A seated person may experience a fixture differently from someone standing beneath it.
Where possible, test a sample at the intended mounting height. Check it from a sofa, desk, and doorway rather than assessing it only from directly below.

Select Color Temperature and Color Rendering
Color temperature influences the atmosphere of the room. Warm options around 2700K–3000K are common starting points for living spaces; 3500K–4000K can suit interiors where a more neutral appearance is preferred. These are design choices, not fixed room requirements.
For spaces where finishes and objects matter, consider a CRI of 90 or higher as a selection target. Review samples against actual materials rather than judging color quality from specifications alone.
Keep the intended color appearance consistent across nearby fixtures. A ceiling can look visually disjointed when adjacent lights differ noticeably in tone.
Check Dimming Performance
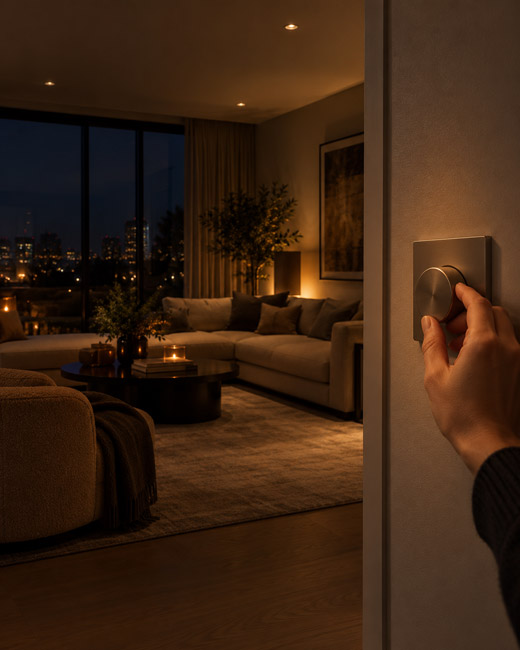
Specify the driver and control together. Confirm the supported dimming method and the manufacturer’s tested compatibility information.
Also check the minimum light level. A product that dims to 10% behaves differently from one designed to reach 1%, which can matter in bedrooms and evening living spaces. Published capabilities vary between product families and control methods.
How to Plan the Layout
Start with what needs illumination. Mark furniture, work surfaces, circulation routes, and display areas before arranging ceiling openings.
In a kitchen, review where people stand while preparing food. A downlight behind the user can leave the worktop in shadow. In a living room, consider whether fixtures will be visible above seating or reflected in a screen.
Use recessed lighting as part of a layered scheme. Pendants, wall lights, and local task lights can provide functions that ceiling downlights alone may not deliver.
Avoid treating “one light per fixed area” or “spacing equals half the ceiling height” as final design rules. Ceiling height, mounting height above the task, beam shape, surface reflectance, and other light sources all affect the result.
For a demanding project, request a photometric calculation using the exact fixture configuration. Review both average illumination and darker areas between fixtures. A high average does not guarantee a comfortable room.
Before installation, coordinate the layout with ceiling services. Moving a light to avoid a duct may also change the balance of the entire arrangement.
What Does Installation Involve?
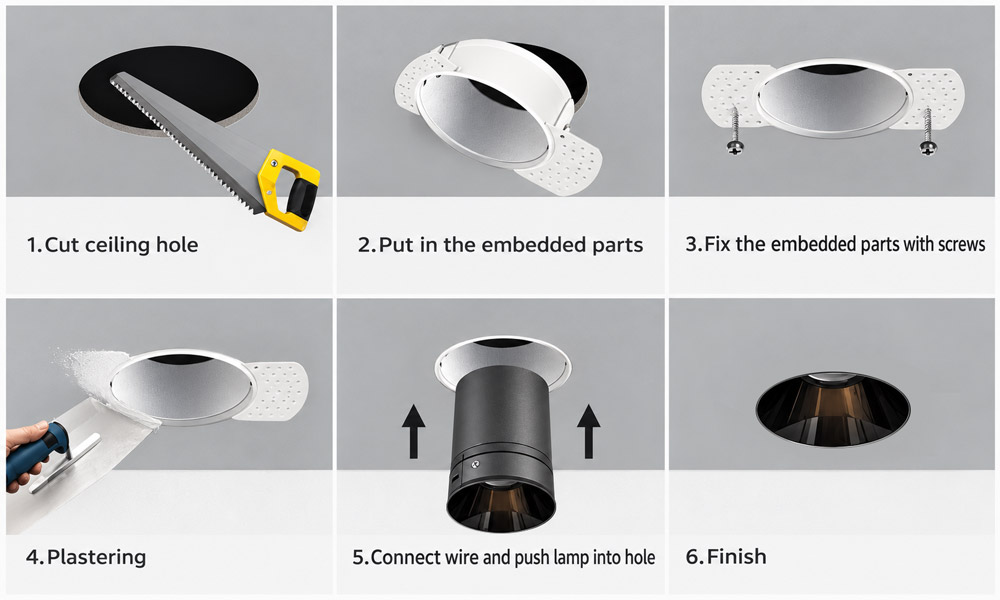
Trimless recessed downlight installation process, showing the steps of embedding the mounting frame, plastering the ceiling surface, connecting the wiring, and achieving a seamless flush-mounted lighting finish.
Trimless installation combines electrical work with precise ceiling finishing. Use the instructions for the exact housing and frame combination, with electrical work handled by a qualified installer.
The typical sequence is:
- Confirm locations, clearances, and access requirements.
- Install the specified housing or mounting supports and electrical provisions.
- Prepare the opening to the manufacturer’s dimensions.
- Secure and align the finishing frame.
- Protect the opening and apply the specified finishing system.
- Complete sanding, priming, and painting as required.
- Install the remaining light components and test operation.
Installation sequences vary by system. Some require the trimless frame to be secured and the opening protected during ceiling finishing, with the light engine installed afterward. Always follow the manufacturer’s instructions for the specific fixture and frame combination.
Before accepting the work, inspect the ceiling with the lights both on and off. Check for uneven edges, visible flange outlines, misaligned square apertures, and light escaping around the perimeter.
Do not paint or plaster over removable components simply to hide a gap. The finished appearance must preserve the intended servicing method.
Maintenance and Replacement
Before purchasing, ask how the light source and driver are accessed after the ceiling is finished.
Some trimless recessed lighting systems allow the LED module and driver to be serviced through the aperture without disturbing the embedded frame. Others require a separate access point. Check the manufacturer’s replacement instructions to confirm how each component can be removed and serviced.
Keep the model numbers, installation instructions, and component specifications. A replacement that fits physically may still have incompatible electrical or optical characteristics.
When comparing products, ask the supplier to demonstrate the removal method and identify available replacement parts. This makes maintenance a concrete purchasing criterion.
FAQs
1. Why do cracks appear around trimless recessed lights?
Cracks can develop where the finishing frame meets the ceiling because of movement, inadequate fixing, or a poor bond between the frame and finishing material. Repeatedly covering a crack with paint will not resolve an underlying movement problem.
Have the installer check the frame’s stability and the finishing system before repairing the area. Use the manufacturer’s specified materials and reinforcement method rather than assuming ordinary filler suits every fixture.
2. How long do trimless LED recessed lights last?
Lifespan depends on the specific LED module, driver, operating temperature, and daily usage. Some models publish a rated life of 50,000 hours, but this is not a guarantee that every component will operate without failure for that period.
Check how the manufacturer defines its rating. An L70 rating describes the time until light output falls to 70% of its initial level under specified conditions; it does not mean the entire fixture suddenly stops working at that point.
3. How do you clean trimless recessed lights without damaging the ceiling?
Switch off the power and allow the fixture to cool. For routine dusting, gently wipe accessible surfaces with a soft, dry cloth, following the manufacturer’s care instructions.
Avoid spraying cleaner into the aperture, soaking unfinished plaster, or scrubbing the painted edge. Do not pull on the embedded frame to reach dust inside the fixture. If internal cleaning requires removing an optical component, use the specified removal procedure to protect the finish and retaining mechanism.
4. Can trimless recessed lights cause a strobe effect near a ceiling fan?
Yes. If rotating fan blades pass through a downlight’s beam, they can repeatedly interrupt the light and create moving shadows or a strobe-like effect. This can happen even when the LED itself operates steadily.
Plan fixture positions around the fan’s blade sweep and the light’s beam spread. There is no universal clearance that prevents the effect in every installation, so test the proposed arrangement with the fan running before finalizing the ceiling openings.
5. What is the difference between dim-to-warm and tunable-white trimless lights?
Dim-to-warm lights automatically shift toward a warmer color as brightness decreases, recreating the changing color temperature of incandescent lighting. Tunable-white systems allow color temperature to be adjusted separately from brightness within their supported range.
Choose dim-to-warm for a simple transition to warmer evening lighting. Choose tunable white when you want independent control of brightness and white-light appearance. An ordinary dimmable, fixed-color LED does not automatically provide either capability.