
How Solar Lights Work (Simple but Smart Technology)
Should Solar Lights Be On or Off While Charging?
First-Time Charging: The Right Way to Start
Does Turning Solar Lights Off Help Them Charge Faster?
Maximizing Charging Efficiency in 2026
Can Solar Lights Charge Indoors?
Winter Charging: What Changes in Cold Weather?
How Long Should Solar Lights Last?
FAQs
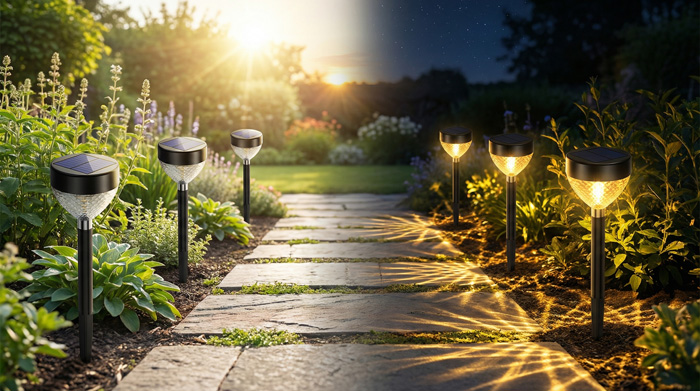
Solar lights are one of the easiest ways to illuminate gardens, pathways, patios, and driveways without increasing your electricity bill. They’re eco-friendly, low maintenance, and increasingly efficient in 2026. Yet one question still causes confusion:
Should solar lights be on or off while charging?
If your solar light has an on/off switch, understanding how it interacts with the charging system is essential. This comprehensive 2026 guide explains how solar lights charge, what the switch actually does, and how to maximize performance and battery lifespan.
How Solar Lights Work (Simple but Smart Technology)
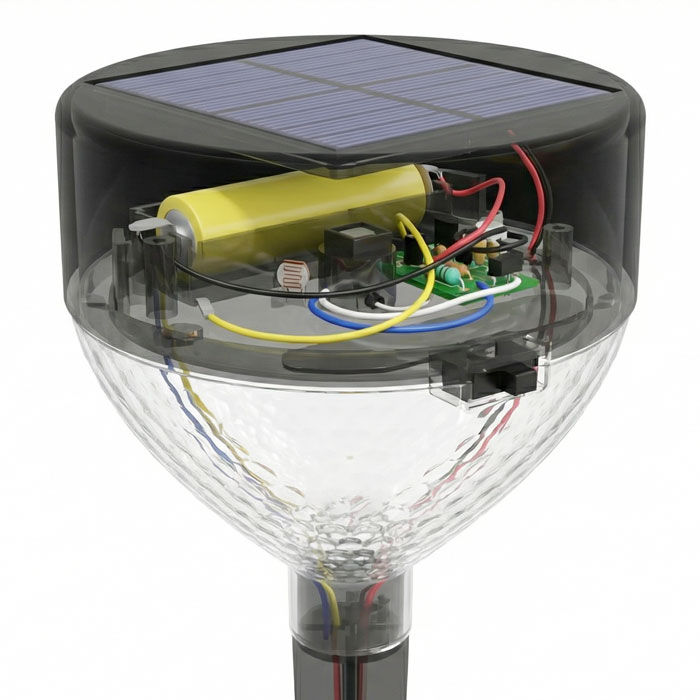
Most modern solar lights contain five key components:
- A solar panel
- A rechargeable battery (typically NiMH or Li-ion)
- A light sensor
- An LED bulb
- An on/off switch
During the day, sunlight hits the solar panel. The photovoltaic cells convert sunlight into electrical energy, which flows into the rechargeable battery. At night, the light sensor detects darkness and activates the LED using stored energy.
The on/off switch controls whether the internal circuit is active. In most modern models (especially 2024–2026 versions), the switch must be turned ON for the battery to charge properly.
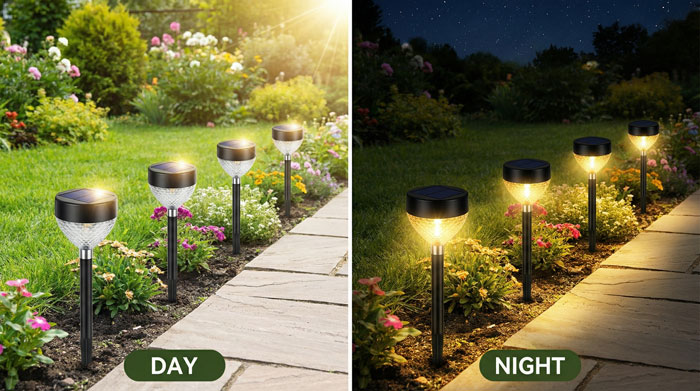
Should Solar Lights Be On or Off While Charging?
In nearly all 2026 models, solar lights should be turned ON while charging.
When the switch is in the ON position, the battery remains connected to the charging circuit. This allows energy from the solar panel to flow into the battery during daylight hours.
When switched OFF, many models disconnect the battery entirely. That means no charging occurs, even if the panel is in direct sunlight.
There are rare exceptions with older designs, but for the vast majority of products currently sold, keeping the light ON is the correct approach.
If you're unsure, a simple test works: turn the switch ON, place the light in full sun for a day, then cover the panel at night. If it illuminates, it's functioning correctly.
First-Time Charging: The Right Way to Start
Proper first-time charging significantly affects long-term performance.
When you unbox new solar lights, check for a small battery protection tab inside the compartment. Manufacturers often include this to prevent drainage during shipping. Remove it before use.
Next, switch the light ON and place it in direct sunlight for 6 to 8 hours. Avoid shaded areas, covered patios, or indoor windowsills for the initial charge. Direct outdoor sunlight provides the strongest energy input.
After a full day of charging, test the light by covering the solar panel with your hand. If the LED turns on, everything is working correctly.
Skipping the initial full charge can reduce early battery efficiency, so this step matters more than many people realize.
Does Turning Solar Lights Off Help Them Charge Faster?
This is a common myth.
Turning solar lights OFF does not make them charge faster. In most designs, it does the opposite — it prevents charging altogether.
The confusion often comes from people assuming the light must be OFF to “focus” on charging. However, the LED does not operate during daylight because the light sensor disables it. The system is already optimized to charge during the day and illuminate at night automatically.
Turning the switch OFF is only useful for long-term storage, battery replacement, or troubleshooting.
Maximizing Charging Efficiency in 2026
Switch position matters, but placement and maintenance matter even more.
Solar lights need 6–8 hours of direct sunlight daily for optimal performance. If you live in the Northern Hemisphere, placing lights in a south-facing location usually captures the most sunlight.
Panel cleanliness is another major factor. Dust, pollen, bird droppings, and pollution can reduce efficiency by up to 30%. Wipe the panel gently with a damp cloth once a month to maintain peak output.
Seasonal angle adjustments can also help. During winter, tilting the panel slightly upward captures lower-angle sunlight more effectively. In summer, a flatter angle is typically sufficient.
Even small improvements in sunlight exposure can noticeably increase nighttime brightness and runtime.
Can Solar Lights Charge Indoors?
Technically, yes — but performance is limited.
Solar lights can charge near a bright window or under strong artificial grow lights. However, window glass filters some UV light, and indoor light intensity is far weaker than direct sunlight.
Charging indoors will be slower and may not provide enough energy for full overnight illumination. Whenever possible, outdoor charging in direct sunlight is the most effective method.
Winter Charging: What Changes in Cold Weather?
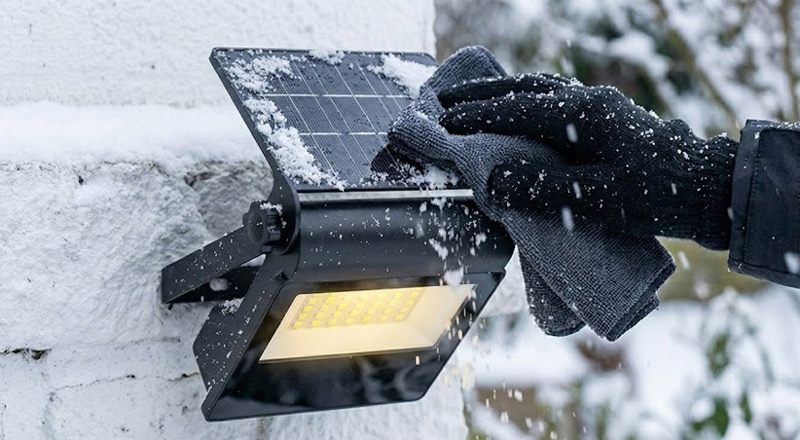
Solar lights continue to charge in winter, but efficiency drops due to shorter daylight hours and lower sun angles.
Cold temperatures do not damage solar panels, but batteries perform less efficiently in freezing conditions. You may notice shorter runtime during very cold nights.
Clearing snow and frost from panels immediately helps maintain charging capacity. Positioning lights in the brightest available winter location also makes a significant difference.
How Long Should Solar Lights Last?
In 2026, quality solar lights are more durable than ever.
LED bulbs can last 5–10 years. Solar panels may function for over a decade. The rechargeable battery remains the most frequently replaced component, typically lasting 18–36 months.
If your solar light stops working after a year or two, replacing the battery is usually the simplest and most cost-effective solution.
Can overcharging damage solar light batteries?
Most modern solar lights include basic charge regulation that stops charging once the battery reaches full capacity.
However, very low-quality units may lack proper regulation, which can shorten battery lifespan over time.
To protect your battery:
- Avoid extreme heat (above 113°F / 45°C)
- Replace aging batteries promptly
- Choose lights with built-in charge controllers
In practice, overheating is more damaging than overcharging from sunlight.
Why do solar lights charge in daylight but struggle on cloudy days?
Solar panels generate electricity based on light intensity, not just visible brightness.
On cloudy days, sunlight becomes diffused and weaker, significantly reducing the energy available for conversion.
High-efficiency monocrystalline panels generally perform better in low-light conditions than polycrystalline panels. In cloudy regions, larger panels and higher-capacity batteries improve reliability.
Does the size of the solar panel affect charging speed?
Yes. Panel size and wattage directly influence charging performance.
A larger panel captures more sunlight and generates more current, resulting in:
- Faster daytime charging
- Longer nighttime runtime
- Improved winter performance
If two lights share the same battery capacity, the model with the larger panel typically performs better—especially in partial sunlight.
Can you replace solar light batteries with higher mAh capacity?
In many cases, yes—within safe limits.
Upgrading to a higher mAh battery can extend runtime, but only if the solar panel is capable of fully charging the larger capacity.
Always follow these guidelines:
- Keep the same battery chemistry (NiMH remains NiMH, Li-ion remains Li-ion)
- Match the correct voltage
- Avoid mixing old and new batteries in multi-cell systems
If the panel output is insufficient, a larger battery may never fully charge, leading to reduced brightness.
Why do some solar lights flicker after charging?
Flickering often indicates battery instability or internal moisture damage.
Common causes include:
- Aging rechargeable batteries
- Moisture inside the housing
- Loose internal wiring
- Low battery voltage at activation
Replacing the battery is usually the first troubleshooting step. For outdoor installations in rainy or humid climates, a waterproof rating of IP65 or higher is recommended.
