
1. Walk Your Property After Dark
2. Establish a Clear Lighting Hierarchy
3. Match the Lighting Method to Each Area
4. Choose a Consistent Warm Light Color
5. Plan for Northbrook’s Seasonal Conditions
6. Design the Power System Alongside the Layout
7. Divide the System Into Useful Control Zones
A Practical Starting Layout for a Northbrook Home
Keep the Design Working as the Landscape Changes
FAQs
Designing landscape lighting in Northbrook, IL, starts with understanding how your property should look and function after sunset. A successful plan makes walking routes easier to follow, gives outdoor seating areas comfortable light, and highlights selected landscape features without overwhelming the yard.
For Northbrook homeowners, the design should also account for winter snow, changing foliage, snow-removal routes, and views from neighboring homes. A fixture that works well beside a summer planting bed may become hidden by snow or exposed to glare once surrounding leaves fall.
The best approach is to plan the nighttime scene first, then choose fixtures, beam patterns, power equipment, and controls to support it.
1. Walk Your Property After Dark
Before selecting lights, walk from the driveway to the front door and through any outdoor areas you use regularly. Repeat the walk with your existing exterior lights switched on so you can see what already works.
Look for:
- Steps, uneven surfaces, and changes in elevation.
- Path intersections and entrances that are difficult to identify.
- Harsh light from porch or garage fixtures.
- Trees or architectural details worth highlighting.
- Windows and neighboring seating areas that should remain free from glare.
- Places where snow is normally cleared or piled.
Then view the yard from indoors. Lighting should also create a pleasant outlook from the rooms you use in the evening.
Mark these observations on a simple property sketch. Include planting beds, hardscape edges, electrical supply locations, irrigation equipment, and potential cable routes. This becomes the foundation of your lighting layout.
2. Establish a Clear Lighting Hierarchy
A yard feels more balanced when the lighting has a clear order of importance.
Start with circulation: the route from the driveway to the entrance, frequently used garden paths, and steps. Next, add enough light for outdoor activities. Finally, introduce a small number of decorative accents.
Choose one primary focal point within each main view. In the front yard, this could be the entrance or a distinctive tree. In the backyard, it might be a seating area framed by softly illuminated planting.
Avoid giving every tree, wall, and garden bed equal brightness. Darker areas provide contrast and help the illuminated features stand out.
3. Match the Lighting Method to Each Area
Different parts of the property need different light distributions. Using the same fixture throughout the yard often creates unnecessary glare or leaves important surfaces poorly illuminated.
Walkways and Front Entrances
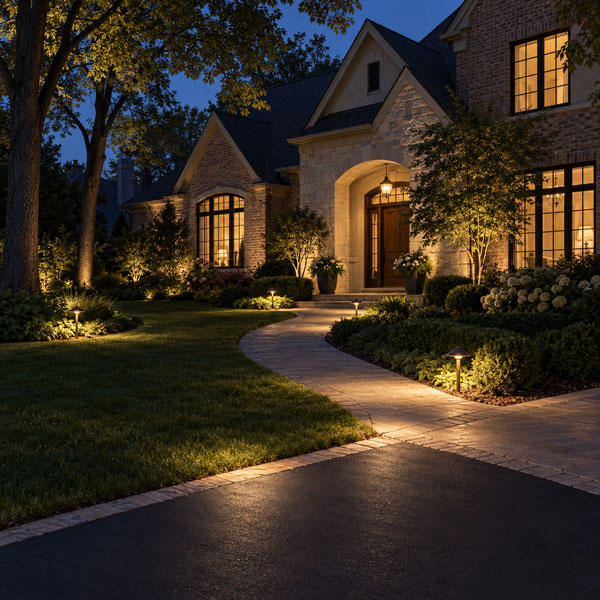
Position path lights so their light falls across the walking surface. Pay particular attention to turns, intersections, and the transition between the driveway and front walk.
Determine spacing from the fixture’s actual light pattern rather than applying a fixed distance everywhere. Mounting height, shielding, path width, and surrounding planting all affect coverage.
A staggered arrangement can suit an informal garden path. A more symmetrical layout may work better with a formal entrance. In either case, avoid creating a row of bright, exposed light sources.
Steps and Changes in Level
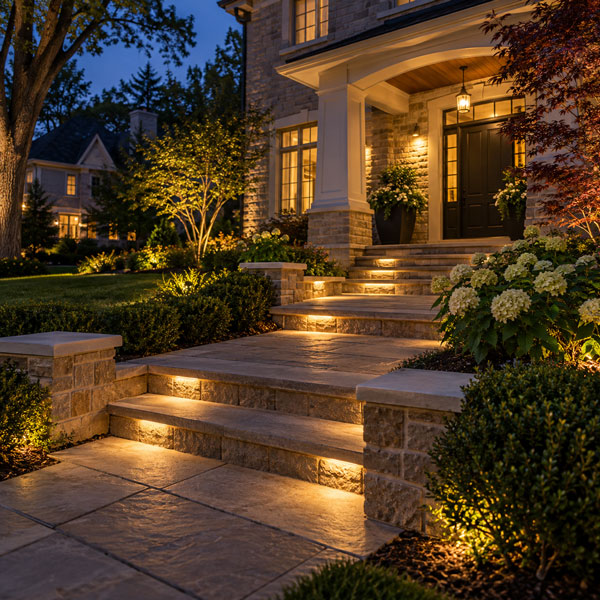
Light the tread surfaces so people can recognize where each step begins and ends. Shielded riser lights or fixtures concealed beneath suitable hardscape edges can provide controlled illumination.
Check the stairs from both directions. A light that looks comfortable while descending may shine directly into someone’s eyes while ascending.
Trees and Planting Beds
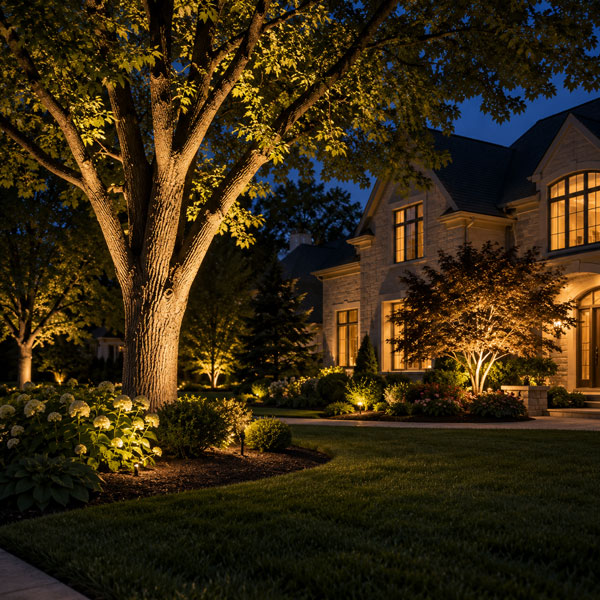
Select trees for their shape, branching, bark, or role in the overall composition.
The choice between uplighting and downlighting changes the effect. Uplighting can emphasize a trunk or canopy, while carefully positioned downlighting can illuminate the ground beneath a tree.
Use uplighting selectively and keep the beam on its intended subject as much as possible. For tree-mounted fixtures, use appropriate mounting methods and allow for future growth.
Low planting usually benefits from restrained illumination. Lighting every shrub can flatten the scene and make the yard feel visually crowded.
Patios and Seating Areas
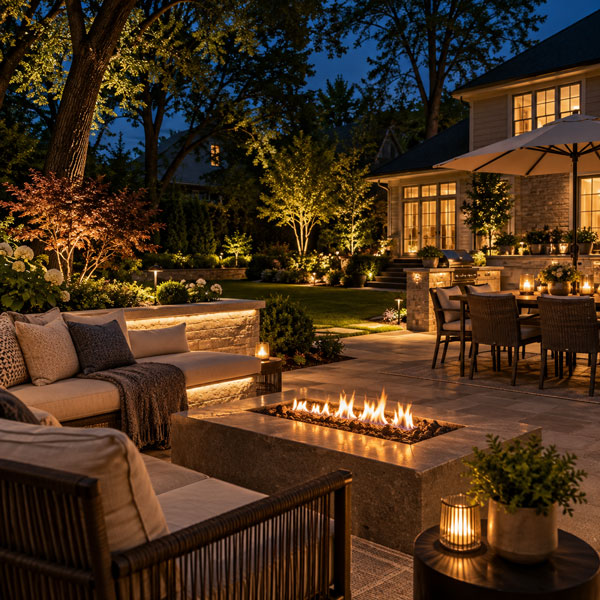
Design patio lighting from a seated person’s perspective. Fixtures that seem unobtrusive while standing can become uncomfortable at eye level from a chair.
Place soft light around the edges of the space, beneath suitable benches or railings, or on nearby landscape features. Add focused task lighting where activities require it.
Keep decorative tree lighting separate from the light needed for dining or food preparation. Each serves a different purpose and may need a different operating schedule.
House Facades and Architectural Details
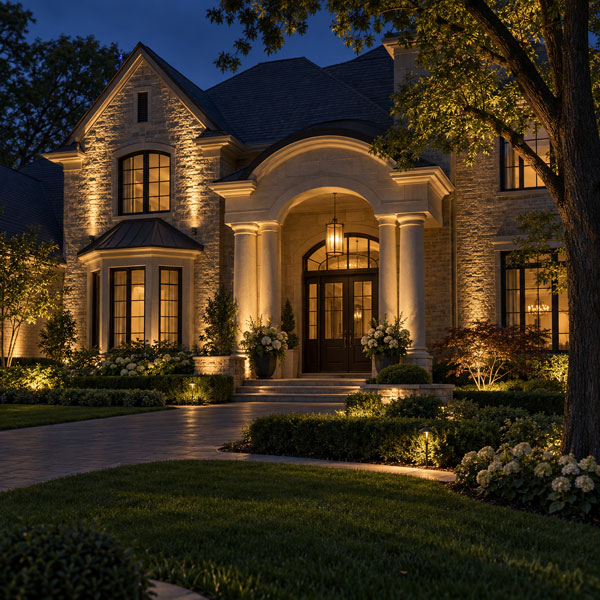
Choose the details that help define the house: an entrance, columns, textured masonry, or a distinctive wall.
A broad wash can create a relatively even appearance, while grazing light close to a textured surface emphasizes relief and shadow. Test the effect on the actual material before committing to placement.
Avoid aiming directly into windows. On smooth walls, carefully check for uneven bright patches and abrupt beam edges.
4. Choose a Consistent Warm Light Color
For a residential landscape, warm light is a useful starting point. Responsible outdoor lighting guidance recommends home lighting at 3000K or below, together with careful shielding and appropriate brightness.
When comparing 2700K vs. 3000K landscape lighting, consider how each looks against your home’s materials:
- 2700K creates a warmer appearance that can suit brick, wood, and relaxed seating areas.
- 3000K produces a slightly crisper warm white that may suit lighter stone and contemporary architecture.
Test samples against the facade and planting. Keep neighboring fixtures visually consistent unless a deliberate difference improves the design.
Brightness deserves the same care. Lumens describe light output, but they do not tell you exactly how bright a path or tree will appear. Beam width, distance, surface reflectivity, and fixture direction also matter.
Start with modest output and increase it only where the nighttime test shows a clear need.
5. Plan for Northbrook’s Seasonal Conditions
A useful lighting plan should account for how the property changes throughout the year.
Keep Fixtures Away From Snow-Removal Routes
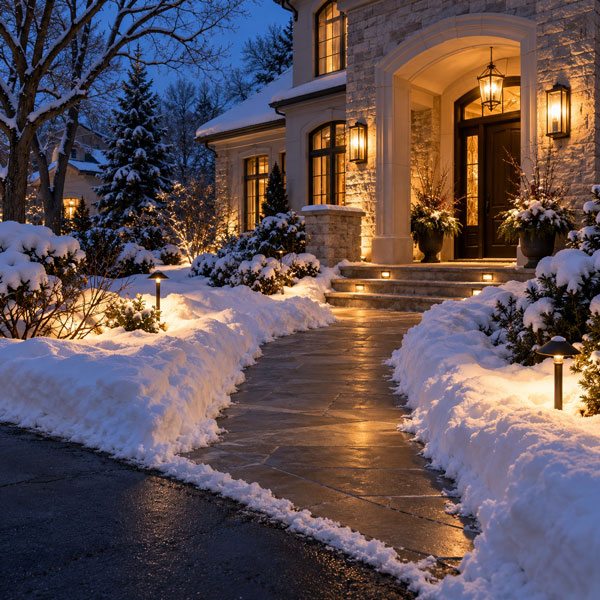
Avoid placing vulnerable fixtures where shovels, snowblowers, or plowed snow are likely to strike them. Where winter access is essential, consider protected mounting locations that can continue illuminating the route when low fixtures are obscured.
Snow also changes how light reflects across the landscape. A setting that feels subtle against grass may appear much brighter after snowfall.
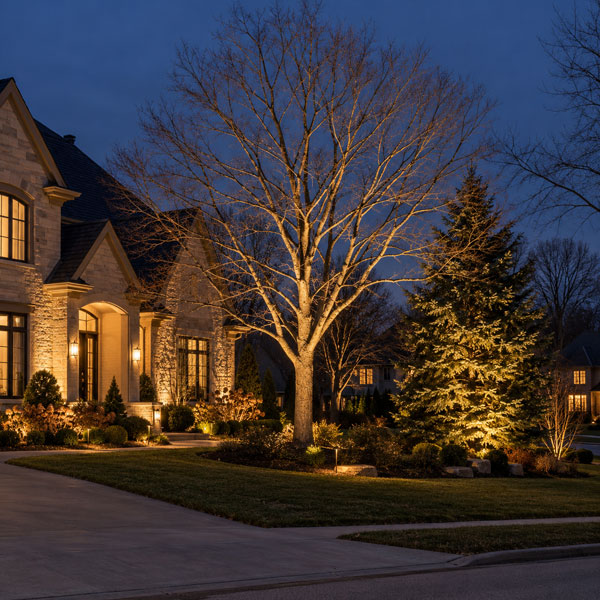
Evaluate Trees With and Without Leaves
A beam contained by summer foliage may shine past bare branches in winter. Check aiming again after leaf drop, especially where trees stand near neighboring windows.
Evergreens create a different challenge: dense foliage can block light and produce a bright outer surface with little visible depth. Adjust direction and output to reveal the tree’s shape.
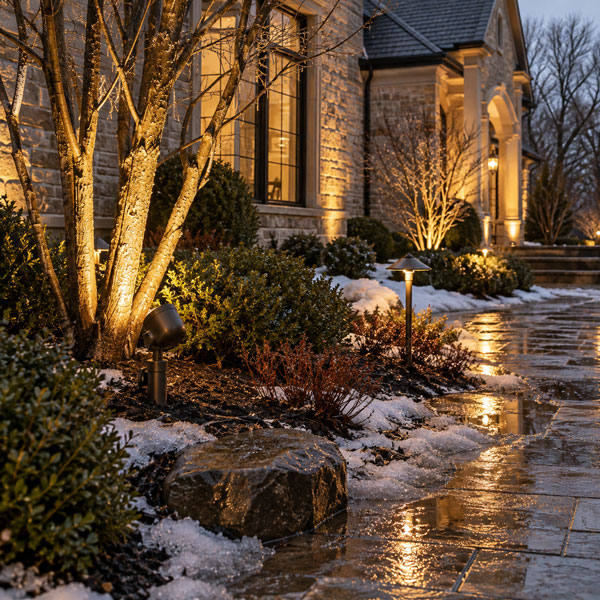
Select Fixtures for Their Actual Exposure
Choose equipment rated for the location, expected temperatures, and moisture exposure. Review housing construction, seals, cable entries, mounting hardware, and connector suitability.
Weather resistance depends on the whole installation. Even a durable fixture can perform poorly if its connections sit in persistent standing water or its mounting becomes unstable.
6. Design the Power System Alongside the Layout
For a wired low-voltage installation, the transformer, cable layout, and fixtures must be planned together.
Record the electrical requirements of each fixture and calculate the connected load using the manufacturer’s specifications. Select a compatible transformer with appropriate capacity and any allowance needed for planned expansion.
Cable length and load affect voltage at the fixtures. Long runs need particular attention, and the final design should keep every fixture within its specified operating voltage range.
Use a landscape lighting wire size chart as a planning reference, then verify the selection against the actual circuit layout and equipment instructions.
Also plan for:
- Accessible transformer placement.
- Connections suitable for the installation environment.
- Cable routes that avoid unnecessary disturbance to established planting.
- A record of buried wiring and connection locations.
- Practical access for future repairs.
Before excavation or electrical installation, confirm utility locations and applicable local requirements. Have new line-voltage electrical work handled by a qualified professional.
7. Divide the System Into Useful Control Zones
Separate controls allow the lighting to follow how the property is used.
A practical arrangement might include:
| Zone | Main purpose | Suggested operating approach |
|---|---|---|
| Entrance and main walkway | Arrival and access | Operate during expected arrival hours |
| Patio and dining area | Outdoor activities | Switch or dim as needed |
| Trees and facade accents | Decorative effect | Turn off earlier when no longer enjoyed |
A photocell responds to ambient light, while an astronomical timer follows calculated sunset and sunrise times. Choose controls that suit the equipment and your preferred schedule.
Well-planned timer controls for landscape lighting systems help avoid leaving decorative lights on after they stop serving a purpose.
Keep illumination targeted, use the lowest useful level, and limit operating hours where practical. These measures work together to reduce unwanted light beyond the property.
A Practical Starting Layout for a Northbrook Home
For a property with a front walkway, an entrance, a mature tree, and a backyard patio, begin with four priorities.
First, illuminate the walking route and any changes in level. Next, give the entrance enough visual emphasis to make arrival intuitive. Add a restrained accent to the selected tree, then create comfortable light around the patio.
Review the scene before adding facade lighting or more garden accents. Existing porch lights and reflected light may already provide part of what you need.
The final fixture count should come from the property’s dimensions and nighttime testing. A considered layout with fewer well-positioned lights can feel more complete than a larger installation without a clear focal point.
Keep the Design Working as the Landscape Changes
Check the installation after winter and whenever planting growth changes the light pattern. Clean dirty lenses, straighten shifted fixtures, inspect visible connections, and clear foliage that blocks useful light.
See also: How to Clean Garden Lights?
Reassess aiming after pruning or landscape renovations. Update operating schedules when your household’s outdoor routine changes.
Good landscape lighting in Northbrook should make the property easier to use and more enjoyable after dark. Thoughtful placement, controlled brightness, and seasonal adjustments help the design remain effective long after installation.
FAQs
1. How much does landscape lighting installation cost in Northbrook, IL?
The price depends on fixture quality, the number of lighting zones, cable distances, access conditions, and whether new electrical work is required. Routing beneath existing paving or installing tree-mounted fixtures can also affect labor.
Compare itemized estimates that include equipment, installation, nighttime adjustments, and warranty coverage. Understanding the factors behind the cost to install landscape lighting makes it easier to compare proposals with the same scope.
2. How much electricity does LED landscape lighting use each month?
Estimate consumption by multiplying total system input power in kilowatts by operating hours.
For example, a system drawing 60 watts and running five hours per night for 30 nights uses approximately 9 kWh. Multiply that figure by your applicable electricity rate to estimate the usage cost. If you calculate from fixture wattages alone, allow for transformer and control losses.
3. Are solar lights a suitable alternative to wired landscape lighting?
Solar lights can suit decorative areas with reliable direct sunlight and flexible runtime expectations. Shaded locations, short winter days, and snow covering the panel can reduce charging and nighttime performance.
When comparing solar vs. low-voltage outdoor lighting, consider whether the location needs dependable scheduled illumination or occasional decorative light.
4. Can an existing halogen landscape lighting system be converted to LED?
Often, but compatibility must be checked before replacing lamps. Confirm the required voltage, AC or DC compatibility, lamp fit, transformer operating range, and compatibility with existing dimmers or controls.
After conversion, test the system under its new load. Recheck beam patterns and light color as well, because an LED replacement may produce a different visual effect even when it fits the original fixture.
5. How long does landscape lighting installation take?
Installation time depends on the size of the property, cable routing, mounting requirements, and access beneath hardscape. A straightforward project may take a day or two, while extensive trenching, tree mounting, or electrical upgrades can extend the schedule.
Ask whether the proposed timeline includes a separate after-dark adjustment visit. That visit is important for confirming the finished appearance.
