
Table of Contents
- Start With the Routes You Actually Use
- Decide Which Parts of the Property Should Stay Dark
- Understand Hawthorn Woods Outdoor Lighting Requirements
- Choose Lighting by What Each Area Needs to Reveal
- Control Light Direction Before Increasing Output
- Choose Color Temperature on the Actual Materials
- Design for Bare Branches, Snow, and Spring Thaw
- Choose the Power Source Around Reliability Needs
- Give Different Lighting Tasks Separate Controls
- Compare Installation Quotes by Scope
- Make the Nighttime Review Part of the Project
- FAQs
Outdoor lighting should make coming home easier: the entrance is recognizable, steps are visible, and the patio feels comfortable after sunset. In Hawthorn Woods, Illinois, a successful lighting plan also respects the darkness around the property.
That local context matters. The village received its International Dark Sky Community designation in 2020, following the adoption of an outdoor lighting ordinance intended to reduce light pollution, conserve energy, and protect the nighttime environment. Preserving darkness is part of the community’s character.
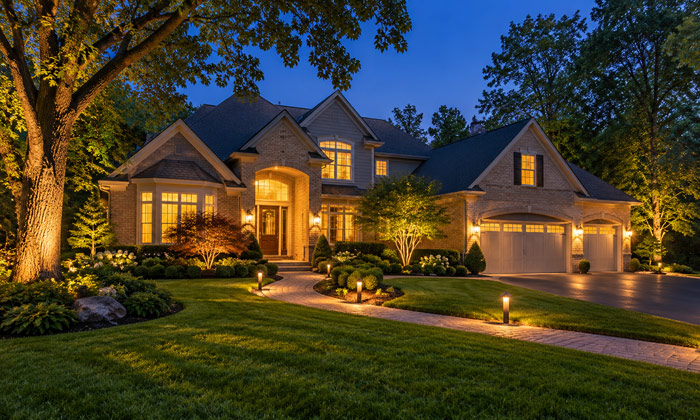
For homeowners, this creates an opportunity to design a more thoughtful landscape. Carefully placed light can reveal a stone entrance, guide visitors around a curved walkway, and give a garden depth without illuminating the entire yard.
The best starting point is deciding what deserves attention after dark—and where darkness should remain.
Start With the Routes You Actually Use
Walk around your property after sunset before choosing fixtures. Follow the routes your household uses on an ordinary evening: from the driveway to the front door, from the kitchen to the patio, or from a side entrance to the trash enclosure.
Notice where you hesitate. A barely visible step, an unexpected turn, or a dark door handle often deserves attention before a decorative planting bed.
Build the lighting plan around three priorities:
- Movement: Make entrances, turns, steps, and changes in surface easy to recognize.
- Outdoor activities: Provide suitable light where people sit, eat, cook, or gather.
- Selected features: Highlight a few architectural or landscape details that improve the view.
This order helps prevent a familiar problem: an attractively illuminated house with an awkward, poorly lit route to its entrance.
For a property with mature trees or a deep backyard, resist treating every visible feature as a lighting opportunity. A tree beside the patio may contribute more to an evening view than a larger specimen at the far boundary.
The useful question is: Will lighting this feature improve how someone experiences the property?
Decide Which Parts of the Property Should Stay Dark
Darkness gives illuminated features their definition. When the house, trees, fence, lawn, and planting beds receive similar attention, the landscape can lose its sense of depth.
A practical approach is to identify areas that need little or no permanent illumination: unused lawn, woodland edges, distant boundary planting, and views toward neighboring bedrooms.
Responsible outdoor lighting guidance emphasizes purposeful placement, controlled light levels, shielding, warm color, and operation only when needed. These principles support a landscape that remains comfortable for residents and surrounding properties.
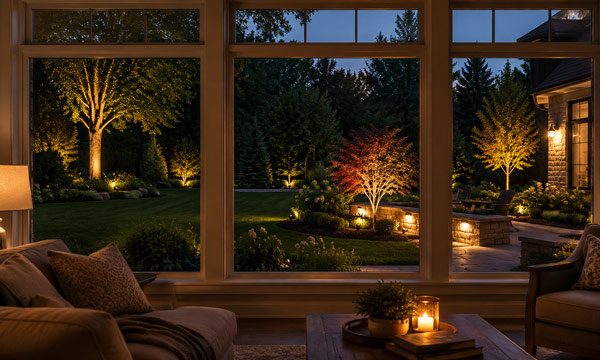
One useful design exercise is to stand inside your main living space with the interior lights at their normal evening setting. Look through the windows.
Which garden feature would create a pleasant focal point? Which fixture would shine directly toward the room? Does lighting the distant fence make the yard feel enclosed?
For a Hawthorn Woods home, this interior view deserves serious attention. During colder months, the garden may be experienced primarily through glass. A restrained composition can provide an attractive view throughout the year.
Understand Hawthorn Woods Outdoor Lighting Requirements
Check the local requirements before purchasing fixtures or approving an installation. Fixture output, shielding, aiming, and operating schedules can all affect the suitability of a proposed system.
For installations subject to the relevant provisions of Chapter 19, the village’s general requirements establish a maximum correlated color temperature of 3000K.
Village of Hawthorn Woods. (n.d.). 9-19-3: General requirements. American Legal Publishing.
The residential standards also contain several fixture-specific limits:
| Fixture category | Published residential limit |
|---|---|
| Shielded luminaire | 1,260 lumens per fixture |
| One unshielded luminaire at the main entry | 630 lumens |
| Other unshielded luminaires | 315 lumens per fixture |
| Low-voltage landscape lighting aimed away from adjacent properties | 525 lumens per fixture |
These figures are limits for particular categories. The ordinance also contains lot-wide lumen accounting and other provisions that affect a complete installation. A fixture’s maximum permitted output should not become the design target.
An important detail is the chapter’s exception for low-voltage landscape lighting controlled automatically to switch off at 10 p.m. in residential districts. Confirm with the village how this exception applies to your proposed system before relying on it. Its wording should not be simplified into a universal rule for every exterior light.
The procedural requirements call for photometric plans with covered development applications. Before installation, establish whether your project requires a permit, lighting review, or supporting fixture information. Where applicable, check homeowners association requirements separately.
Choose Lighting by What Each Area Needs to Reveal
Different parts of a property require different visual information. A walkway needs readable edges and transitions. A seating area needs comfortable surroundings. A tree may need only enough illumination to reveal its form.
| Area | What homeowners need to see | Practical lighting approach |
|---|---|---|
| Front entrance | Door hardware, threshold, visitors, and address | Shielded fixtures positioned around the arrival experience |
| Walkways | Direction, turns, edges, and surface changes | Downward-facing pathway lights with coverage suited to the route |
| Steps | Each tread and change in level | Controlled light directed across the walking surface |
| Driveway transitions | The connection between parking and pedestrian routes | Focused illumination around the point where people leave their vehicles |
| Patios | Tables, circulation routes, and nearby surroundings | Separate task lighting and softer perimeter illumination |
| Selected trees or walls | Texture, shape, or a useful focal point | Carefully aimed accent lighting with controlled spill |
Make Walkways Readable in Both Directions
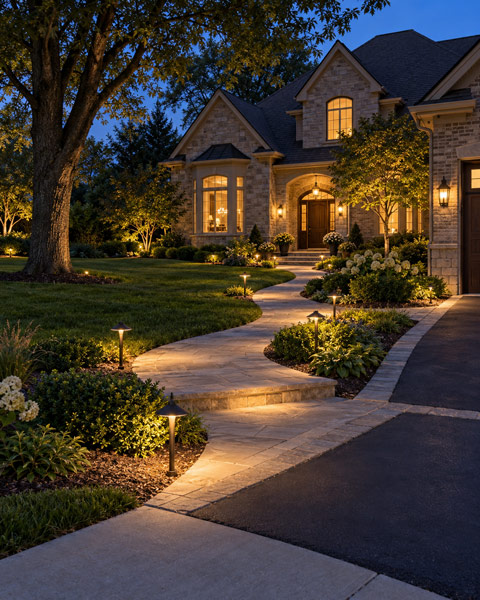
A walkway can look attractive from the street while producing glare for someone returning from the front door.
Test the route both ways. Check whether the light source becomes visible as you turn a corner or climb a step.
Fixture spacing should follow the actual beam pattern, mounting height, planting, and path geometry. A fixed distance copied from another property may leave dark gaps or create unnecessary overlap.
Pay particular attention to transitions. The junction between a driveway and a footpath often matters more than an uninterrupted stretch of straight paving.
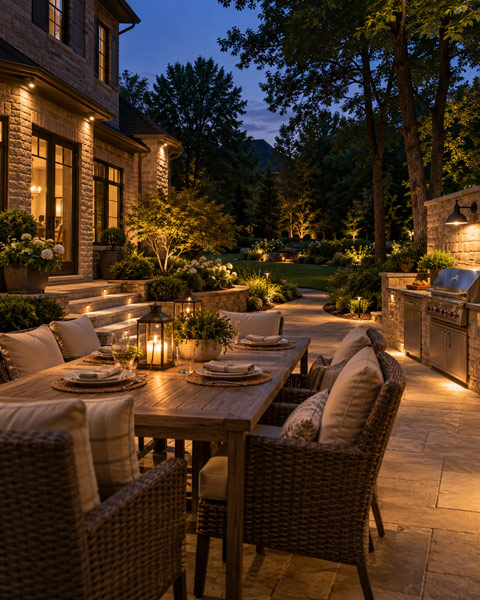
Check Patios From a Seated Position
A fixture hidden from standing eye level may shine directly into someone’s eyes when they sit down.
Evaluate patio lighting from the chairs people actually use. Keep concentrated beams away from faces and provide separate illumination for tasks such as preparing food.
A comfortable patio can have a clearly visible table, readable circulation routes, and relatively dark surroundings. The entire backyard does not need the same brightness.
Control Light Direction Before Increasing Output
If an area feels poorly lit, first examine where the light lands.
A brighter lamp may increase glare while leaving the important surface difficult to see. Adjusting the fixture’s position, shielding, or beam width can be more useful.
The choice between uplighting and downlighting should follow the job:
- Use downlighting to illuminate walking surfaces, entrances, and occupied areas.
- Use accent uplighting selectively where it reveals a worthwhile landscape or architectural feature.
- Keep beams contained within their intended targets.
Hawthorn Woods specifically regulates uplighting, including permitted applications, aiming, inclination, and output. Tree lighting therefore needs careful selection and positioning.
For a mature tree, inspect what happens beyond the trunk and branches. A beam that appears contained in summer may travel through an open canopy after the leaves fall.
This makes seasonal aiming part of the design, rather than a cosmetic adjustment left until later.
Choose Color Temperature on the Actual Materials
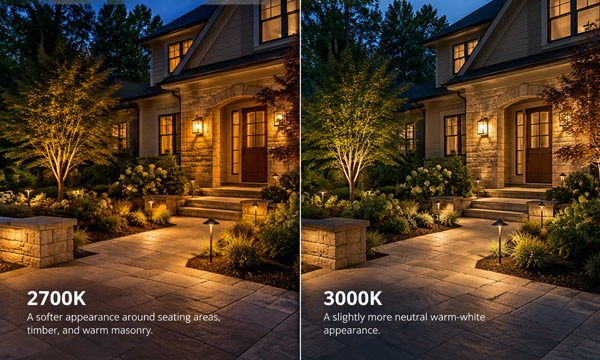
Warm lighting generally suits residential evening spaces, but the appearance of a lamp depends partly on what it illuminates.
When choosing between 2700K and 3000K landscape lighting, test both on your home’s brick, siding, stone, paving, and planting.
As a design starting point:
- 2700K can create a softer appearance around seating areas, timber, and warm masonry.
- 3000K can suit homeowners who prefer a slightly more neutral warm-white appearance.
Keep color consistent across features seen together. An entrance can look disjointed when its wall lights, path lights, and nearby accents have visibly different tones.
Also separate color from output. Kelvin describes the color appearance of light. Lumens describe light output. Moving from 2700K to 3000K does not automatically provide more illumination.
A sample viewed on your own exterior materials is more useful than a color label considered in isolation.
Design for Bare Branches, Snow, and Spring Thaw
A northern Illinois lighting plan should be reviewed under more than one seasonal condition.
Three situations deserve particular attention.
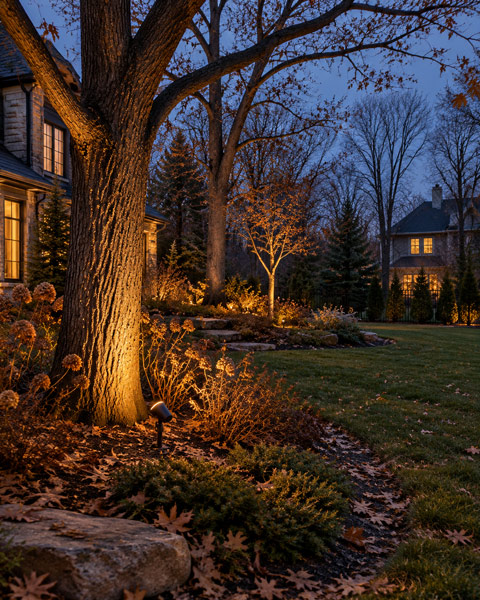
When Leaves Disappear
Foliage can conceal a fixture or intercept a beam during summer. After leaf fall, the same installation may expose the source or send light toward a neighboring window.
Use permanent shielding and controlled aiming to manage the light. Treat foliage as a changing landscape element.
For properties with substantial deciduous planting, schedule a review after the canopy opens. Examine tree accents and fixtures near property boundaries first.
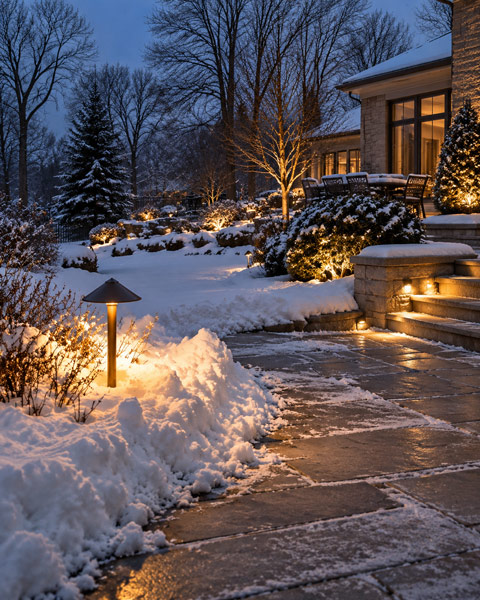
When Snow Changes the Scene
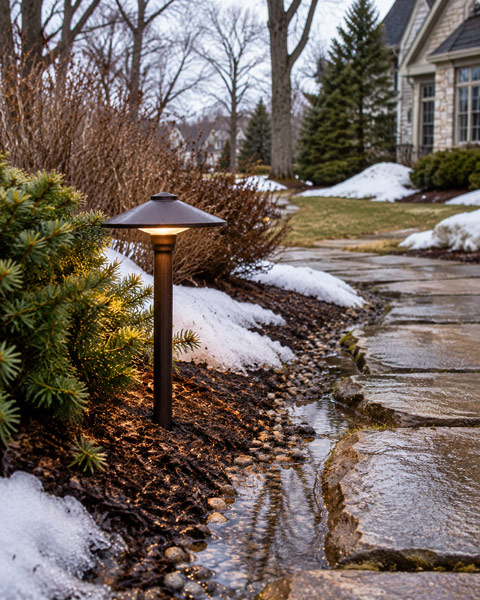
Reflective surfaces can increase the amount of light returned into the surrounding environment. A practical response for a snowy yard is to reassess brightness after significant snow cover, especially around pale paving and open planting beds.
Dimming may improve comfort where the ground becomes more reflective. Fixture placement also needs to account for snow storage and clearing equipment.
A path light beside a convenient planting edge in July may sit directly in a shoveled snow pile in January. Identify those locations before installation.
When Water Collects Around Fixtures
During thawing conditions, check where meltwater drains and whether ground-mounted fittings could sit in standing water.
Review ingress protection ratings, published operating temperatures, drainage requirements, and an appropriate U.S. electrical safety listing as separate selection criteria. An IP rating concerns protection against ingress; electrical safety evaluation addresses additional requirements.
For long-term ownership, also consider how easily fixtures can be adjusted, cleaned, and serviced without disturbing established planting.
Choose the Power Source Around Reliability Needs
A wired low-voltage LED system is a practical starting point for entrances, frequently used paths, and other locations where consistent scheduled operation matters.
The installation still needs a suitable power supply, correctly selected cable, compatible controls, and connections intended for their exposure. On larger properties, cable distance and circuit layout deserve particular attention.
Have a qualified electrician handle new circuits, receptacles, and hardwired connections, with the applicable local approvals.
Solar lighting can suit supplementary accents and locations where providing cable would be disruptive. Its suitability depends on the available sunlight, panel position, battery capacity, temperature limits, and required operating time.
Winter brings shorter days and a lower sun angle, reducing the available solar resource. Snow and site shading can add further constraints.
When evaluating solar-powered lights for winter use, ask how the system performs through several poor charging days. A summer runtime claim gives limited information about a shaded winter location.
For an essential step or arrival route, choose a system whose winter performance can be demonstrated for the intended conditions.
Give Different Lighting Tasks Separate Controls
Lighting becomes more useful when its operating schedule follows household activity.
Consider separate control groups for:
- Arrival lighting: Entrances and the routes used when returning home.
- Outdoor living: Patio, dining, and cooking areas used while people are present.
- Decorative accents: Trees and architectural details that can switch off earlier.
Set each group to a schedule consistent with the requirements applying to the installation. An astronomical timer can track changing sunset times, while appropriately positioned sensors can serve short periods of activity.
Efficient LEDs still consume unnecessary energy when lighting is excessive, poorly directed, or left operating without a purpose. Controls and placement are central to energy performance.
Ask the installer to demonstrate how schedules are changed and how the system behaves after a power interruption. Everyday operation should be clear to the homeowner.
Compare Installation Quotes by Scope
A meaningful lighting budget starts with a measured layout and a fixture schedule.
When comparing landscape lighting installation costs, ask each contractor to identify:
- Fixture quantities, specifications, and accessories.
- Cable routes and any difficult crossings beneath paving.
- Power supplies, controls, and electrical preparation.
- Installation and restoration work.
- Nighttime aiming and subsequent adjustments.
- Warranty terms and service arrangements.
Two quotes with the same fixture count may cover substantially different work.
A useful budgeting approach is to request a price for the essential arrival and walking routes, followed by a separate price for optional accents. This shows what each addition contributes and makes phased installation easier to evaluate.
Running costs can be estimated separately. For example, a system drawing 80 watts at the supply and operating for an average of five hours per night uses approximately 146 kWh per year. At an assumed electricity price of $0.20 per kWh, that equals $29.20 annually.
This is an illustrative calculation. Use the proposed system’s actual input power, expected hours, and your electricity rate for a property-specific estimate.
Make the Nighttime Review Part of the Project
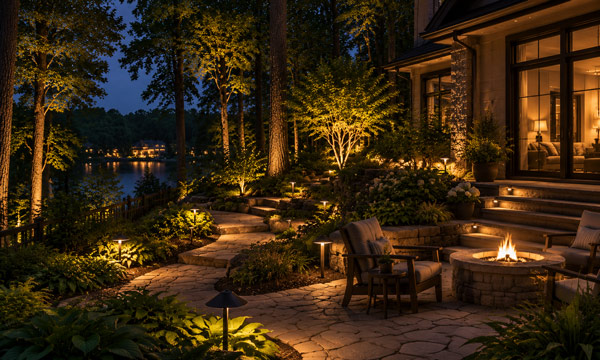
Include a nighttime adjustment visit in the installation scope. Daylight inspection cannot show whether a fixture creates glare or whether an important step disappears into shadow.
Review the completed system from four positions:
- Walking the routes: Check turns, surface changes, thresholds, and steps.
- Sitting outdoors: Look for exposed sources and uncomfortable beams.
- Inside the house: Evaluate the garden view from frequently used rooms.
- Along your property boundary: Look for light escaping toward neighboring homes.
During this review, identify the brightest visible source and decide whether it needs shielding, repositioning, or lower output.
Also ask whether any fixture can be removed without reducing useful visibility. This exercise can reveal redundant accents and improve the overall composition.
Keep the final fixture schedule, control settings, and cable layout. Arrange a seasonal adjustment where changing foliage affects the design, and check alignment after landscape work or snow clearing.
FAQs
1. Which Outdoor Lights Attract Fewer Insects?
Amber or yellow light generally attracts fewer flying insects than blue-rich light, although the response varies by species. Research has found reduced attraction to filtered yellow and amber LEDs compared with shorter-wavelength alternatives. When selecting lighting that attracts fewer insects, also reduce unnecessary brightness and operating hours.
2. Can Outdoor Lighting Interfere With Security Cameras?
Yes. Concentrated bright areas, glare, and reflections can make parts of a camera image harder to interpret. Lighting should provide suitable coverage across the area the camera needs to record. Test actual nighttime footage with the proposed lights operating, and check whether people remain visible as they move between brighter and darker areas.
3. Why Do My Outdoor LED Lights Flicker?
Possible causes include failing components, moisture-related connection problems, and incompatible controls or power supplies. When troubleshooting flickering lights, note whether the issue affects one fixture or an entire group and whether it follows rain or a control change. Research on low-voltage LED replacements has documented flicker associated with certain transformer and dimmer combinations.
4. Can I Replace Halogen Landscape Bulbs With LEDs?
Often, provided the replacement matches the fixture and electrical system. Check the lamp base, physical fit, input-voltage requirements, outdoor suitability, and compatibility with the existing transformer and controls. Some installations require additional component changes. Test a compatible replacement before converting the entire system, particularly where older electronic transformers are involved.
5. How Long Should Outdoor LED Lighting Last?
The answer depends on the complete fixture and its operating conditions. LED lifetime is often expressed as operating hours until output falls to a specified level, commonly 70% of the initial output. Electronics can fail earlier, so a long LED rating does not guarantee an equally long fixture life. Compare product-level warranty coverage, replacement-part availability, and service options alongside rated hours.
