
Table of Contents
- Start With Three Views of Your Yard
- 1. Place Path Lights Where People Make Decisions
- 2. Create a Welcoming Entrance With Light on Vertical Surfaces
- 3. Make Steps Read Clearly From Both Directions
- 4. Give One Tree a Sculptural Role
- 5. Use Brick and Stone to Shape the Lighting Effect
- 6. Conceal Lighting Beneath Benches and Deck Details
- 7. Design Patio Lighting Around People’s Faces
- 8. Compose a Garden View From Inside the House
- 9. Create a Winter Lighting Arrangement
- 10. Let the Yard Become Quieter as the Evening Progresses
- How to Turn These Ideas Into a Practical Plan
- FAQs
The most effective Hamilton landscape lighting ideas begin with the way you experience your yard: arriving home, walking through the garden, sitting with friends, and looking outside from a favourite room. A successful design gives each of these moments the light it needs while preserving the atmosphere of an outdoor space.
For a Hamilton, Ontario property, that design should also account for seasonal change. A fixture hidden behind summer foliage may become exposed after leaves fall. A subtle lighting effect on dark paving can feel much brighter when snow covers the surrounding ground.
The following ten ideas combine familiar lighting techniques with a more considered approach to placement, viewing angles, and year-round use. You can apply them to a compact urban backyard, a sloping garden, or a larger property with several outdoor living areas.
Start With Three Views of Your Yard
Before choosing fixtures, study your property from three positions:
- The arrival view: What should visitors notice as they approach the entrance?
- The seated view: What will people see from the dining table, deck, or garden bench?
- The indoor view: What would you like to enjoy through the windows after dark?
These viewpoints often reveal different priorities. A light that looks attractive from the driveway may shine directly into someone’s eyes from a patio chair.
Begin by testing a consistent warm white colour, such as 2700K, across the main areas. Keep light directed toward its intended surface, use modest output, and give each fixture a clear purpose. Warm colour, shielding, and appropriate operating times work together to support responsible outdoor lighting.
1. Place Path Lights Where People Make Decisions
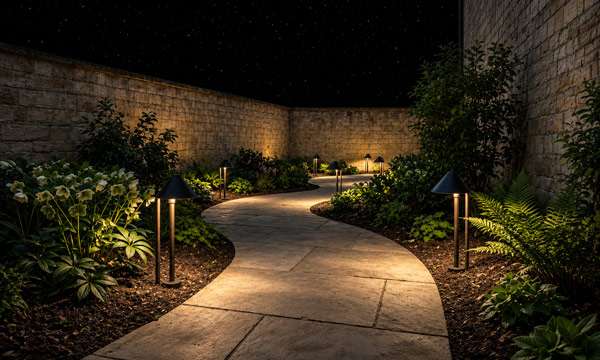
A pathway does not always need an evenly spaced row of fixtures. Its most important locations are often the places where someone must make a decision: a bend, a junction, a gate, or the transition from driveway to walkway.
Start with those points, then check whether the connecting route remains easy to follow. Add light where the walking surface becomes difficult to read.
For a curved front walk, position shielded path lights within the planting bed so their light reaches the paving without the fixtures obstructing movement.
Let the light distribution determine the spacing. Two fixtures with similar appearances can produce very different patterns. Test the actual product after dark before committing to installation positions.
Also check the route in both directions. A comfortable approach to the front door should remain comfortable when you leave.
2. Create a Welcoming Entrance With Light on Vertical Surfaces
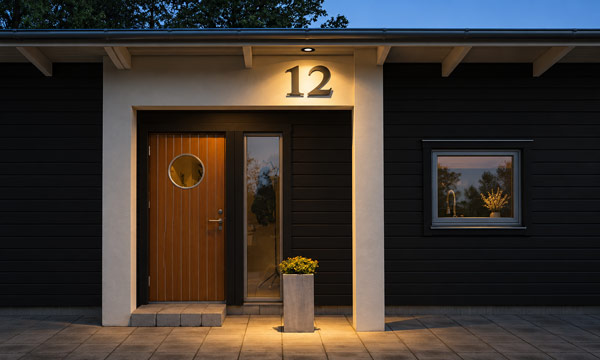
An entrance becomes easier to understand when visitors can see the door, house number, and people standing nearby.
A porch light that illuminates only the ground may leave these details poorly defined. Consider a shielded downlight near the doorway, a softly illuminated address plaque, or a gentle wash across the entrance wall.
For a recessed doorway, use the surrounding wall or porch structure to distribute light into the entrance. Check the result from the public approach and from the doorstep.
A useful detail is to coordinate the entrance lighting with the first section of the walkway. A sudden jump between a bright porch and a dim path can make the arrival feel disjointed.
Aim for a gradual visual transition that helps guests understand where to go.
3. Make Steps Read Clearly From Both Directions
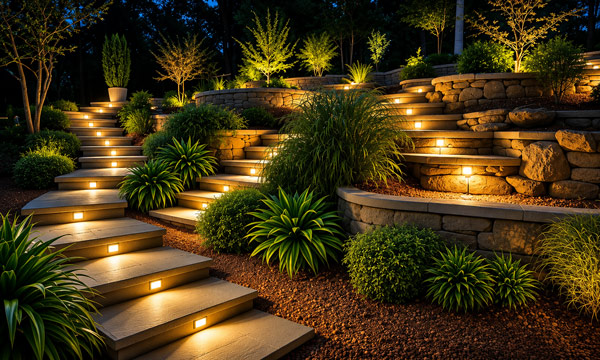
Sloping properties and changes in garden level deserve particular attention. On steps, the lighting should reveal the tread surfaces and the transition between levels.
Shielded riser lights, carefully positioned side lights, or suitable fixtures beneath an overhanging stair nosing can provide useful illumination. Their effectiveness depends on the shape and construction of the staircase.
Inspect the stairs while walking up and down. A fitting concealed from someone ascending may be directly visible to someone descending.
Watch for shadows that make a tread appear shorter, deeper, or missing. Decorative points of light along a staircase are insufficient if the walking surfaces remain difficult to distinguish.
For Hamilton yards with winter use, consider where snow accumulates and how the stairs are cleared. Fixtures should remain accessible without sitting in the path of shovels or snow-removal equipment.
4. Give One Tree a Sculptural Role
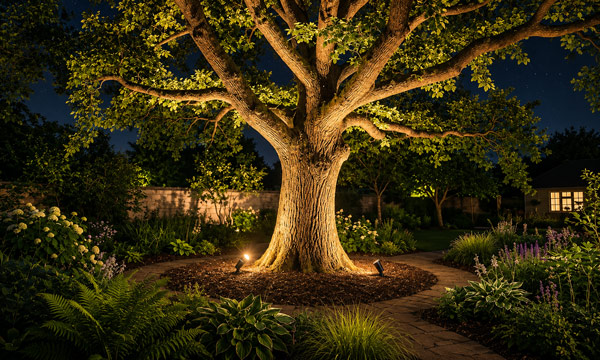
A mature tree can provide a strong focal point, especially when its trunk and branching structure are visible from the house or patio.
Study its shape before choosing a lighting direction. A broad canopy, an open branching pattern, and a narrow upright tree each call for a different approach.
Try lighting the trunk and selected lower branches from an offset position. This can reveal depth and texture while leaving part of the tree in shadow.
Where appropriate, professionally installed downlighting can create a soft pattern through the branches onto the ground. Tree-mounted equipment needs suitable mounting methods and periodic adjustment as the tree grows.
Check the effect after leaf fall. If a beam that once met dense foliage now continues into open sky or neighbouring windows, adjust its aim, output, or operating schedule.
5. Use Brick and Stone to Shape the Lighting Effect
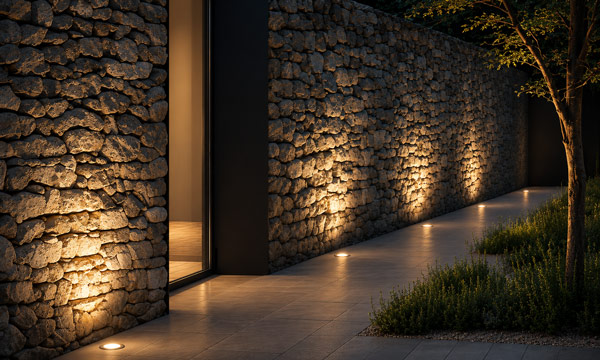
Masonry offers an opportunity to make the surface itself part of the design.
Light positioned close to a wall can graze across its face, creating shadows around projecting stone or brickwork. Moving the fixture farther away generally produces a broader, more even wash.
Choose the effect after seeing a sample on the actual wall. Strong grazing can emphasise repaired mortar, uneven joints, and surface damage as readily as attractive texture.
On a retaining wall, concealed lighting beneath a suitable cap can illuminate the vertical face and help define the garden’s levels.
Test one short section first. Observe it from the main seating area and from inside the house. The right effect should suit both the material and the distance from which you usually see it.
6. Conceal Lighting Beneath Benches and Deck Details
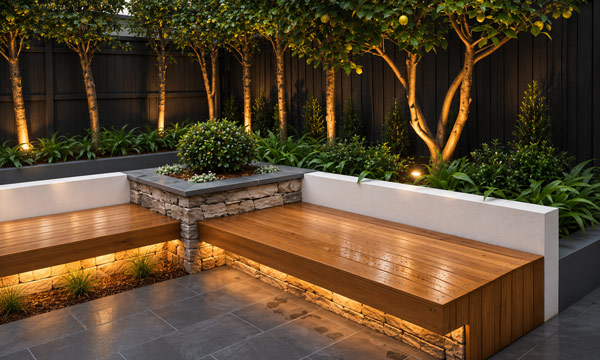
Built-in benches, raised planters, and deck edges can accommodate discreet lighting that adds definition without introducing more visible fixtures.
A concealed light beneath a bench can softly reveal the ground below it. Lighting beneath a planter lip can bring out its form and distinguish it from the surrounding paving.
Keep the source recessed or shielded so individual LEDs remain hidden from normal viewpoints. Check this from across the yard as well as from the deck itself.
Be selective about continuous lines. Outlining every horizontal edge can make a small space visually crowded. One illuminated bench or a short run beside an important transition may provide enough definition.
Plan access for future maintenance. Concealed equipment should remain reachable without dismantling a major section of the deck.
7. Design Patio Lighting Around People’s Faces
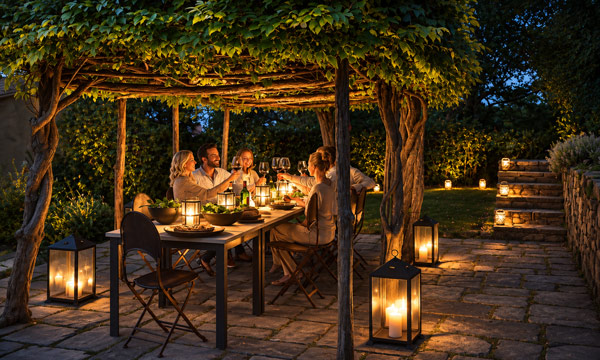
Outdoor dining needs a different treatment from a flower bed or retaining wall. People need to see one another, handle food, and move comfortably around furniture.
Evaluate the lighting while seated at the table. A fixture that feels unobtrusive when standing may become uncomfortable at eye level.
Soft light from a nearby wall, a shielded fixture beneath a covered structure, or carefully placed lighting beside the seating area can help create a comfortable setting.
Keep concentrated task lighting near the cooking or serving surface. The rest of the patio can remain gentler.
Leave enough light around chair positions and circulation routes for people to move easily. Furniture arrangements change, so test the layout with chairs pulled out and guests moving between the table and the house.
8. Compose a Garden View From Inside the House
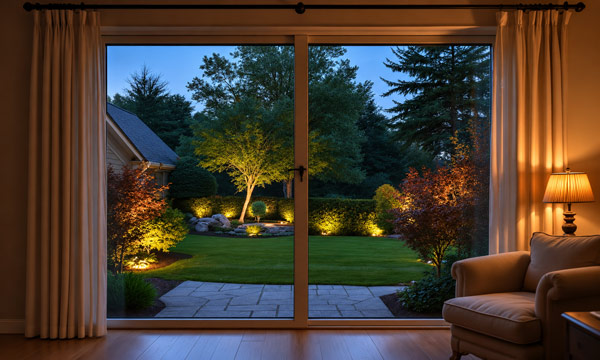
Your yard can remain part of your living space even when the weather keeps you indoors.
Choose a window you regularly look through, then identify a feature beyond it: a tree trunk, a textured wall, a sculpture, or a planted corner.
A restrained focal point beyond the patio can give the view depth. Keep the area immediately outside the glass visually calm so the eye can travel into the garden.
Before increasing outdoor brightness, reduce nearby indoor lighting and check the window again. Reflections from the room may be obscuring a perfectly adequate garden scene.
For a small backyard, this approach can be especially effective. A softly defined feature near the far side gives the view a clear destination without requiring the entire boundary to be illuminated.
9. Create a Winter Lighting Arrangement
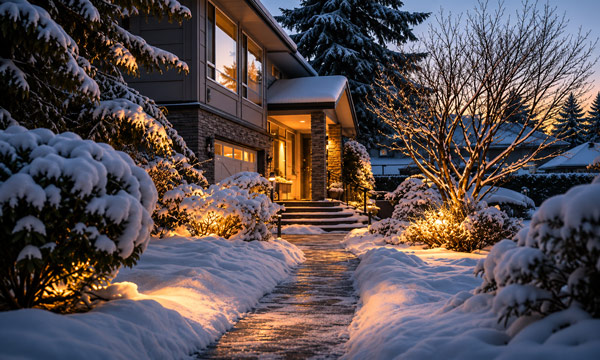
A landscape lighting plan should accommodate the garden’s changing structure.
In summer, foliage may intercept beams and conceal fixtures. In winter, bare branches expose light sources, snow changes surface brightness, and cleared paths may differ from the routes used during warmer months.
Review the layout once leaves have fallen. Check whether previously concealed fixtures are now visible from windows or seating areas.
After snowfall, assess the scene again. You may find that decorative zones need less output because the surrounding ground reflects more light.
Keep fixtures clear of designated snow-storage areas, and choose equipment with operating-temperature and exposure ratings suited to its actual location.
A useful winter arrangement may emphasise the entrance, frequently used paths, and one feature visible from indoors, with less emphasis on spaces that are temporarily unused.
10. Let the Yard Become Quieter as the Evening Progresses
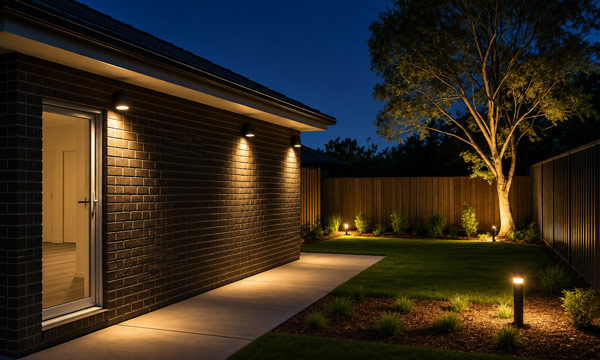
Different activities call for different lighting combinations. Separately controlled zones allow the yard to respond to those activities.
Consider three settings:
- Arrival: Entrance and essential access routes.
- Outdoor gathering: Dining, seating, circulation, and selected decorative features.
- Later evening: Decorative zones switched off, with access lighting available where needed.
Choose switching or dimming equipment that supports the intended fixtures and control arrangement.
Where a property borders dense planting or natural habitat, preserve unlit areas and prevent unnecessary spill toward them. Timers and appropriately set motion controls can reduce lighting when outdoor spaces are unoccupied.
This approach also gives the garden a more natural rhythm. The scene changes as activities end, rather than remaining at its busiest setting throughout the night.
How to Turn These Ideas Into a Practical Plan
Map the Features That Matter
On a simple sketch, mark entrances, walking routes, level changes, seating areas, and important views from the house.
Add existing light sources, including porch fixtures and nearby street lighting. Assess what they already contribute before specifying additional fittings.
Test the Actual Fixtures After Dark
Use a temporary demonstration with suitable equipment before finalising positions. Check the effect from the driveway, the entrance, the patio, and the principal windows.
A demonstration can reveal problems that a daytime drawing misses: a visible lamp beneath a bench, an uncomfortable reflection on paving, or a tree light aimed beyond its intended target.
Plan the Power Supply Alongside the Layout
For a low-voltage system, fixture selection, cable routes, transformer capacity, and control zones need to be considered together.
Have the installer check the proposed equipment ratings and voltage at the fixtures, particularly on longer cable runs. A visually successful layout still needs an appropriately designed power supply.
Review Decorative Lights by Switching Them Off Individually
Once the essential access lighting works, evaluate each decorative fixture.
Temporarily switch one accent off and study the view. If the composition remains equally clear and attractive, that fixture may add little value.
This is a useful way to refine a small garden. Removing a competing highlight can make the feature you care about easier to appreciate.
The strongest Hamilton landscape lighting design gives your property a clear entrance, comfortable outdoor spaces, and a garden view worth enjoying through the seasons. Start with the places you use most, test them carefully, and build the remaining scene around what you discover.
FAQs
1. How Much Does Landscape Lighting Cost in Hamilton?
The price depends on the installation scope, equipment, access, and construction work involved. Fixture count alone provides a weak basis for comparison.
Ask for an itemised quote covering fixtures, power equipment, controls, cable installation, any paving or landscaping reinstatement, and final aiming after dark. Confirm whether future servicing and replacement components are included.
A useful quote should explain the intended result in each area. This makes it easier to compare proposals that contain different quantities or types of fixtures.
2. Are Solar Landscape Lights a Good Choice for Hamilton Yards?
Solar lighting can suit decorative applications where the panel receives sufficient sunlight and variable runtime is acceptable. Its suitability depends on daily charging conditions and the required lighting duration.
Solar-powered lighting needs adequate solar exposure to replenish its batteries, while shorter winter days reduce the available solar resource. For a route that needs dependable illumination throughout a specified period, assess the system’s winter performance before relying on it.
Check the proposed panel position during the least favourable season, including shade from buildings and evergreen planting.
3. Can Existing Halogen Landscape Lights Be Upgraded to LED?
Often, yes, if the fixtures accept replaceable lamps and suitable LED replacements are available.
Check the lamp base, physical dimensions, specified supply voltage, thermal requirements, and suitability for the fixture’s enclosure. The existing transformer and any dimming equipment also need to support the replacement lamps.
Some transformers designed for halogen loads have minimum-load requirements that a smaller LED load may fail to meet. Compatibility problems can cause flickering or failure to operate, so a successful upgrade may require changes beyond the lamps themselves.
4. How Much Electricity Does LED Landscape Lighting Use?
Estimate fixture energy use with this calculation:
Total fixture watts × operating hours ÷ 1,000 = kilowatt-hours
For example, twelve 3-watt fixtures have a combined rated load of 36 watts. Operating them for five hours uses approximately:
36 × 5 ÷ 1,000 = 0.18 kWh per night
Over 30 nights, that equals 5.4 kWh, excluding transformer and control losses. Actual consumption depends on the complete system’s input power and operating schedule. Multiply measured or estimated kilowatt-hours by the applicable electricity rate to estimate the energy charge.
5. Do I Need a Permit to Install Landscape Lighting in Hamilton?
Requirements depend on the exact work involved. Installing a new outdoor receptacle, adding a circuit, or creating a hardwired supply raises different questions from connecting an approved plug-in system.
Ontario requires a notification of work for most electrical work, with requirements and exemptions to be confirmed for the particular installation. An electrical notification is also separate from a municipal building permit. Confirm the scope before work begins, and use a Licensed Electrical Contractor when hiring someone to perform electrical work in your home.
