
Understand The System Before You Start
Plan Your Lighting Like A Designer, Not Just A Installer
Choose Fixtures And Bulbs That Fit Your Yard
Size The Transformer Correctly
Pick The Right Cable And Layout Pattern
Step-By-Step Installation
Maintenance Tips For Long-Term Reliability
FAQs
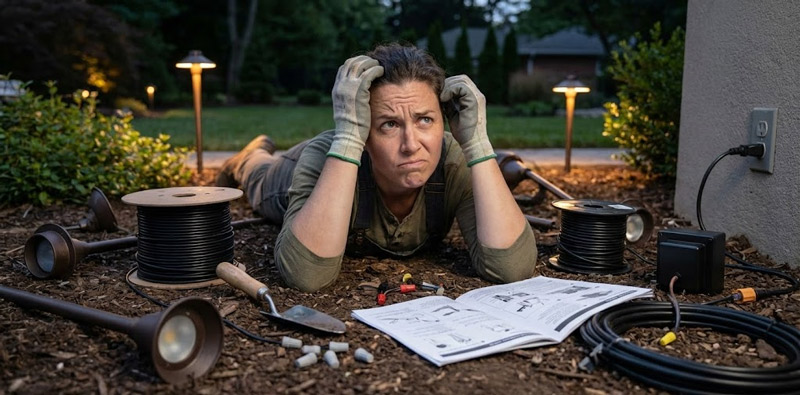
Low voltage garden lights are one of the easiest upgrades you can make to a yard. They add safety to walkways, make steps and edges visible at night, and turn trees, shrubs, and flowerbeds into features after sunset. Compared with line-voltage (120V/230V) fixtures, low voltage systems are simpler to work with because the risk level is lower, the wiring is more forgiving, and you can usually expand the layout later without tearing up your entire landscape. Still, “easy” does not mean “careless.” A clean, reliable installation comes from good planning, correct transformer sizing, smart cable routing, proper connections, and a thoughtful aiming of each fixture so the light looks intentional rather than accidental.
This guide walks you through the full process—planning, choosing components, laying cable, connecting fixtures, and testing—so your lights work well and look professional for years. It includes both standard paragraph explanations and a practical bullet checklist, so you can read it like a story or use it like a field manual.
Understand The System Before You Start
A typical low voltage lighting system has four main parts: a power source (your outdoor GFCI outlet or a hardwired feed), a transformer that steps down household voltage to 12V or 15V, a low voltage cable that carries power around the yard, and the fixtures themselves (path lights, spotlights, well lights, step lights, deck lights, and more). Many modern transformers include timers, photocells, app control, and multiple voltage taps. The goal is to deliver enough voltage to each fixture so it shines at the brightness you expect without overdriving bulbs or causing uneven light.
Because cable runs can be long and fixtures draw power along the route, voltage drop is the main technical challenge. If the first light looks bright but the last one looks dim, that’s usually a layout or wire-size issue—not a “bad light.” The best installations plan for voltage drop from day one.
Plan Your Lighting Like A Designer, Not Just A Installer

Before buying anything, go outside at night with a flashlight and a notebook. Identify where light provides function (steps, gates, walkways, uneven ground) and where it provides drama (a specimen tree, textured stone wall, water feature). A common mistake is placing too many path lights too close together, creating an “airport runway” effect. Often, fewer fixtures placed with intention look better than a lot of bright points.
Think in layers: soft path lighting for movement, accent lighting to highlight focal points, and a little ambient glow that makes the yard feel welcoming. Consider how the lighting looks from key viewpoints—your patio, living room windows, and the street. You’re not just lighting objects; you’re shaping what people notice.
Choose Fixtures And Bulbs That Fit Your Yard
LED fixtures are the standard today because they use less power, last much longer, and stay cooler. When shopping, look for durable materials (brass or powder-coated aluminum), weather-rated construction, and replaceable light sources if possible. Cheap fixtures can work for a season, but they often fail at the connections or corrode quickly.
Color temperature matters. For most gardens, warm white (around 2700K–3000K) feels natural and cozy. Neutral white (around 3500K–4000K) can look crisp but may feel harsh in a residential yard if overused. Consistency matters too—mixing multiple color temperatures often looks messy.
Size The Transformer Correctly
Transformer sizing is not guesswork. Add up the wattage of every fixture you plan to install. For example, if you have ten 4-watt LED path lights and three 7-watt spotlights, your total load is (10×4) + (3×7) = 40 + 21 = 61 watts. You generally want a transformer rated above that—often with 20% to 50% headroom—so it runs cooler and leaves room for future additions. A 100-watt transformer would be a comfortable choice for a 61-watt system.
Some transformers include multiple output zones so you can put the front yard on one schedule and the backyard on another, or separate a long cable run from a short one to reduce voltage drop problems.
Pick The Right Cable And Layout Pattern
Low voltage lighting cable is usually rated by gauge: 12-gauge is thicker than 14-gauge and has less voltage drop, which is helpful for long runs or higher wattage loads. Many homeowners default to 12-gauge because it offers flexibility and reduces headaches later. You can still use 14-gauge for small, short systems, but once you start adding multiple fixtures and longer distances, thicker cable often pays off.
Your cable layout can follow a few common patterns:
- A daisy chain (straight line) is simplest but most likely to show voltage drop at the end.
- A hub layout runs separate lines back to a central point; it can be neat but uses more cable and more connections.
- A loop layout (where the cable forms a loop and feeds fixtures from both directions) can balance voltage better, depending on how it’s connected.
- A T layout splits a main run into two branches, often useful for front yard + side yard splits.
The “best” pattern depends on your yard shape, fixture locations, and transformer placement. The goal is to keep runs reasonable and avoid overloading a single long line.
Step-By-Step Installation
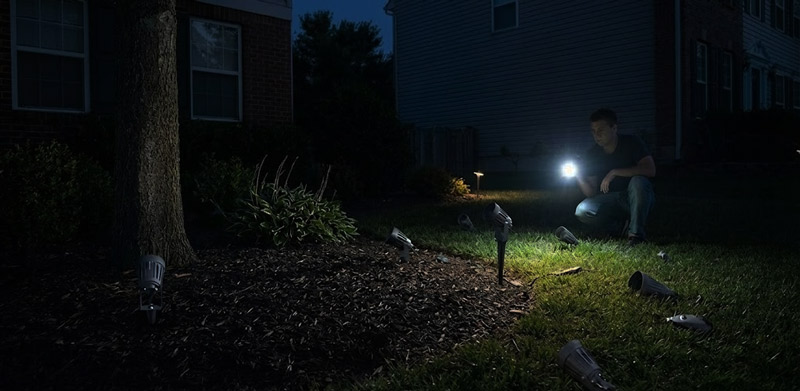
1) Do A Mock Layout At Night
Place the fixtures on the ground where you think they should go—don’t stake them in yet. Turn on a flashlight to simulate beams, or temporarily power a few fixtures if you can. Move them around until the spacing feels right. For path lights, many people prefer offset placement rather than perfectly symmetrical rows. For spotlights, aim for gentle highlights rather than blasting the trunk like a stage light.
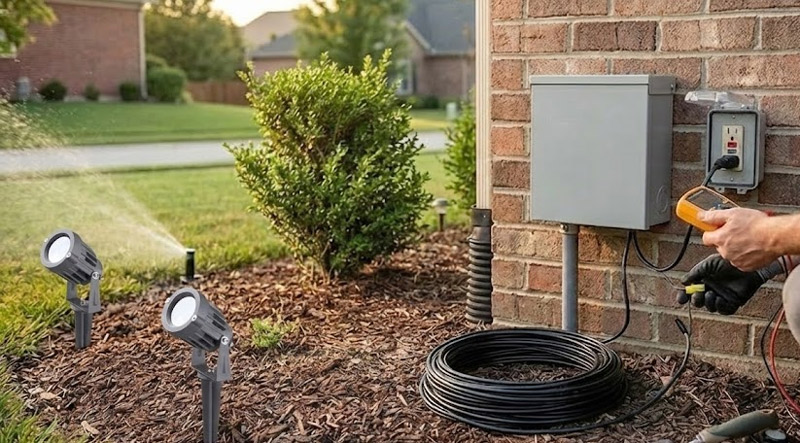
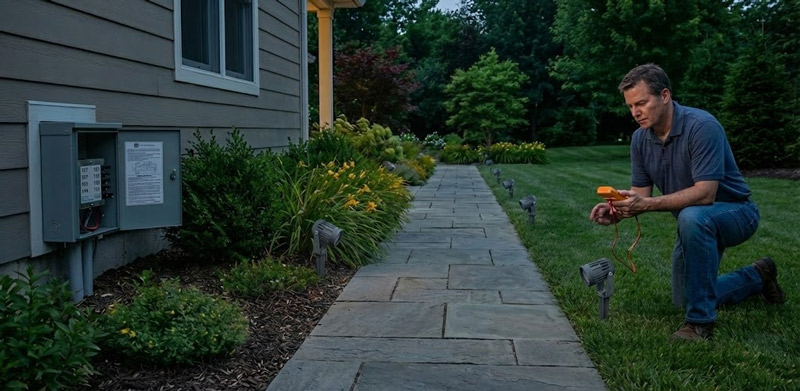
2) Mount The Transformer Safely
Most plug-in transformers mount on a wall near an outdoor GFCI outlet. Choose a location protected from direct sprinkler spray and not buried behind thick plants. The transformer should be accessible for programming timers and troubleshooting later. If you’re hardwiring the transformer (common for larger systems), follow local electrical code—this may require a licensed electrician depending on your area.
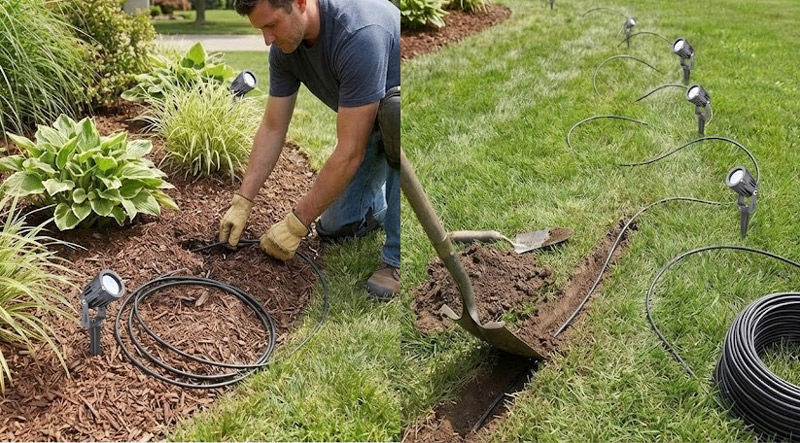
3) Run The Low Voltage Cable
Lay the cable along the route you planned, leaving extra slack at each fixture location. Slack is not a waste—it’s what lets you adjust fixture position later or remake a connection if needed. Avoid tight bends, and keep cable away from hot surfaces or areas where it may be cut by edging tools. In garden beds, tuck cable under mulch. Along lawns, you can slit the soil with a flat spade and press cable into the cut so it disappears.
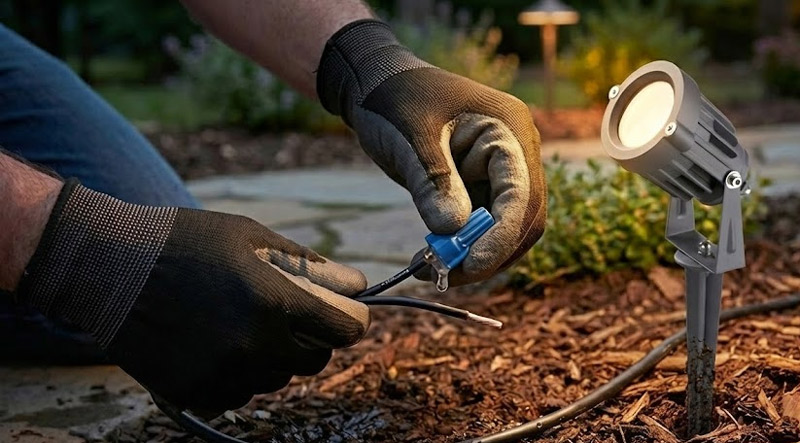
4) Connect Fixtures Correctly
Most low voltage fixtures use push-on pierce connectors or wire nuts/gel-filled connectors. Pierce connectors are fast but can fail if moisture gets in or contact is weak, while gel-filled or heat-shrink connectors last longer, especially in wet climates. Always ensure clean copper, solid metal-to-metal contact, moisture protection, and gently tug the wires to confirm a secure connection.

5) Stake And Aim Fixtures
Once connections are made, stake the fixtures in place. Aim spotlights carefully: for trees, a common approach is to place the light a few feet away from the trunk and aim upward to reveal branching structure. For walls, graze the surface from below to emphasize texture. For steps, use shielded step lights or carefully aimed small fixtures so the light lands on the tread, not in people’s eyes.
6) Test The System And Adjust For Voltage Drop
Turn the system on and walk the entire route. Look for dim fixtures, flicker, or lights that don’t turn on. If you see dimming toward the end of a run, you have options: move some fixtures to a different run, shorten the run, use thicker cable, or use a higher voltage tap (12V/13V/14V/15V depending on your transformer). Don’t “solve” dimming by adding brighter bulbs everywhere; fix the delivery first.

7) Bury Or Hide Cable Permanently
After testing and aiming, hide the cable properly. Don’t bury everything too deep—low voltage cable typically doesn’t need deep trenching, but it should be protected from garden tools. Under mulch, a couple inches is often fine. In turf, press it below the surface so mowers won’t snag it.
Maintenance Tips For Long-Term Reliability
Even a perfect install benefits from occasional checkups. Once or twice a year, walk the yard at night and look for fixtures that shifted, got blocked by plant growth, or started to dim. Clean lenses, remove mulch piled too high around fixtures, and trim plants that now cast heavy shadows. After heavy rain, check for flicker that might suggest water got into a connector. A little seasonal maintenance keeps the system looking intentional rather than “installed once and forgotten.”
FAQs
What size transformer do I need for low voltage garden lights?
Add up the wattage of all fixtures connected to the system.
Select a transformer with an additional 20%–50% capacity to allow cooler operation and future expansion.
For example, a total load of 61 watts is well suited to a 100-watt transformer.
Why are some lights dimmer than others on the same run?
This is most often caused by voltage drop along a long cable run.
The effect is amplified when using thinner wire or a simple daisy-chain layout.
Solutions include using thicker cable, splitting the run into shorter branches, or selecting a higher voltage tap on the transformer if available.
Which cable gauge should I use: 12-gauge or 14-gauge?
Use 12-gauge cable for longer runs, larger systems, or when future expansion is likely.
It provides lower resistance and helps prevent dimming as the system grows.
14-gauge cable can work for small layouts with short runs, but it is less forgiving if fixtures are added later.
Are quick “pierce” connectors reliable, or should I use waterproof connectors?
Pierce connectors are convenient and fast, but many long-term failures are caused by poor contact or moisture intrusion.
For better durability—especially in wet or buried locations—use gel-filled waterproof connectors or heat-shrink waterproof splices.
Ensure copper conductors are clean and connections are tight before sealing.
How do I aim spotlights and path lights without creating glare?
Aim spotlights for soft highlights rather than direct brightness.
For trees, place the fixture a few feet from the trunk and tilt it upward to reveal structure and texture.
For paths and steps, keep lights low and shielded, and adjust angles so beams land on the walking surface—not into sightlines from patios, windows, or standing eye level.
