

Table of Contents
- What Gives an Art Deco Flush Mount Its Character?
- How Do You Choose the Right Size and Profile?
- Connect the Fixture to the Room Through Selective Repetition
- Choose Glass for the Experience Beneath It
- What Light Color and Brightness Work Best?
- How Should You Style It in Different Rooms?
- A Practical Styling Sequence
- FAQs
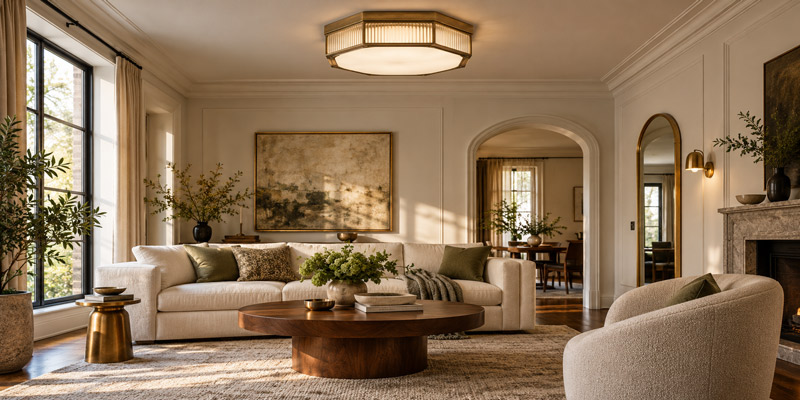
To style an Art Deco flush mount ceiling light, connect its geometry to the room, balance its visual weight with the furniture, and choose light that complements the materials below it. A stepped frame, ribbed glass shade, or polished metal rim can introduce plenty of character without requiring an entirely Art Deco interior.
The most useful starting point is the view you see every day. Look into the room from the doorway, sit in your usual chair, and consider how the ceiling light relates to the furniture from each position.
A fixture can look beautiful in a product photograph yet feel disconnected at home. Successful styling gives it a clear relationship with the space—even when the surrounding furniture comes from different periods.
What Gives an Art Deco Flush Mount Its Character?
Art Deco draws much of its identity from deliberate geometry: stepped forms, repeated lines, angular patterns, and carefully arranged curves. These relationships matter as much as decorative richness.
In a flush mount ceiling light, that character might appear through concentric metal rings, an octagonal frame, symmetrical glass panels, or a shallow shade with a strong architectural outline.
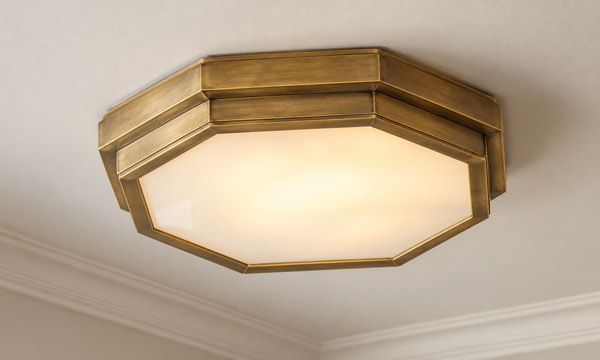
An octagonal brass frame and opal glass diffuser give this Art Deco flush mount ceiling light its geometric character and soft glow.
Identify the fixture’s most distinctive feature before choosing accessories around it. Is it the shape, the finish, or the glass texture?
A light with an elaborate stepped frame may need very little additional pattern nearby. A simpler fixture with ribbed glass offers more room for expressive furniture and artwork.
This also helps distinguish the styling needs of different ceiling lights. A flush mount sits close to the ceiling, while a semi-flush mount has a visible gap or short supporting stem. That difference changes how much of the fixture you see from across the room.
How Do You Choose the Right Size and Profile?
Diameter is only part of the decision. Projection—the distance the fixture extends below the ceiling—and the amount of visible metal also affect its presence.
Two fixtures with the same diameter can feel surprisingly different. A broad white diffuser with a narrow rim may appear light and quiet. A dark frame with several solid metal tiers may feel more substantial.
Check the Remaining Space Below the Light
Measure the fixture’s full installed height, including decorative details.
For example, a light projecting five inches below an eight-foot ceiling leaves seven feet seven inches beneath its lowest point. This calculation helps you assess the room, although it does not establish whether a particular installation meets applicable requirements.
Consider circulation routes, nearby doors, and the fixture’s installation instructions alongside appearance.
Test Three Everyday Views
Before committing to a size, mark its approximate outline on the ceiling with removable tape and assess it from:
- The doorway: Does it relate comfortably to the room’s width and main furniture grouping?
- The sofa or dining chair: Does the frame feel proportionate when viewed at an angle?
- The bed: Is the underside attractive and comfortable to look toward?
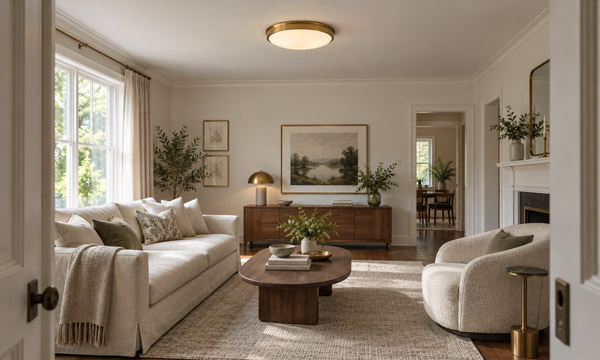
A shallow brass flush mount ceiling light adds decorative detail to this low-ceiling living room while keeping the space visually open.
The bedroom view deserves particular attention. A fixture that looks delicate from the doorway may reveal exposed bulbs or a visually heavy underside when you lie down.
In a room with limited ceiling height, a broader, shallower design can sometimes provide decorative presence more comfortably than a narrow, deep fixture.
Connect the Fixture to the Room Through Selective Repetition
A useful styling exercise is to repeat one geometric feature and one material already present in the light.
For example, ribbed glass might relate to the vertical grooves of a cabinet. A curved metal frame could connect with an arched mirror. A stepped rim might find a quieter counterpart in the profile of a picture frame.
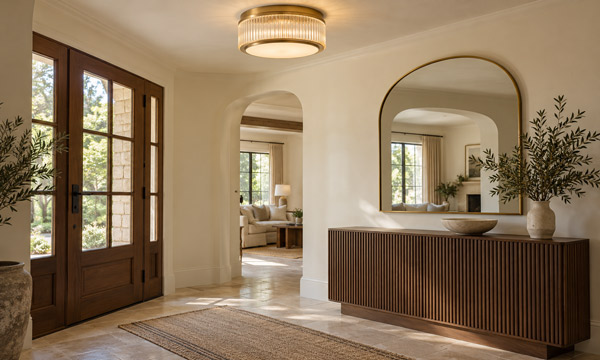
Ribbed glass on the Art Deco ceiling light echoes the fluted walnut console, while brass accents connect the fixture with the arched mirror.
These connections work best when they vary in scale. Large curves in an armchair can relate to smaller curves overhead without creating an obvious matching set.
Give Metallic Finishes Different Roles
An Art Deco flush mount does not require every handle, lamp, and furniture leg to share its finish.
If the ceiling light has a substantial brass frame, repeat that warmth in a small detail, such as a mirror edge or cabinet pull. Other pieces can introduce dark wood, painted metal, or brushed nickel.
Pay attention to reflectivity as well as color. Polished brass and brushed brass create different visual effects, even when their tones are similar. A room with several reflective surfaces may benefit from a ceiling fixture with a softer finish.
Leave Some Surfaces Quiet
Pattern becomes more effective when it has space around it.
If the ceiling light combines faceted glass, stepped metalwork, and strong contrast, consider plain curtains or a rug with a subtle texture. If the room already contains patterned wallpaper and detailed molding, a simpler Art Deco silhouette may establish a clearer focal point.
The amount of decoration matters less than how clearly you can read each element.
Choose Glass for the Experience Beneath It
Glass determines both the fixture’s daytime appearance and the experience of looking toward it after dark.
Opal or frosted glass often creates a more visually continuous luminous surface. Clear glass emphasizes the bulb and the construction of the fixture. Ribbed glass adds texture, although the bulb may remain visible depending on the design.
For a bedroom or a living room where people recline, examine photographs taken directly beneath the illuminated fixture. Check whether the source appears comfortable from that position.
Tinted glass also deserves a closer look. Its daytime color may suit the furniture beautifully, while its effect on the light may change the room’s appearance at night.
Look at the ceiling surrounding the fixture, too. If the design produces a visible halo or pattern, that effect becomes part of the decoration. A smooth ceiling can provide a calm backdrop; pronounced texture or uneven paint may become more noticeable under certain lighting angles.
What Light Color and Brightness Work Best?
An attractive metal finish cannot compensate for light that makes the room’s colors feel wrong.
Start With 2700K or 3000K
Both 2700K and 3000K fall within the warm range commonly used in homes. Around 2700K generally gives a warmer appearance, while 3000K offers a slightly less yellow impression.
For styling purposes, try 2700K alongside warm woods, cream upholstery, and aged brass. Consider 3000K when you want white glass, pale stone, or cooler metallic details to retain a somewhat crisper appearance.
Treat these as starting points. Compare the light with your actual paint, fabric, and flooring samples after dark.
Look Beyond Color Temperature
Color temperature describes the appearance of the light itself. Color rendering concerns how objects appear beneath it.
Where fabric, artwork, and material colors are central to the room, a CRI of 90 or above is a useful selection target. It indicates strong color fidelity, although CRI alone cannot describe every aspect of color quality.
Compare Light Output Separately From Fixture Size
Use light output in lumens when assessing brightness. A wider shade does not necessarily produce more light.
Also check whether the quoted output refers to the bulbs or the complete fixture. Glass, internal construction, and light distribution affect the result you experience in the room.
Choose the ceiling light’s output alongside the other lighting you plan to use. A dimmable fixture offers flexibility, but reading corners, artwork, and work surfaces still deserve their own consideration.
How Should You Style It in Different Rooms?
The same decorative language can serve different purposes throughout the home.
| Room | Fixture direction | A useful connection in the room | What to keep visually quiet |
|---|---|---|---|
| Living room | Shallow brass frame with opal glass | Curved seating or a gently arched mirror | Large upholstery surfaces |
| Bedroom | Softly stepped frame with a diffused underside | An upholstered headboard with a simple curved outline | Bedding and curtains |
| Entryway | Octagonal frame or a strong geometric rim | A runner with a restrained angular pattern | Console styling |
| Dining room | Broad diffuser with concentric or stepped detailing | The table’s outline or a repeated detail in the chairs | Surrounding small accessories |
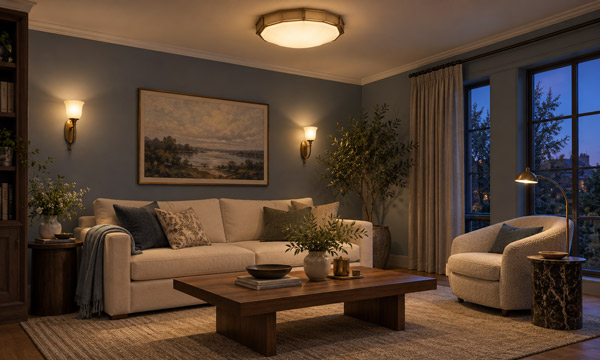
An Art Deco flush mount ceiling light, wall sconces, and a reading lamp create layers of warm illumination throughout this inviting living room.
Living Room: Build a Relationship With the Seating Area
Position and scale should make sense in relation to the main seating group.
In a large or irregular room, the architectural center and the furniture arrangement may suggest different locations. Consider the intended layout before finalizing the installation.
Add light at another height so the ceiling fixture does not carry the whole evening atmosphere. Well-chosen wall sconces for the living room can repeat a metal finish or curved detail while illuminating a different part of the space.
Bedroom: Style for the View From the Pillow
The underside of the light becomes an important decorative surface in a bedroom.
Choose a diffuser and frame that remain comfortable to look toward from the bed. A subtle stepped edge may provide enough character when the room already has a detailed headboard.
Keep nearby bedside lighting visually related through one feature, such as finish or shape. The ceiling light and bedside lamps can have different silhouettes.
Entryway: Think About the Next Room
An entryway ceiling light is often seen together with fixtures beyond it.
Stand at the front door and check the whole view. If several lights are visible, consider how their sizes and levels of detail relate. A strong entry fixture can work well with a quieter light farther into the home.
A mirror may help establish another connection, but check what it reflects. The reflection becomes part of the composition.
Dining Room: Give the Table a Clear Setting
A flush mount can suit a dining room where a low ceiling makes a hanging fixture difficult to accommodate.
Because the light remains close to the ceiling, use the surrounding composition to establish the dining area: the table, artwork, rug, and furniture placement all contribute.
A broad, relatively simple diffuser can work especially well when the table surface or chairs already provide substantial texture.
A Practical Styling Sequence
Use this order to keep individual choices connected:
- Identify the room’s main view. Start at the doorway and locate the furniture grouping the light should relate to.
- Choose the fixture’s strongest feature. Decide whether geometry, glass, or metal finish will lead the design.
- Test width and projection. Check the outline from standing, seated, and reclining positions where relevant.
- Repeat selected details. Connect one shape and one material to pieces in the room.
- Evaluate the evening result. Check the fixture alongside the other lights and the room’s actual finishes.
This sequence also makes it easier to decide what the room needs next. Sometimes the missing connection is a small furniture detail or a different lampshade.
FAQs
1. Can I Use LED Bulbs in an Art Deco Flush Mount Ceiling Light?
Usually, if the fixture has replaceable bulbs and the replacements meet its requirements. Check the base, voltage, physical dimensions, and maximum permitted wattage. For a fully enclosed shade, select bulbs specifically rated for enclosed use.
The requirements for using LED bulbs in existing fixtures still apply to decorative lights. A fixture with an integrated LED module requires its specified replacement or servicing method.
2. Why Does My Art Deco Ceiling Light Flicker When Dimmed?
Common causes include an incompatible dimmer, a lamp or driver that does not support dimming, or a setting below the combination’s stable operating range.
When investigating lights that flicker on a dimmer, begin with the fixture’s supported dimming method and the manufacturer’s compatibility information. Persistent flickering can also have other causes, so have an electrician assess it if compatibility checks do not resolve the problem.
3. Can an Art Deco Flush Mount Be Used in a Bathroom?
Yes, provided the specific fixture is suitable for its intended location. Decorative style and a glass shade do not establish moisture protection.
Understanding damp-location and wet-location ratings helps distinguish exposure to condensation from exposure to splashing or flowing water. Wet locations require appropriately marked fixtures; the exact bathroom position must also satisfy installation instructions and applicable local requirements.
4. Can I Install an Art Deco Flush Mount on a Sloped Ceiling?
Only when the specific model supports that installation. Check its stated slope compatibility, permitted mounting arrangement, and any required accessories.
Also consider the appearance: a flush mount may follow the angle of the ceiling, changing how its frame and diffuser look from below. Confirm both the installation requirements and the resulting orientation before purchasing.
5. How Do I Clean the Glass and Metal Without Damaging the Finish?
Switch off the power and let the fixture cool. Follow its care instructions, beginning with gentle dusting using a soft, dry cloth.
Use liquid cleaners only where the manufacturer permits them, and keep moisture away from electrical components. Treat plated metal, lacquered finishes, decorative glass, and intentionally aged surfaces according to their specific instructions. Abrasive polishing can alter a finish or remove patina that is part of the design.