

Table of Contents
- Wall Sconce Height at a Glance
- First, Decide What the Sconce Needs to Illuminate
- Living Room and Dining Room Sconce Height
- Bathroom Sconce Height Beside a Mirror
- Bedside Sconce Height
- Outdoor Sconce Height Beside a Front Door
- Hallways and Staircases Need a Clearance Check
- Light Direction Changes the Best Mounting Position
- Mark Three Heights Before Positioning the Electrical Box
- Test the Position Before Drilling
- FAQs
Most decorative wall sconces should be mounted with the center of the fixture approximately 60–66 inches (152–168 cm) above the finished floor. This is a useful starting point for living rooms, dining rooms, and many hallways. Bedside reading lights, bathroom sconces, and fixtures beside stairs need adjustments for how people use the space.
The measurement also needs a clear reference point. The center of the light fixture, the center of its backplate, and the center of the electrical box can sit at different heights.
A reliable installation plan considers three things together: where the fixture looks balanced, where its light reaches, and where its mounting connection actually belongs.
Wall Sconce Height at a Glance
Use these positions to begin planning, then refine them around the fixture’s dimensions and the people using the room.
| Location | Starting height above the finished floor | Measurement reference |
|---|---|---|
| Living room or dining room | 60–66 inches / 152–168 cm | Center of the fixture |
| Larger hallway or tall entryway | Consider 66–72 inches / 168–183 cm | Center of the fixture; check the mounting offset |
| Beside a bathroom mirror | Approximately 60–65 inches / 152–165 cm | Center of the backplate, adjusted for the light source and users |
| Beside a bed or reading chair | Approximately 48–60 inches / 122–152 cm | Initial fixture position, refined from a seated position |
| Beside an exterior entrance | Approximately 66 inches / 168 cm | Center of the fixture above the finished landing |
| Along a staircase | Set individually for the stair geometry | Height above the nearby walking surface |
These are design guidelines. The fixture’s installation instructions and applicable clearance requirements determine the final installation.
First, Decide What the Sconce Needs to Illuminate
A fixture used to soften a living room needs a different position from one used for shaving, reading, or navigating stairs.
Before choosing a height, identify its main job:
- Ambient lighting: Spread comfortable light across the room or surrounding surfaces.
- Task lighting: Put useful light on a face, book, or work area.
- Accent lighting: Emphasize artwork, wall texture, or architectural details.
- Circulation lighting: Help people see routes, level changes, and obstacles.
This decision can prevent a common installation problem: placing every sconce along the same horizontal line even though the lights serve different purposes.
A bedside reading light and a decorative hallway sconce can work better at different heights within the same home.
Living Room and Dining Room Sconce Height
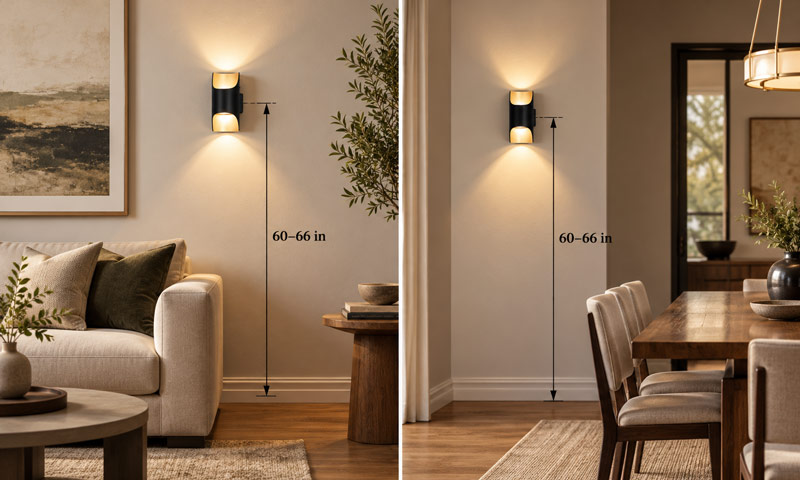
For general decorative lighting, begin with the fixture center around 60–66 inches above the finished floor.
Then evaluate the position from the seating people actually use. A fixture that looks comfortable while standing may expose its bulb when viewed from a low sofa.
When positioning wall sconces for a living room, consider the shade opening, projection from the wall, and relationship to nearby furniture. Around dining tables, check the view from every seat, especially those facing the fixture directly.
If the bulb or LED source appears harsh from a normal seating position, investigate the fixture’s shielding and shade design before committing to a different mounting height.
Adjusting for High Ceilings
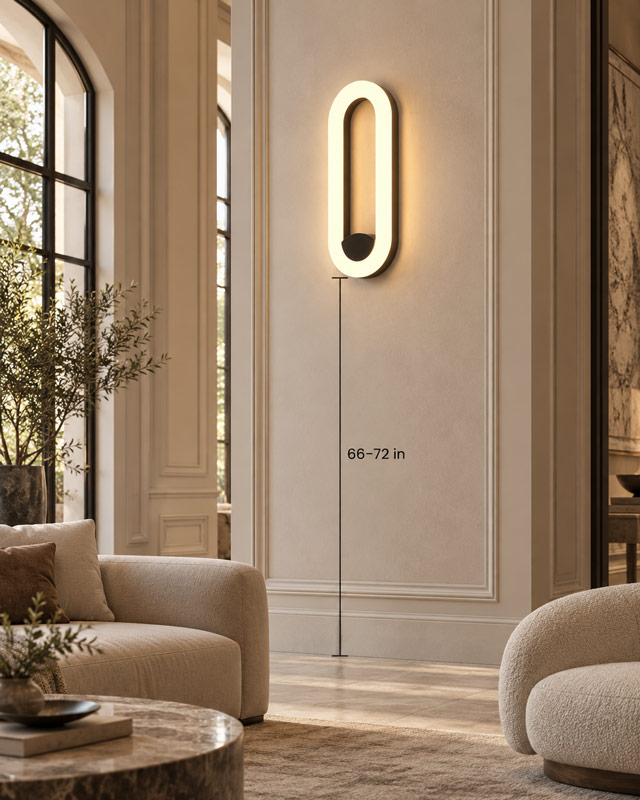
Taller rooms can accommodate higher ambient sconces. A position around 66–72 inches may suit a large hallway or vaulted living space, depending on the fixture and surrounding architecture.
Fixture size deserves equal attention. A small sconce placed high on a large wall can still look undersized. Consider a taller or more substantial design when the wall needs greater visual presence.
For a room with a high ceiling and low seating, assess both views separately: the overall wall composition from the entrance and the exposed light source from the sofa.
Bathroom Sconce Height Beside a Mirror
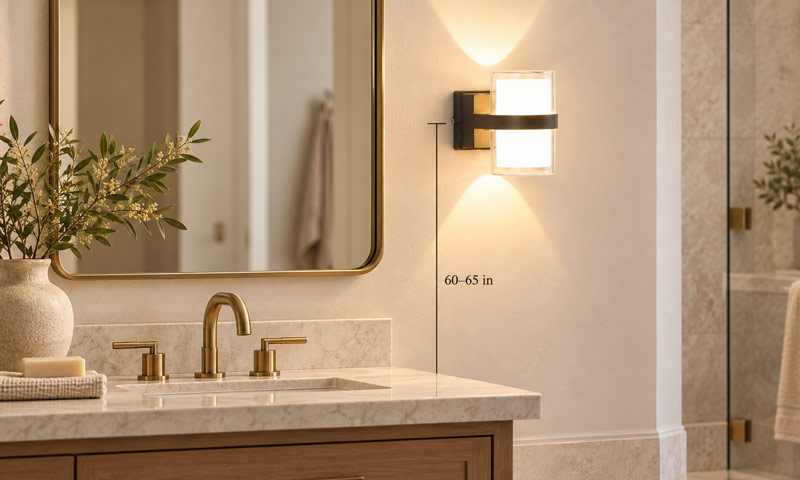
A common starting position for sconces flanking a bathroom mirror is 60–65 inches from the floor to the center of the backplate. The goal is to bring useful illumination close to face height.
Check where the glowing portion of the fixture sits relative to that backplate. A long arm, hanging shade, or tall decorative stem can move the light source considerably.
For a shared bathroom, test the position with the regular users. A vertical diffused light can be helpful when their eye heights differ because the illuminated surface extends across a broader vertical area.
Avoid choosing side-sconce height solely to match the top of the mirror. That alignment can move the light above the area where it is most useful.
If the fixture must sit above the mirror, plan its position around the mirror height, shade dimensions, cabinet opening, and required clearances. Check facial shadows during the lighting review, since illumination from above produces a different result from light arriving at both sides.
Bedside Sconce Height
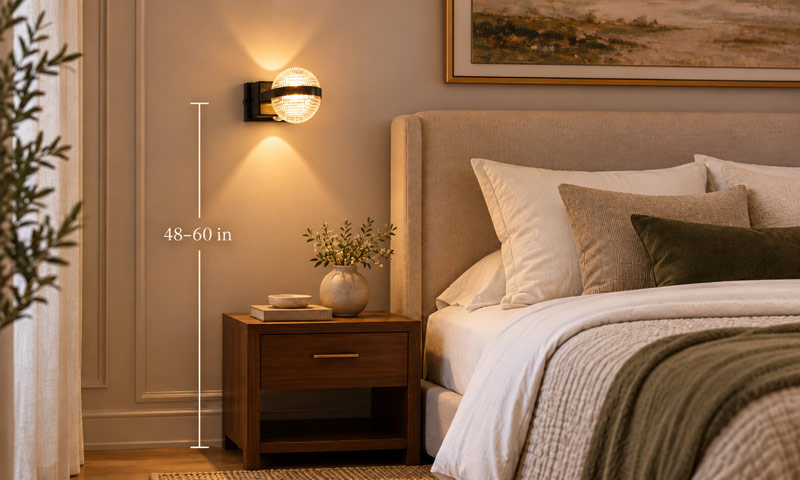
For bedside lighting, a broad planning range is 48–60 inches above the floor, followed by adjustment from the actual seated position.
Put the mattress, pillows, and headboard in their intended positions before marking the wall. Sit as you normally would while reading.
Check that:
- The light reaches the page comfortably.
- The shade shields the source from your eyes.
- The switch is easy to reach.
- An adjustable arm can move through its intended range.
Mattress height can change the result substantially. A position that works beside a low platform bed may feel awkward beside a taller bed.
For a shaded reading sconce, the lower edge of the shade can be assessed around seated shoulder height, with the final position determined by its beam and shielding.
Outdoor Sconce Height Beside a Front Door
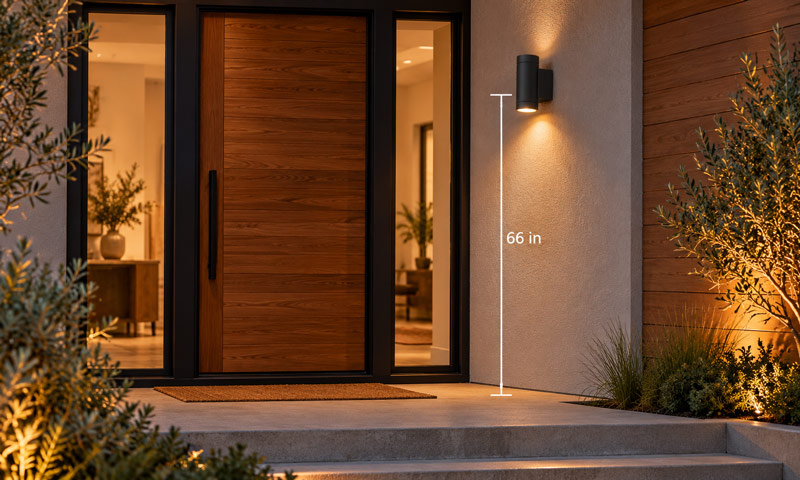
For entrance sconces, approximately 66 inches from the finished landing to the center of the fixture is a practical starting point.
Measure from the surface where someone stands at the door. A raised porch or landing changes that reference.
For example, if the landing is 12 inches above the approach path, a fixture center measured 66 inches from the path would sit only 54 inches above the landing.
When planning front-door entrance lighting, assess the fixture from three positions: approaching the entrance, standing at the handle, and stepping back down.
The chosen position should help illuminate the lock and threshold while keeping the bright source comfortable to view. Shielding and careful downward aiming help keep outdoor light within the area that needs it.
A useful design review therefore includes both a daytime check of the fixture’s proportions and an evening check of the light it produces.
Hallways and Staircases Need a Clearance Check
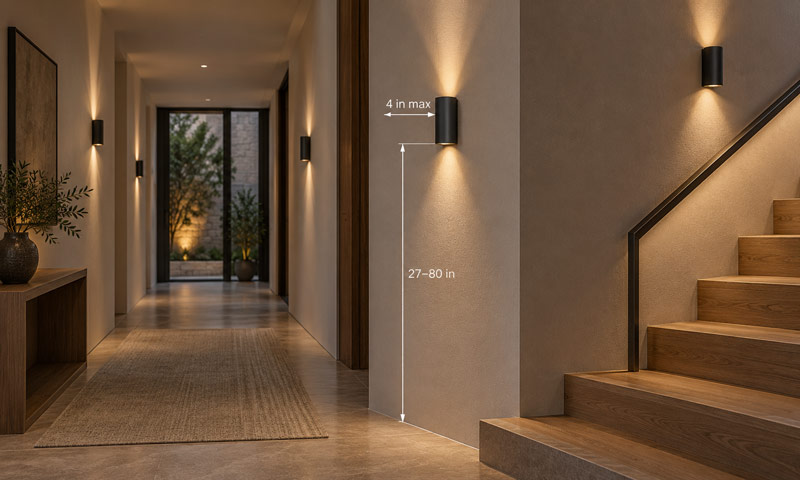
In hallways, mounting height and fixture projection work together. A deep shade or projecting arm can interfere with movement even when the fixture center follows a conventional height.
Where U.S. accessibility standards apply, wall-mounted objects with leading edges more than 27 inches and no more than 80 inches above the floor are generally limited to a 4-inch projection into circulation paths. Required route widths must also remain clear.
For stairs, reference the walking surface near each fixture. Measuring every light from the lower landing can produce inconsistent clearances as the staircase rises.
Check the view while ascending and descending. A light source hidden on the way up may become directly visible on the way down.
Where decorative sconces leave tread edges or landings poorly illuminated, dedicated stair lighting can provide additional light close to those surfaces.
Light Direction Changes the Best Mounting Position
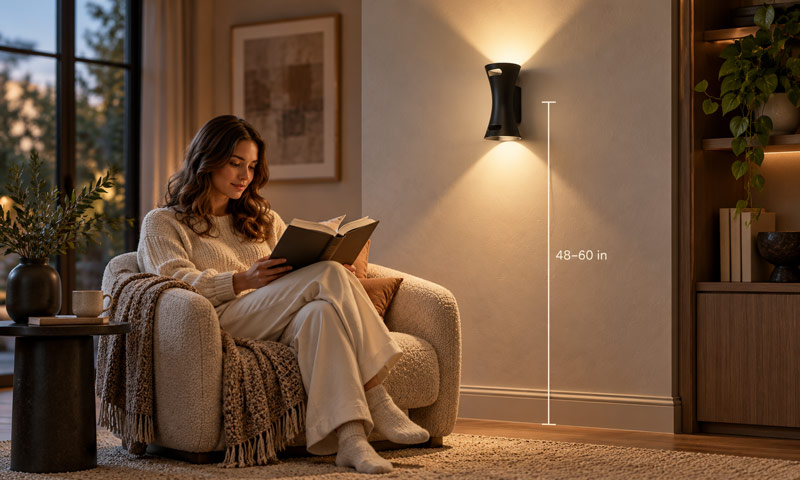
The relationship between uplighting and downlighting matters because mounting height changes where the beam meets the surrounding surfaces.
An uplight placed close to the ceiling may create a concentrated bright patch. Moving it lower can give the beam more room to spread, depending on its optics.
A downward-facing reading light needs a position that allows it to reach the page while its shade shields the source.
An up-and-down fixture needs enough wall space in both directions for its intended pattern. Nearby shelves, ceilings, and trim can interrupt that pattern.
For decorative lighting, assess the illuminated wall as part of the installation. Two fixtures with identical dimensions can produce very different results at the same height.
Mark Three Heights Before Positioning the Electrical Box
One of the most useful improvements to a sconce plan is to record three separate measurements:
- Fixture center: The midpoint between the fixture’s overall top and bottom.
- Light-source position: The location of the bulb, diffuser, or shade opening that affects illumination and glare.
- Junction-box center: The electrical connection position required by the mounting drawing.
These points may align on a compact, symmetrical fixture. On a tall or offset design, they may be several inches apart.
A Worked Example
Suppose a sconce is 18 inches tall, and you want its overall center 66 inches above the floor. Its installation drawing shows that the junction-box center sits 3 inches below the fixture center.
The planned positions would be:
| Reference point | Height above the finished floor |
|---|---|
| Top of fixture | 75 inches |
| Center of fixture | 66 inches |
| Bottom of fixture | 57 inches |
| Center of junction box | 63 inches |
If the box were placed at 66 inches without accounting for that offset, the fixture center would end up at 69 inches.
This example illustrates why a note reading “sconce height: 66 inches” is incomplete. A clearer instruction identifies the intended fixture position and the corresponding box position.
Use the selected product’s actual mounting diagram for this calculation.
Test the Position Before Drilling
A practical way to evaluate the proposed height is to check it in four stages.
Start with a full-size outline. Tape a paper template to the wall at the proposed position. Mark the fixture’s top, bottom, center, and backplate. Include nearby mirrors, furniture, and trim in the assessment.
Check the projection. A flat outline shows proportions but cannot reveal how far a shade or arm enters the space. Confirm the actual depth wherever people walk, sit, or stand up.
Review normal sightlines. Look from the room entrance, the main seat, and any adjacent level changes. For a shared space, include users of different heights.
Assess a working sample when possible. An unlit template cannot reveal glare, facial shadows, or beam spread. Use a safely powered demonstration to evaluate these before finalizing the installation.
Once the position works, record the finished-floor reference, fixture location, mounting offset, and nearby clearances on the installation drawing. Have the electrical connection and mounting requirements confirmed before rough-in.
FAQs
1. How far apart should wall sconces be?
For hallway lighting, 6–8 feet (1.8–2.4 m) is one common starting recommendation. Larger spaces and fixtures with wider distributions may suit greater spacing. Review the actual light coverage so the arrangement provides useful illumination between fixtures.
2. Can you install wall sconces without hardwiring?
Yes. Purpose-made plug-in sconces connect to a nearby outlet and attach to the wall using their specified mounting hardware. Plan the cord route and switch access before installation, and choose a model designed for plug-in use.
3. What color temperature is best for wall sconces?
For living rooms, bedrooms, and dining areas, 2700–3000K is a useful starting range for a warm appearance. Coordinate the sconces with nearby lighting so the room feels visually consistent. Color temperature describes the appearance of the light; it does not indicate brightness.
4. Are all LED wall sconces dimmable?
No. Check whether the replaceable bulb or integrated LED system supports dimming and which controls it requires. The light source, driver, and dimmer must be compatible. Poor compatibility can cause flickering when using a dimmer switch, limited adjustment, or unexpected shutoff.
5. Is a damp-rated wall sconce suitable near a shower?
A damp-rated wall sconce is intended for moisture conditions such as humidity or condensation. Where water can splash or spray onto the fixture, a wet-location rating is needed. Confirm the product’s approved installation position and applicable bathroom requirements before selecting it.