
Table of Contents
- What makes a garden light look Craftsman?
- Choose fixtures by what you need to see
- Start the layout at the front door and work back to the street
- 1. Give the porch lantern a job at arm’s length
- 2. Space path lights around the walk people actually take
- 3. Walk down the steps as well as up them
- Choose the glass and the light color together
- Decide which metals should age visibly
- Light one garden detail from the porch chair
- A worked layout for a small Craftsman front garden
- FAQs
Carry a watering can out to the shed at dusk and try unlocking the door with your free hand. You may discover that the siding looks beautifully lit while your shoulder casts a shadow over the keyhole. The same thing can happen indoors. A bright ceiling fixture lights the top of every flowerpot, yet the handwritten label on the front of a drawer is almost impossible to read.
For most garden sheds, a good starting layout is a shielded light that reaches the latch and threshold, plus a broad interior light facing the shelves. If you spend time potting plants or repairing tools, give the bench its own light and switch. If the shed opens onto a seating area, add a softer light you can use after the work is done.
Where those lights go depends on a few things worth figuring out before you buy anything.
Choose a power source that fits the way you use your shed
A shed you visit for five minutes at a time has a different power requirement from one where you spend an evening dividing perennials. The length of a typical visit is often more useful than the floor area when choosing between battery, solar, and hardwired lighting.
| Power option | Where it works well | What to check |
|---|---|---|
| Removable rechargeable LED | A shaded shed, a rental, or occasional trips for tools | Look for the runtime on the brightness setting you’ll use. Make sure you can remove the light for charging without emptying a shelf. |
| Solar light with a separate panel | A shed without electricity that has a sunny roof edge, fence, or nearby wall | Check the panel cable length and how much winter sun reaches the proposed panel location. |
| Existing low-voltage landscape lighting | The path or exterior doorway near an existing lighting run | Confirm that the fixture matches the system voltage and AC or DC output, and that the transformer has capacity for the added load. |
| Hardwired lighting | Regular evening work, especially when several lights run together | Have a licensed electrician plan the supply and switching and check local permit requirements. |
When comparing solar-powered garden shed lights, put the advertised runtime in the context of a real evening. A 6-watt lamp uses about 1.5 watt-hours over three five-minute visits. The same lamp uses 9 watt-hours during one 90-minute potting session, before system losses. A separate panel gives you the freedom to put the lamp over the bench and the panel where it can recharge. Shade and shorter winter days can reduce the available runtime.
Lighting the path and entrance
1. Light the last turn in the path
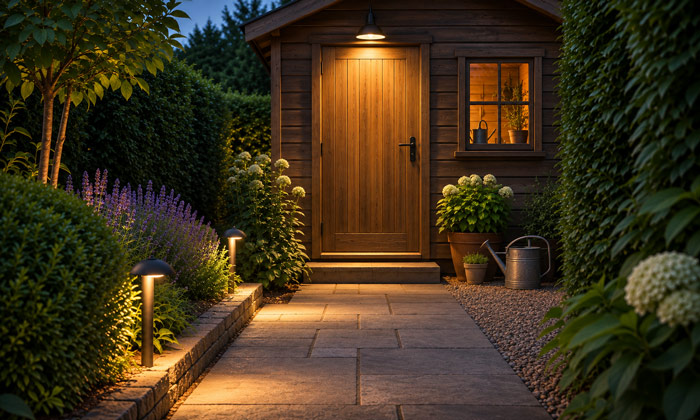
Wheel an empty garden cart from the house to the shed at dusk. Pay attention to where you slow down. It may be where gravel gives way to pavers, where the path bends around a bed, or where the front wheel meets the shed ramp. That spot is a good place to try the first path light.
Set a shielded fixture just outside the width used by the cart, with its beam falling across the change in surface. Then walk back toward the house. A ramp edge that stands out on the way in can disappear when viewed from the top.
If you use solar stakes, judge the spacing between solar path lights with the cart in front of you. If its tub blocks the entire pool of light, try moving one fixture to the other side of the path. That small adjustment can do more for visibility than adding another stake to a straight, level stretch.
2. Position the door light with the door open
For a single shed door, start by trying a downward-facing sconce on the latch side. Have someone hold a flashlight at the proposed mounting point while you work the lock. Open the door halfway, then all the way. Check that you can still see the handle, the threshold, and the place where you’ll put your foot while backing out with something heavy.
Double doors deserve particular attention. An open door can cover a wall fixture or swing into a projecting shade. A shallow surface-mounted light under the eave can leave both doors free while illuminating the landing. Test the position with the taller person in the household standing at the handle. Their head and shoulders will show you exactly where the shadow falls.
Choose a fixture listed for wet locations wherever wind-driven rain can reach it. A sheltered area that develops condensation needs a fixture rated for at least damp locations. The water marks left by the last storm can tell you more about the site than the depth of the overhang alone.
Lighting the shelves and potting bench
3. Aim the interior light at the fronts of the shelves
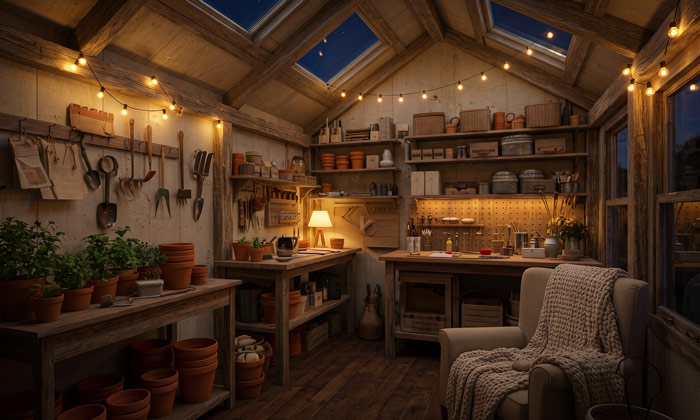
In a narrow shed, the middle of the ceiling often sits directly behind you when you face the storage wall. Your back intercepts the light just as you lean in to find a hose washer or read a packet.
Try a diffused linear fixture running parallel to the shelf fronts, slightly out into the aisle. From there, light can reach drawer labels, bin handles, and the tools hanging below. For one particularly deep shelf, a short light tucked behind its front lip can reach the contents beneath it. Sit or crouch to check that the lip also hides the bare LEDs from view.
For dark tools on dark timber, try slipping a piece of pale, matte board behind the hooks before buying a second fixture. A black hand fork or pair of pruners becomes much easier to recognize when you can see its outline.
4. Set up the bench light with a full pot on the worktop
An empty potting bench is a poor lighting test. Put your tallest everyday pot in its usual spot, set a plant label beside it, and write on the label. You’ll see immediately whether the pot, your wrist, or an overhead shelf blocks the light.
A diffused bar spanning most of the working area gives you room to move a tray along the bench. The underside of a shelf above the bench is often a convenient mounting point. Try the bar near the front edge and adjust its angle until you can see both the writing surface and the inside of the pot. If you prefer an adjustable lamp, start on the left for a right-handed gardener or on the right for a left-handed gardener.
Color quality matters here, too. If you compare flower colors, painted finishes, or subtle yellowing on leaves, look for a color rendering index of 90 or higher. A broad diffuser also helps when a glossy seed packet catches the reflection of individual LEDs.
5. Let daylight reach the bench from the side
Before adding a roof window, try the shed on a bright afternoon with the door closed. A tall shelving unit, hanging basket, or stack of empty nursery pots may be blocking the best daylight you already have.
Where the layout allows, put the short end of the workbench against the window wall. Daylight then travels across the bench from the side as you work. Keep tall storage on a solid wall and reserve the space immediately beside the window for low items. A pale, matte finish on the window recess can help carry light into a dark timber interior.
This change is especially worthwhile in a small shed. You gain a usable daytime work surface while keeping the long stretch of wall above the bench free for tools.
Evening lighting for the garden and porch
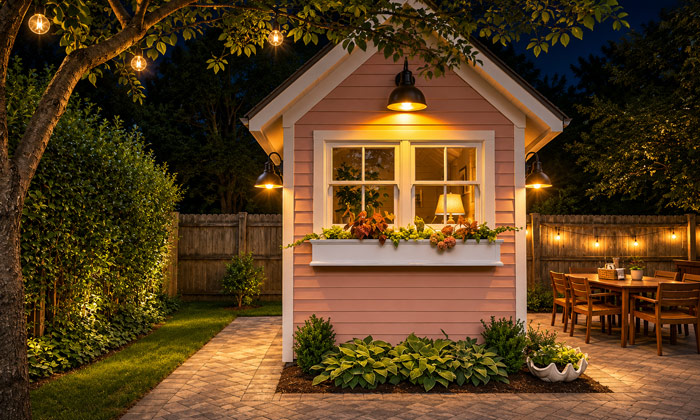
6. Turn one garden-facing window into a lantern
If you can see the shed from the house, a single softly lit window can give it a presence in the evening garden. Put a small, warm light inside, below the window’s sightline, and aim it toward a group of terracotta pots or a pale backboard. From the patio, you see the color and shape of the objects through the glass.
Make the final adjustment from the place where you actually sit. If a bright point reflects in the window, move the lamp sideways or lower it behind the sill. Give this light its own timer or switch so you can enjoy the view with the work lights off.
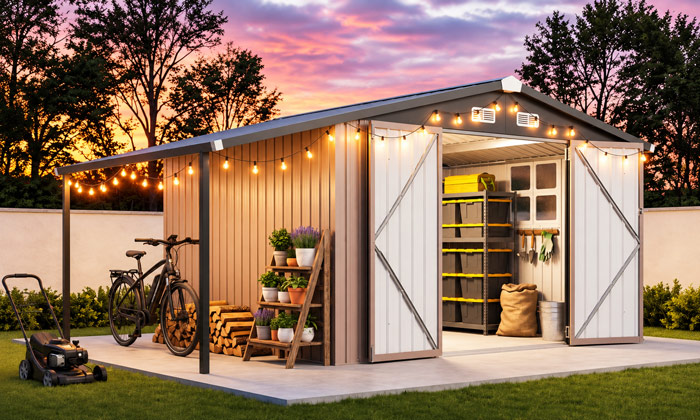
7. Choose porch lighting from a seated position
A string of lights that looks comfortable while you’re standing can put a row of bright bulbs directly in your eyes once you sit down. Bring the chairs into position before deciding where anything should hang.
On a covered shed porch, try a short run of outdoor-rated string lights tucked along the inner face of a beam. For a narrow bench under a shallow overhang, a shaded outdoor table lantern may be all the seating area needs. Around 2700 K or warmer is a good starting point for a soft exterior light. Keep the output low enough that you can still see the garden beyond the porch.
8. Give the entrance and workbench different controls
A motion light earns its place when you arrive carrying a bag of potting mix. At the bench, you may spend several minutes threading twine or writing labels with very little movement. Put the entrance on a sensor if that suits your routine, and give the work light a manual switch you can reach just inside the door.
Test the entrance timer while doing the slowest part of a normal visit. Unlock the door, bring the cart through, turn it around, and close the latch. Set the delay long enough to finish that sequence. If the sensor also sees a public sidewalk or a frequently used patio, narrow its detection area toward the approach to the shed.
A two-light layout for a small shed without electricity
Consider a 6-by-8-foot shed under mature trees, with shelves on the left and a fold-down potting table at the back. The roof gets little useful sun. A shielded, battery-powered motion light beside the latch handles arrivals. Inside, a removable rechargeable bar can serve both work areas if you choose one designed for more than one mounting cradle.
Put the first cradle where the bar lights the shelf fronts and the second above the fold-down table. On an ordinary evening, the light stays by the shelves. When you unfold the table for a longer job, move the bar with you. A second interior fixture becomes worth buying when someone needs to find tools while the bench is in use. Until then, the second mounting position solves the problem with one light to recharge.
FAQs
1. How much does it cost to install Craftsman garden lighting?
For a rough U.S. starting point, general landscape-lighting estimates run about $80 to $300 per fixture installed. Custom metalwork, art glass, or a new masonry mounting point can take a Craftsman installation above that range. When comparing the cost to install landscape lighting, ask for the decorative fixtures, power equipment, wiring, and labor to be priced separately. That makes it easier to see what changes if you keep an existing porch lantern or simplify the path lights.
2. Will solar Craftsman path lights work beneath mature trees?
They can work where the panel receives enough daylight, but dense canopy makes evening runtime less predictable. Check where the panel will sit during the leafiest part of the year. If the lantern belongs in shade, a fixture with a separate panel lets you place the collector in a sunnier spot. For a route you rely on every evening, test how long the solar lights charge in shade at that location before buying a full set.
3. Can I replace a broken glass panel in a Craftsman garden lantern?
Often, yes. Look for a model number and ask whether an individual pane or a complete panel assembly is available. A flat pane held by removable retainers is a different repair from a sealed or bonded assembly. Give the supplier the panel dimensions, thickness, edge shape, and a daylight photo of an intact pane. With seeded or opalescent glass, request a sample if possible. Two panes that look alike on a white tabletop can differ noticeably when the lantern is lit.
4. Is a motion sensor or dusk-to-dawn control better for a garden gate?
Choose according to how the gate is used. A dusk-sensing control paired with a timer suits a front gate that receives steady evening foot traffic. A motion sensor suits a side gate used occasionally after the rest of the garden lights go off. With motion control, approach from both directions during setup. The light should come on before you reach the latch, and someone walking past on the public sidewalk should be able to continue without triggering it.
5. How much electricity do LED garden lights use each month?
Use the system’s actual input wattage, its nightly operating hours, and your electricity rate. For example, a system drawing 30 watts at the outlet for five hours each night uses 4.5 kWh in a 30-day month. At an illustrative rate of $0.18 per kWh, that comes to $0.81 per month. If your transformer is labeled “100W,” check whether that figure describes its capacity. A transformer sized to support 100 watts can be serving a much smaller lighting load.
