
How Solar Lamps Work
1. Not Enough Sunlight During the Day
2. The Solar Panel Is Dirty, Cloudy, or Covered
3. The Battery Is Worn Out
4. The On/Off Switch Is Off
5. They Think It’s Not Night Yet
6. Water Intrusion and Condensation
7. Corroded Battery Contacts and Loose Wiring
8. Cold Weather and Heat Can Both Reduce Performance
9. The LED or Circuitry Has Failed
A Simple Troubleshooting Routine You Can Actually Follow
How to Make Solar Garden Lights Work Better Long-Term
FAQs
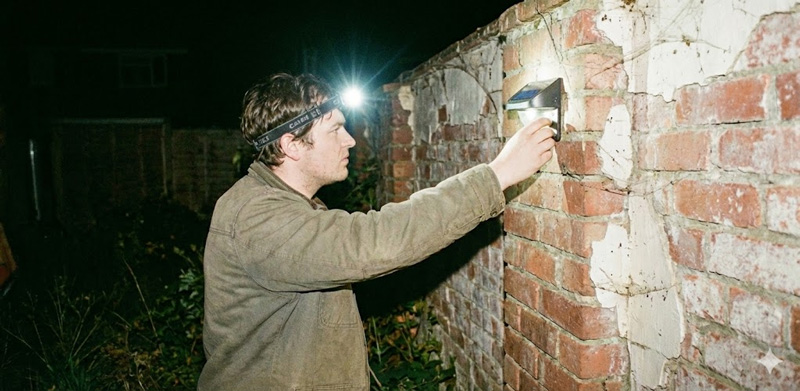
Solar lamps offer the concept of "set it and forget it" in the world of embodiment for light. Strategically place the lights along walkways, place them among the flowers, and enjoy the soft nightlight effect when waking each morning—with no power cord, switch, or additional energy costs. But what if the solar lamps fail to come on after dusk (or flicker for a brief moment and die)? Well, the good news here is this: the overwhelming "broken" solar lamps that refuse to turn on (or flicker for a brief moment before ceasing to work) aren’t necessarily all that broken after all.
How Solar Lamps Work
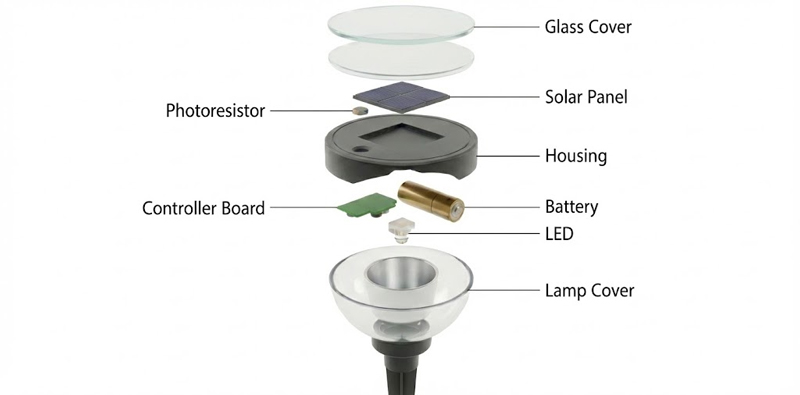
A simple solar lamp consists of the following:
-
It should be noted that the first component is the solar panel itself. This is the part of the system which
-
That energy is stored in a rechargeable battery.
-
At night, an LED uses the stored power to give illumination.
-
A light sensor, such as a small photodiode, detects the absence of light, triggering the light to turn on.
If the lamp does not light up at night, then either one of four elements is not pulling its weight: it is not collecting enough energy, it doesn't store it properly, it doesn't turn on at the right time, or it does not use that energy efficiently.
Seasonal changes make it worse
Your solar lamps might work perfectly in summer and fail in winter. Shorter days, a lower sun angle, and more cloud cover can reduce charge time enough that the batteries never reach usable levels.w.
1. Not Enough Sunlight During the Day
This is the most common reason for the failure of solar lamps at night, even if the day appears clear with good weather.
Shade is sneakier than you think
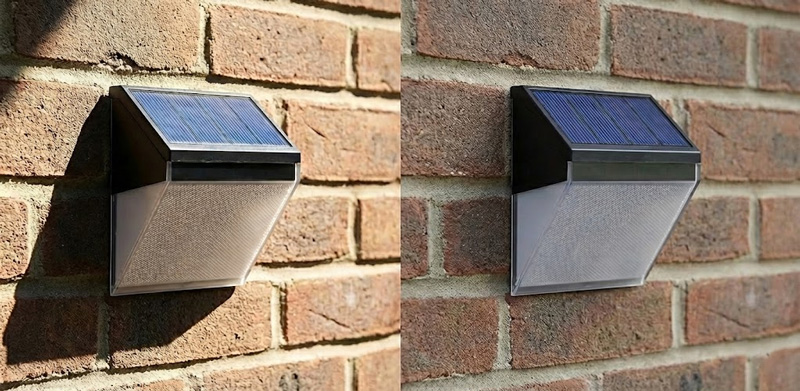
Figure 1. Model: LM-SL-904.
A solar panel needs several hours of strong, direct light. If your garden lights are placed under trees, next to tall shrubs, near a fence casting shadows, or on the north side of a structure, they may be charging at a fraction of their potential. Even partial shade—say, moving shadows from branches—can reduce charging dramatically.
Seasonal changes make it worse
Your solar lamps might work perfectly in summer and fail in winter. Shorter days, a lower sun angle, and more cloud cover can reduce charge time enough that the batteries never reach usable levels.
Move one or two lamps to the sunniest spot you have—ideally where they get midday sun—and compare performance for 2–3 nights. If the “test lamp” works, the problem is location, not the lamp.
2. The Solar Panel Is Dirty, Cloudy, or Covered
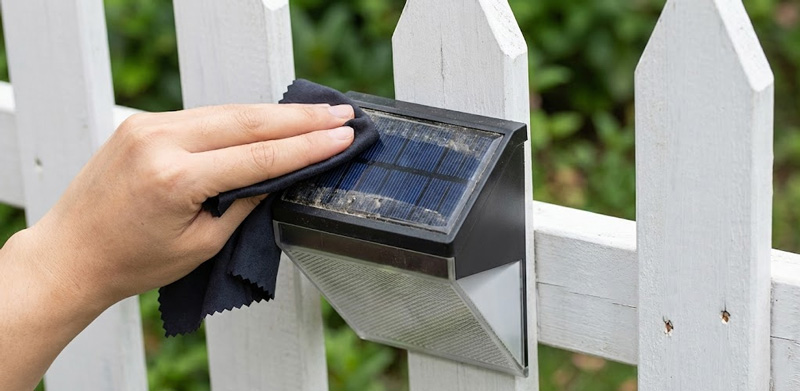
Solar garden lights rest close to the ground, so they accumulate dust, pollen, water spots, bird deposits, and a layer of garden soil. Even the thinnest layer reduces charging rates by more than most people think.
With time, some light panels become cloudy as a result of exposure to UV light, minute scratches on the surface, or old plastic materials. They may look okay at first sight; however, a foggy light panel won’t transmit light properly.
See alsol: How to Clean Garden Lights?
Gently clean the panel using a water-soaked microfiber cloth with a small amount of soap on it. However, if the panel is plastic-based and its transparency is greatly reduced, then polishing products may give a slight respite, but only a replacement of the panel/entire head unit would ultimately work depending on the model.
3. The Battery Is Worn Out
Rechargeable batteries do not last forever. Most of the so-called solar-powered lighting products are made with small NiMH or NiCd batteries; better versions use lithium batteries. In fact, the cycling through charges of cells and the exposure of batteries to temperature fluctuations lead to a reduction of the battery cells’ capacity.
See also: Solar Powered Garden Lights Battery Life: How Long Does It Last?
In fact, even when a battery is spent, it can retain some kind of charge—and certainly not a sufficient amount to illuminate a light all night long. This is why you may notice the light decrease more quickly once they are on.
A common misconception
A lot of people would say that if the light turns on, then everything is fine with the battery. Not true. Most likely, the opposite is true, that is, when the battery is nearly drained, an LED might flicker for a brief moment, but the light would not remain steady.
Solar garden lights that have batteries that can be replaced can have their batteries substituted for new ones of a similar type and voltage rating. Ensure that it is a rechargeable battery and not an ordinary alkaline battery cell. Check that it has the right size for your lighting needs, whether it’s for AA or AAA batteries for solar stake lights, for example. Check your battery compartment for corrosion and clean it if there’s any accumulation (see below for more on this).
4. The On/Off Switch Is Off
This is always the case - especially after a storage period, during the transportation of the product, or after the battery change - where many solar-powered lamps come with a micro-switch that is often super-sensitive or doesn’t quite click into place. If this is not on, the flashlight will charge without turning on at night.
Now, the lamp head should be turned open, and the switch should be turned firmly to the ON position. A loose switch may turn out to be faulty, a phenomenon that can occur in low-quality solar garden lights.
5. They Think It’s Not Night Yet
Most solar lamps rely on their light sensor to sense when it's dark. If nearby artificial glow-porch lanterns, street lighting, landscape spotlights, even bright windows-hits that sensor, it may never wake up. Your solar garden lights might be "working perfectly" in every other sense, yet stubbornly stay off because they're tricked by the surroundings.
The effect can be subtle. A light placed near white gravel, pale walls, or shiny patio furniture can reflect just enough light at dusk to push off activation a bit longer.
Quick test:
Try covering the solar panel completely with your hand or a cloth. Many solar lamps use the panel itself as the light sensor. If the lamp springs to life the moment you cover it, the sensor is fine-the issue is that the surrounding light is simply too bright.
Move lights farther away from areas that catch the nighttime illumination. If you want a bright entry, choose higher-output solar lamps or opt for motion-activated models instead of depending on little path lights.
6. Water Intrusion and Condensation

Figure 2. Model: LM-SP04.
Solar lamps that sit outside tend to advertise their ability to handle the elements. But while such lights may be advertised as being “weather-resistant,” that's not the same thing as waterproof. Within the first month of buying a solar lamp, if it rains copiously, gets sprayed by sprinklers, or goes through freeze/thaw cycles, the water seeps inside.
Solar-powered garden lights near sprinkler systems are particularly vulnerable. Extended exposure to water can also lead to the introduction of minerals that will cause the contacting points to flake off.
Switch on the lamp to observe if there is moisture. Allow it to dry inside until it is totally dried out. This will take a day or two. Remove any corrosion you observe in the form of white powder or greenning on metallic components. Now tighten the joints firmly after drying. Using outdoor silicone on the joints can be of great assistance. Do not seal battery compartments tightly.
7. Corroded Battery Contacts and Loose Wiring
Sometimes a functioning battery will not light a bulb if it has corroded contact points or is not pressing well on them. This problem is very common with older solar-powered garden lights that may have developed exposure to water and fertilizer with age.
Corrosion is like a nagging barrier where the electric current cannot move fluently, making the LED display flicker, dim, or not work at all.
Check the terminals and spring contacts of the battery. If you spot any corrosion, you can remove it with a cotton bud soaked with a few drops of white vinegar to deal with alkaline marks or isopropyl alcohol to remove any dirt. Just ensure that it is all dry before you replace it in the battery.
8. Cold Weather and Heat Can Both Reduce Performance
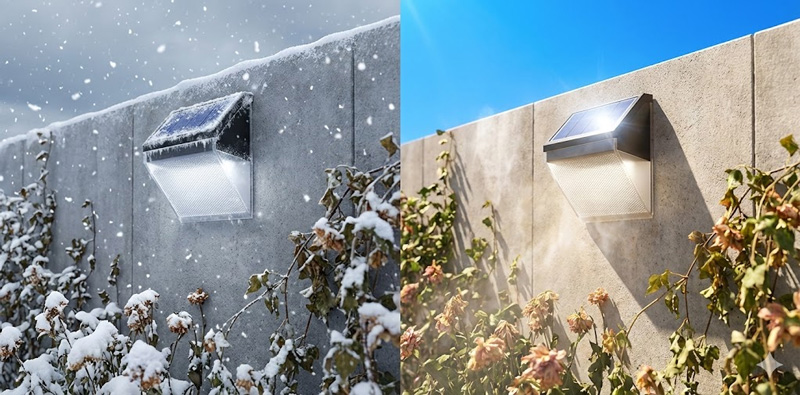
The functioning of batteries is also dependent on temperatures. Rechargeable batteries will offer lower power when it is cold, and in this scenario, the light may dim faster. For warm temperatures, rechargeable batteries will drain faster and result in a permanent loss of power with time.
Problems during winters for solar garden light systems include longer charging time and reduced output of the battery, which consequently affects light emission at night.
One can expect lower runtime values in colder periods of the year. One may consider purchasing better batteries that have larger capacity or solar-powered lamps that are designed to work in lower temperatures. For areas that are particularly cold, decorative solar lamps can be packed away in periods of extreme weather and brought out again in periods of favorable weather.
9. The LED or Circuitry Has Failed
But if you have already eliminated sunlight, cleanliness, sensor performance, and the battery, the potential culprit in your case could be a physical failure, such as a burned-out LED or a control board that has been affected by water or heat.
More affordable solar garden lights have a tendency to fail faster because they have poor-quality seals, thinner wires, and less protection on the circuit board.
By this point, the best course of action would be to replace the lamp, unless you have an upgraded model that was made with the intent to fix. Nevertheless, one last thing you could consider is the following: you could attempt to power the same battery with a different version of the same type of light. If the battery can power the other light, yet not this one, the malfunction is likely found in the head.
A Simple Troubleshooting Routine You Can Actually Follow
If you'd rather avoid pursuing every likely perpetrator, you can opt for this fast and easy routine:
-
Wipe the panel clean and ensure the switch is turned ON.
-
The sensor can be tested by covering it with the panel at dusk or in a darkroom to check its sensitivity.
-
Move the lamp to a location where it receives intense direct sunlight throughout the entire day.
-
Insert a new rechargeable battery of the same type.
-
Check for moisture or corrosion on the inside housing.
Trouble with solar garden lights is usually resolved by following steps 1 through 4.
How to Make Solar Garden Lights Work Better Long-Term
A few simple habits will keep the lamps dependable once your lamps are up and running:
-
Put placement first: choose spots according to how much sun they'll get, not by looking good. If a gorgeous angle sits in perpetual shade, it won't light up for you.
-
Regularly wipe the panels down, particularly during heavy pollen season or following a dust storm.
-
Replace rechargeable batteries every 1–3 years, depending on how good of a quality you purchased and what kind of climate you are in.
-
Sprinklers should not spray directly onto the heads.
Clear expectations set by the light type: tiny stake lights for accent lighting, not flooding a whole driveway the way wired fixtures would.
Solar lamps brighten up when made into mini solar power systems, rather than being normal lamps. If the lights fail to illuminate during the night, the solution isn’t much, as the culprit is always sunlight, sensing, or batteries. Now, the above-mentioned elements play an even more important role in solar-powered garden lights, where the energy-storage capacity is lower, as well as the environment.
If you are having problems with your solar lamps or if you have any concerns about how they work, we can be contacted. We have experts who can assist you in identifying the cause and who can give you the fastest possible solution.
FAQs
Why don’t my solar lights charge well behind a window, under a roof, or through glass?
Most solar-powered garden lights need direct outdoor sunlight for efficient charging.
House windows, patio covers, and some plastics can reduce or filter the wavelengths solar panels use most effectively, and indoor light levels are usually far too low.
Practical fix: Install the panel where it has open-sky exposure and can receive roughly 4–8 hours of sun per day. If the light must sit under an eave, choose a model with a remote/separate panel that can be placed in full sun.
Do brand-new solar lights need to be activated before first use?
Yes, many do.
Some lights ship with a battery pull-tab in the compartment to prevent drain during transport, and many also require switching the unit to “On” after unboxing.
Setup steps: Remove the pull-tab (if present), turn the switch on, and allow a full initial charge cycle in direct sunlight for one to two days before judging performance.
Why do my solar lamps turn on during the day or stay on in bright conditions?
This usually happens when the light sensor “thinks” it is nighttime.
The most common causes are a shaded or covered solar panel, a panel facing away from the sky, or long daytime shadows falling across the sensor area.
Sanity test: Put the panel in direct sun. If the light turns off, the sensor is likely working and placement is the problem. Re-aim the panel toward open sky and remove obstructions.
Can I upgrade to higher-capacity batteries or switch battery types?
You can sometimes use a higher-capacity replacement battery, but only when chemistry and voltage match what the light was designed for.
Switching chemistries (for example NiMH to Li-ion) can cause improper charging, shortened lifespan, or safety risks because the charger circuitry is tuned for a specific battery type.
Best practice: Match the original chemistry (NiMH, NiCd, or Li-ion), voltage, and size. Higher capacity is usually fine within the same chemistry, but avoid mixing different types.
Is it normal for solar lights to shut off early even when they’re working?
Yes. Many designs use power management to protect runtime and battery life.
Some lights start bright in early evening and then dim gradually, while others use an auto shutoff timer (often around 6–8 hours). Motion-activated lights may stay dim until triggered.
Best fix: Check for brightness modes (High/Low) and Timer/Motion settings. For longer runtime, use Low mode or choose a model with a larger panel and battery.