
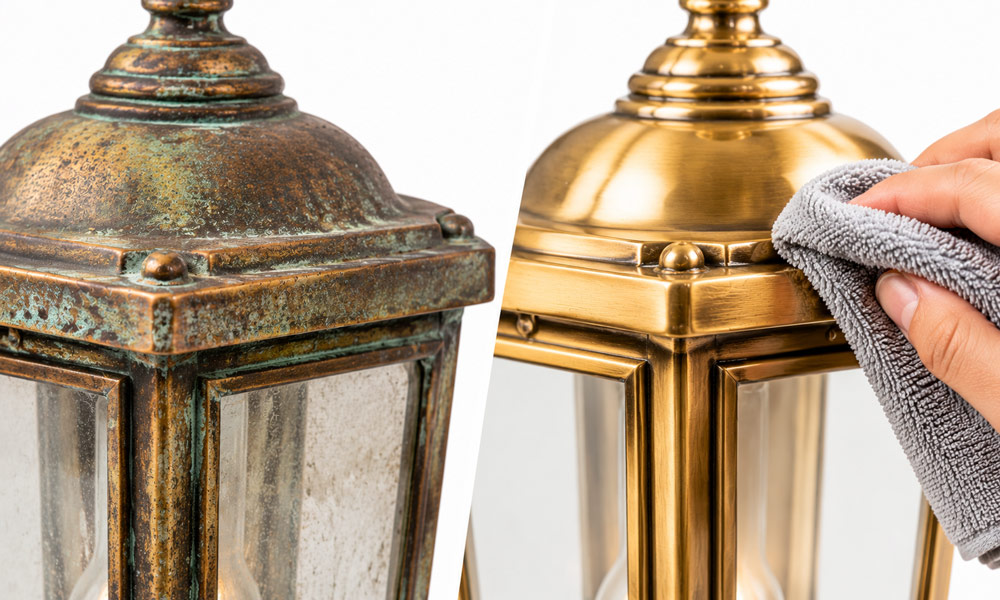
Table of Contents
To clean oxidized outdoor light fixtures, disconnect the power, wash away dirt with a mild detergent solution, and identify the metal and its surface finish before treating any remaining discoloration. Use an oxidation remover or polish only when it is suitable for that specific surface.
The most useful starting point is to establish which layer has changed: the dirt on the fixture, its protective finish, or the metal underneath. A cleaner that improves bare copper can damage a painted aluminum housing. A chalky coating may need finish repair even after the loose powder washes away.
This guide explains how to tell those conditions apart, clean each surface appropriately, and reduce the chance of the problem returning.
What Does Oxidation on Outdoor Light Fixtures Actually Look Like?
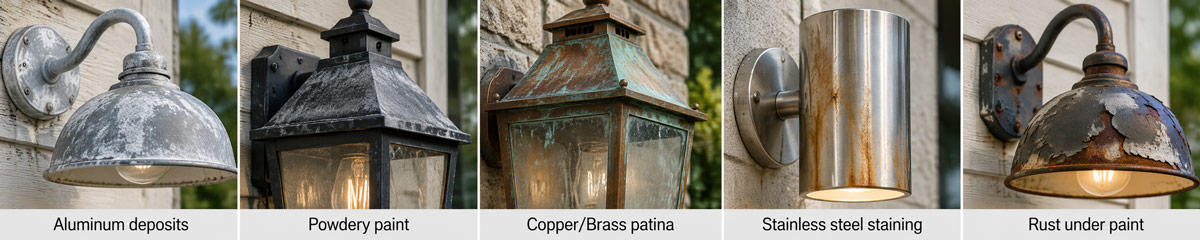
“Oxidation” is often used to describe almost any weathered outdoor light. In practice, several different conditions can produce a dull, powdery, or discolored surface.
| What you see | Possible explanation | What to establish before cleaning |
|---|---|---|
| White or gray deposits on aluminum | Corrosion products, mineral deposits, or deterioration of a surface coating | Whether the aluminum is bare, anodized, painted, or powder coated |
| Powder on a faded painted surface | Chalking caused by weathering of the coating | Whether the remaining coating is intact or beginning to fail |
| Brown, dark, or green areas on copper or brass | Tarnish, natural patina, an intentional aged finish, or active corrosion | Whether the finish is meant to remain polished or develop patina |
| Orange or reddish marks on stainless steel | Surface iron contamination or corrosion | Whether the marks are superficial or accompanied by pitting |
| Rust beneath lifting paint on steel | Corrosion underneath a damaged coating | Whether the housing and mounting points remain sound |
Color helps narrow the possibilities, but it cannot identify the problem by itself. For example, weathered paint can release a pale powder that resembles corrosion on the metal beneath it.
The difference between copper and stainless steel garden lights also matters here: preserving an established copper patina and removing rust staining from stainless steel require different maintenance decisions.
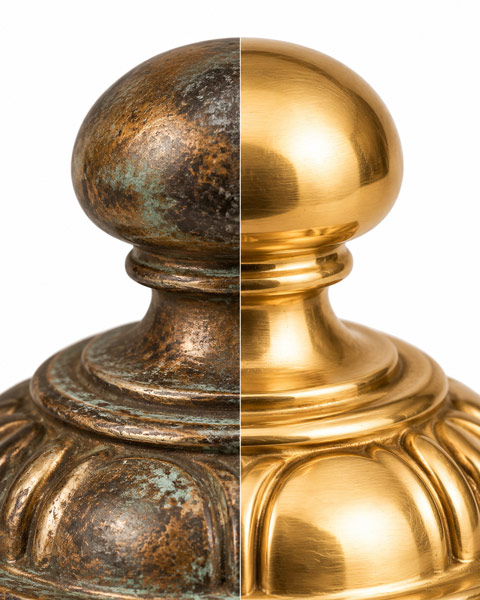
A close-up comparison of aged brass patina and a polished finish.
Should Every Discolored Surface Be Restored to a Shine?
Establish the intended appearance before polishing.
An aged brass lantern may be designed to darken. A matte aluminum housing should retain its matte texture. A plated fixture may have only a thin decorative surface that repeated polishing can wear through.
Polishing removes material as well as discoloration. On copper and brass, repeated abrasive polishing can gradually soften decorative details. If the original finish is uncertain, begin with cleaning and leave polishing until the material and finish are confirmed.
What You Need Before Starting
Prepare a small cleaning kit:
- Soft microfiber cloths, including a white cloth for inspecting residue.
- A mild, pH-neutral detergent suitable for the fixture’s finish.
- Lukewarm water and a separate supply of clean rinse water.
- A soft, nonabrasive brush for accessible grooves.
- A dry towel for removable covers and small parts.
- A material-specific cleaner, only if the initial wash proves insufficient.
Before handling wired fixtures, switch off their supply at the circuit breaker. Disconnect plug-in or transformer-powered systems as instructed by their manufacturer. Disable solar fixtures according to their care instructions, and let lamps and housings cool.
Keep liquid away from sockets, wiring entries, and electronic components. If cleaning would expose damaged wiring or require disconnecting electrical connections, have a qualified electrician handle that work.
How to Clean Oxidized Outdoor Light Fixtures Step by Step
Step 1: Identify the Metal and Finish
Check the product specification, installation manual, or supplier’s care instructions.
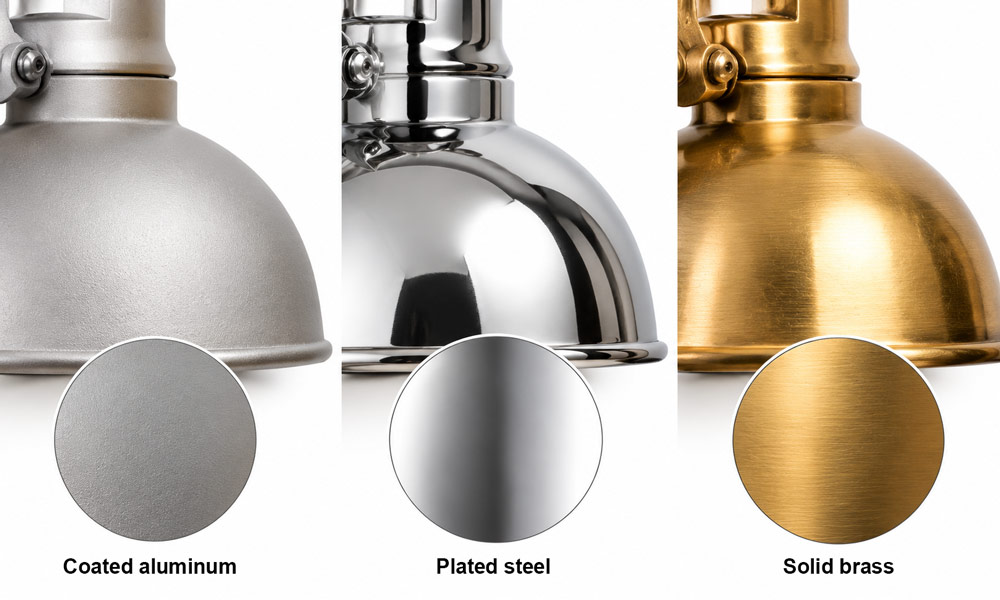
Comparison of coated aluminum, plated steel, and solid brass finishes.
Descriptions such as “bronze finish” or “brass appearance” describe color and do not necessarily identify the underlying metal. The fixture could be coated aluminum, plated steel, or solid brass.
Record two separate facts:
- The underlying material: aluminum, copper, brass, stainless steel, or another metal.
- The exposed surface: bare metal, anodizing, paint, powder coating, plating, lacquer, or an intentional patina.
When either fact remains unknown, keep the treatment limited to the gentlest cleaning method permitted by the manufacturer.
Step 2: Wash Away Surface Contamination
Begin with basic garden-light cleaning: dampen a soft cloth with the diluted detergent solution, wring it out, and wipe the housing gently.
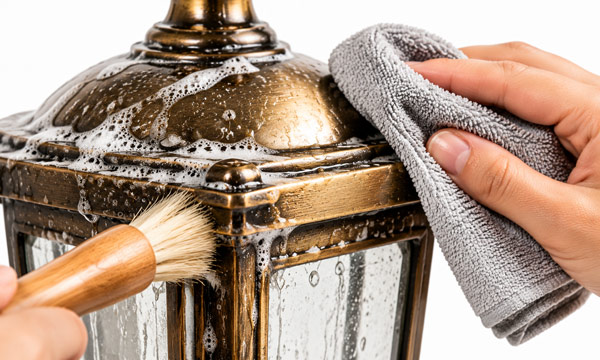
Gently cleaning a brass outdoor lantern with a soft cloth and brush to remove dirt and grime.
Lift away grit rather than dragging it across the finish. Use a soft brush for accessible decorative grooves, taking care around seals and openings.
Remove covers only where the fixture is designed for user servicing. Clean those parts separately according to their material and care instructions.
This first wash is an important diagnostic step. Dirt, salts, and cleaning residues can hide the condition of the surface beneath them. Gentle cleaning also avoids unnecessary abrasion of an otherwise serviceable finish.
Step 3: Rinse, Dry, and Compare Three Areas
Remove detergent with a separate cloth dampened with clean water, then dry the surface.
Before treating the entire fixture, compare:
- A sheltered area: beneath a cap or another normally hidden surface.
- An exposed area: the upper or outward-facing side.
- A joint: around a screw, seam, or mounting point.
These areas provide useful comparisons. A sheltered surface may help show the original color. An exposed face may show more weathering. Local damage around a joint can suggest a different cause from uniform discoloration.
Judge the result after drying. If the surface becomes uneven, loses its texture, or continues releasing substantial finish-colored residue during gentle wiping, stop increasing the cleaning pressure.
A test patch is a compatibility check, not a reason to keep trying stronger chemicals until something changes. Testing an unobtrusive area before broader treatment is an established precaution for cleaning architectural metals.
Step 4: Treat the Remaining Discoloration According to the Surface
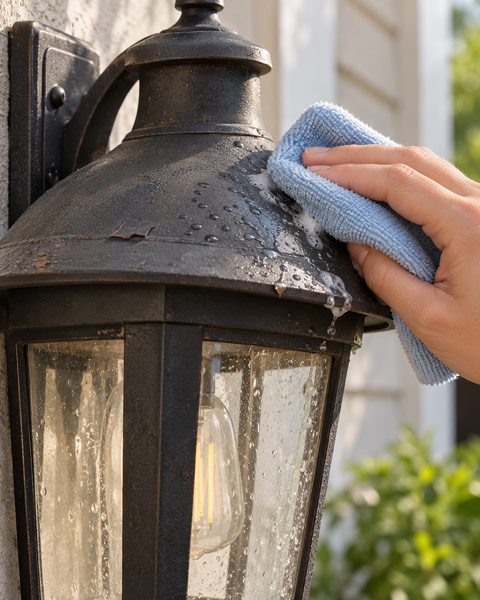
Faded patches and peeling edges create visible irregularities across the coated surface.
Painted or Powder-Coated Fixtures
Continue with mild detergent and soft cloths while the coating remains intact.
If washing removes loose powder but leaves a faded surface, the remaining problem may be deterioration of the coating itself. Cleaning can remove the residue; it cannot rebuild the coating’s binder or restore missing paint.
Blisters, lifting edges, and corrosion spreading beneath the finish call for an assessment of coating repair. Scrubbing harder can enlarge the damaged area.
Avoid general metal polish on these surfaces unless the fixture manufacturer specifically approves it. Abrasive treatment can change the gloss, color, or texture.
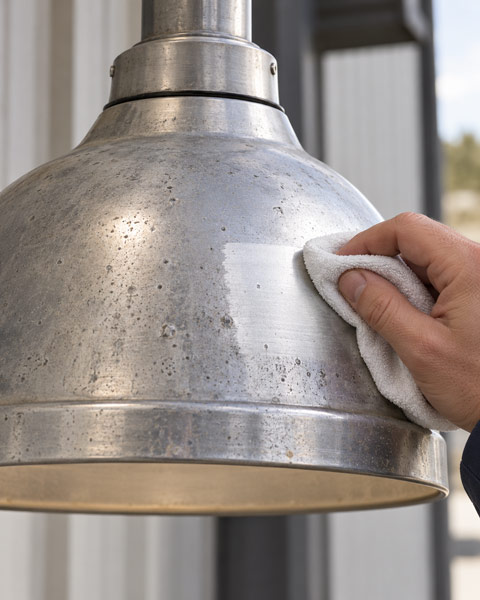
The exposed aluminum surface displays subtle tonal variations and a soft, matte finish.
Bare Aluminum
Aluminum naturally forms a thin protective oxide layer. A slightly dull appearance does not automatically mean that it needs aggressive cleaning.
For persistent deposits on confirmed bare aluminum, use a cleaner explicitly approved for that application. Follow its dilution, contact-time, and residue-removal instructions, beginning with a small test area.
Check the wording carefully: suitability for bare aluminum does not establish suitability for an anodized or painted aluminum fixture.
If cleaning reveals pits or missing material, further cleaning will not level those defects. Repeatedly chasing a brighter appearance can remove more surface without resolving the underlying damage.
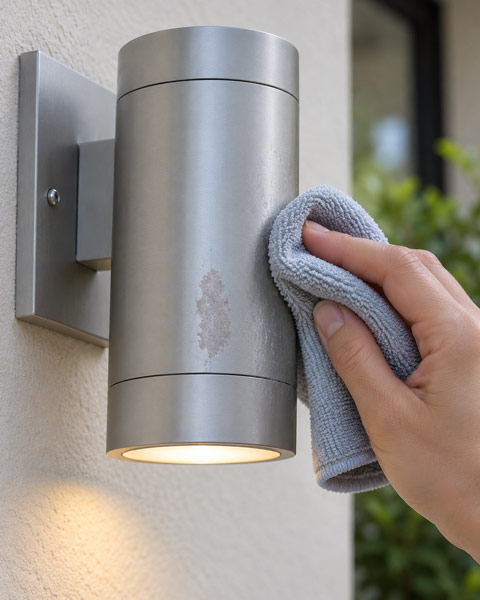
Uneven coloration and worn patches can create a mottled appearance on anodized aluminum.
Anodized Aluminum
Treat anodizing as the surface you need to preserve.
Use the approved mild cleaning method and avoid abrasive polishing intended for bare metal. If the anodized appearance is worn through or permanently discolored, ask the manufacturer about repair or replacement options.
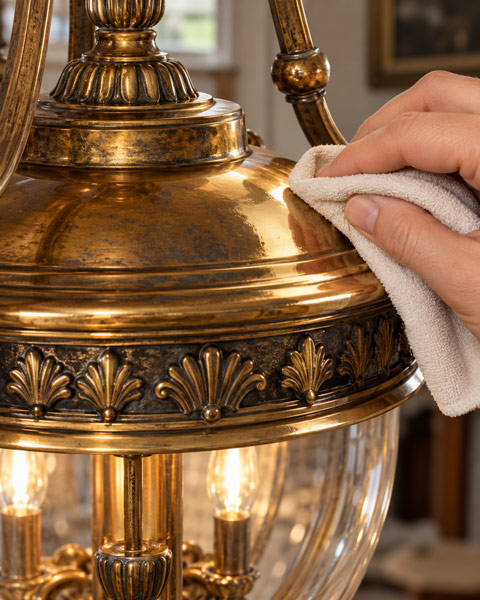
Copper and brass surfaces display varied tones, from warm metallic highlights to darker brown patina and subtle discoloration.
Copper and Brass
First determine whether the surface is bare, lacquered, plated, or intentionally aged.
For lacquered or decorative aged finishes, use the permitted gentle wash. Tarnish beneath a failing clear coating generally requires assessment of that coating rather than more surface polishing.
For confirmed bare copper or solid brass intended to look bright, use a compatible polish only where the fixture manufacturer permits it. Apply sparingly, use light pressure, and remove residues thoroughly, including from decorative recesses.
An established, adherent patina can be retained when that appearance suits the fixture. Powdery deposits, flaking, or continuing material loss deserve closer assessment.
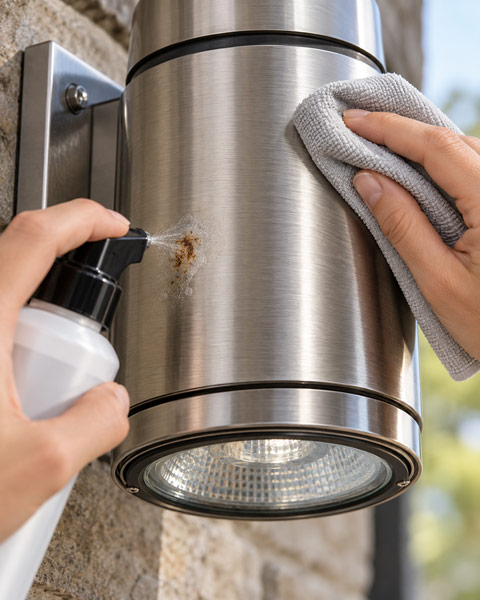
Subtle discoloration and uneven sheen can create visible variations across the stainless steel surface.
Stainless Steel
Start with detergent cleaning and wipe in the direction of any visible grain.
For remaining superficial rust marks, use a stainless-steel cleaner approved for the finish. Keep it away from adjacent coatings, lenses, and seals unless it is also approved for those materials.
Avoid ordinary steel wool and carbon-steel brushes. They can leave iron particles that subsequently rust on the stainless surface. Chloride-containing cleaners can also cause staining or pitting.
Step 5: Remove Residue and Reassemble Carefully
Follow the treatment product’s instructions for removing residue. Do not allow cleaner or polish to accumulate in seams, grooves, or behind trim.
Dry accessible surfaces and let removable components dry completely. Refit covers and serviceable seals in their original positions, using the specified tightening method.
If a gasket is cracked, distorted, or no longer seated correctly, resolve that problem before returning the fixture to service. A clean exterior does not compensate for a damaged enclosure.
Why Vinegar and Baking Soda Are Poor Default Choices
Household cleaning recipes often ignore the finish.
An acidic cleaner may behave very differently on bare metal, lacquer, anodizing, and powder coating. A paste can also act as an abrasive, altering a matte or brushed surface even when it removes the visible stain.
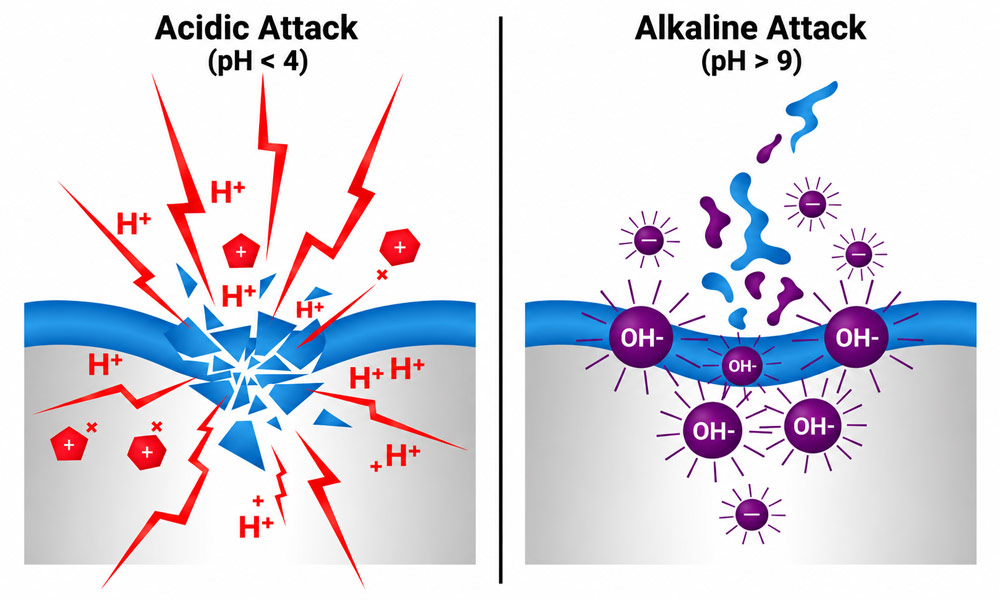
Left: Acidic Attack — Film degradation and pitting. Right: Alkaline Attack — Film dissolution and surface roughening.
Brass presents another concern: both acidic and alkaline cleaning products can contribute to selective corrosion under unsuitable conditions. Residues left in recesses can cause further discoloration.
Choose a cleaner based on the documented surface and the deposit you are removing. A successful treatment should leave the intended finish intact after the fixture is dry.
How to Keep Oxidation From Returning
The location of recurring damage can be more informative than its color. Use these patterns as working hypotheses to investigate, rather than definitive diagnoses.
Deposits Return Mainly Around Screws or Seams
Look for trapped moisture, damaged coating edges, or contact between different metals.
Dissimilar metals in electrical contact can experience galvanic corrosion when moisture provides an electrolyte. Local corrosion around a fastener is therefore worth investigating before repeatedly treating the surrounding surface.
Use replacement hardware and any isolation components specified for the fixture. Changing screw material without checking compatibility can create another problem.
Damage Is Concentrated Near the Ground
Inspect sprinkler direction, soil splash, mulch, and drainage.
A practical first action is to reduce repeated wetting and keep the fixture’s designed clearances and drainage paths unobstructed. Cleaning will have limited lasting value if the same area is wetted every irrigation cycle.
Sheltered Areas Deteriorate Faster
A roof or cap can reduce direct rain exposure while allowing airborne contamination to remain on the surface.
If deposits repeatedly build up beneath caps or overhangs, include those areas in your inspection routine. Do not assume the most visible upper surface represents the condition of the whole fixture.
Salt Exposure Keeps Causing Problems
For seaside properties, review whether the outdoor coastal light fixtures are suitable for that environment.
Follow the fixture’s maintenance requirements and adjust inspection frequency to actual deposit buildup. Coating suppliers commonly specify more frequent cleaning for salt-exposed installations than for mild environments.
A useful maintenance record is simple: photograph the same area after cleaning, record the date, and check where deposits first return. That gives you a better basis for changing the cleaning interval or correcting the exposure.
When Should You Stop Cleaning?
Stop and assess repair or replacement when you find:
- Deep pitting or significant loss of metal.
- Corrosion affecting mounting points or structural parts.
- Paint or plating lifting over a growing area.
- Damaged seals or evidence of internal water entry.
- Discoloration that can only be reduced by visibly removing the intended finish.
The right endpoint is a clean surface with its intended finish preserved and its enclosure fit for service. On an aged copper lantern, that may include patina. On a coated aluminum light, it means retaining the protective coating.
FAQs
1. Can I Pressure Wash Outdoor Lights if They Are Rated IP65?
Avoid pressure washing unless the fixture’s instructions explicitly allow it. An ingress rating describes performance under specified test conditions; it does not authorize every nozzle, pressure, distance, or cleaning chemical.
Understanding the difference between IP44 and IP65 helps establish water-exposure limits, but the fixture’s cleaning instructions should determine the method.
2. Why Did My Brass Outdoor Light Turn Pink After Cleaning?
On solid brass, a pink surface can indicate dezincification, where zinc is selectively removed and a copper-rich surface remains. Unsuitable acidic or alkaline cleaners can contribute to this process.
Stop the treatment and have the surface assessed. On a plated fixture, a color change may instead mean that a different underlying layer has been exposed. Appearance alone cannot distinguish the two reliably.
3. Can Metal Oxidation Remover Fix a Cloudy Plastic Light Cover?
Do not apply a metal oxidation remover to a plastic cover unless it is explicitly approved for that exact material and coating.
Cloudiness can come from deposits, scratching, or deterioration of the plastic. Begin with the lens manufacturer’s cleaning method. Incompatible chemicals and abrasive treatment can cause further haze, cracking, or surface damage. Persistent damage may require a replacement cover.
4. How Do I Remove Green or Brown Stains Beneath an Outdoor Light?
First identify the wall material and the source of the stain. Moisture running from copper, bronze, or brass can leave green or brown staining on nearby stone.
Do not transfer the fixture’s metal cleaner directly to the wall. Natural stone may require a stain-specific poultice, and acids can etch susceptible surfaces. For deep stains or an uncertain stone type, use a stone-restoration professional.
5. Why Does My Outdoor Light Flicker After Cleaning?
Leave the fixture switched off while the cause is investigated. Flickering that begins after cleaning could involve moisture entry or a disturbed connection, although timing alone does not establish the cause.
Check only the user-serviceable components permitted by the manual. If water may have reached electrical parts, or flickering continues, have a qualified electrician inspect the fixture before further use. Do not assume that a dry-looking exterior means the internal components are dry.
