
Start With the Purpose of the Lighting
Evaluate the Property After Dark
Create Layers of Exterior Lighting
Choose the Right Lighting Techniques
Match Fixture Placement to the Architecture
Control Brightness and Beam Spread
Select an Appropriate Color Temperature
Choose Durable Outdoor Fixtures
Plan the Electrical System
Add Smart Controls and Timers
Test the Design Before Final Installation
Maintain the Lighting System
FAQs
Exterior home accent lighting should do more than make a house visible after dark. A well-planned system highlights architectural features, improves nighttime safety, creates visual depth, and gives the property a polished appearance. The key is to design the lighting around the home itself rather than simply installing fixtures wherever space is available.
Start With the Purpose of the Lighting
Before selecting fixtures, decide what the lighting needs to accomplish. Exterior accent lighting usually serves several purposes:
- Highlighting architectural details
- Illuminating landscaping
- Improving visibility along paths and steps
- Creating a welcoming entrance
- Increasing nighttime security
- Extending the use of patios and outdoor spaces
These goals should be prioritized. A front façade may need subtle architectural lighting, while a side walkway requires practical illumination. Trying to use one type of light for every purpose often produces an uneven or overly bright result.
Evaluate the Property After Dark
Walk around the property at night and identify areas that disappear into darkness. Look at the house from the street, driveway, front entrance, backyard, and neighboring viewpoints.
Pay attention to architectural elements worth emphasizing, such as:
- Stone or brick walls
- Columns and arches
- Gables and rooflines
- Textured siding
- Entryways
- Mature trees
- Garden walls
- Water features
Also note potential safety concerns, including dark steps, uneven walkways, changes in elevation, and poorly visible entrances.
This nighttime assessment helps determine where lighting will have the greatest visual and practical impact.
Create Layers of Exterior Lighting
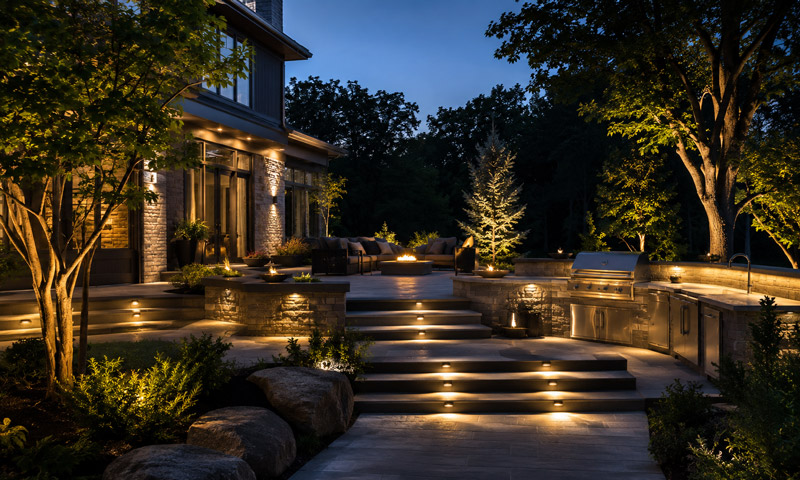
A successful exterior lighting plan uses layers rather than relying on a single row of fixtures. The three main layers are ambient, task, and accent lighting.
Ambient lighting provides general visibility around patios, entrances, and gathering areas. Task lighting illuminates specific locations such as steps, gates, outdoor kitchens, and pathways. Accent lighting draws attention to selected architectural or landscape features.
The layers should work together without competing. Accent lights are usually more effective when the surrounding areas remain slightly darker. This contrast allows highlighted features to stand out naturally.
Choose the Right Lighting Techniques
Different lighting techniques create different visual effects. The technique should match the shape, material, and location of the feature being illuminated.
Uplighting
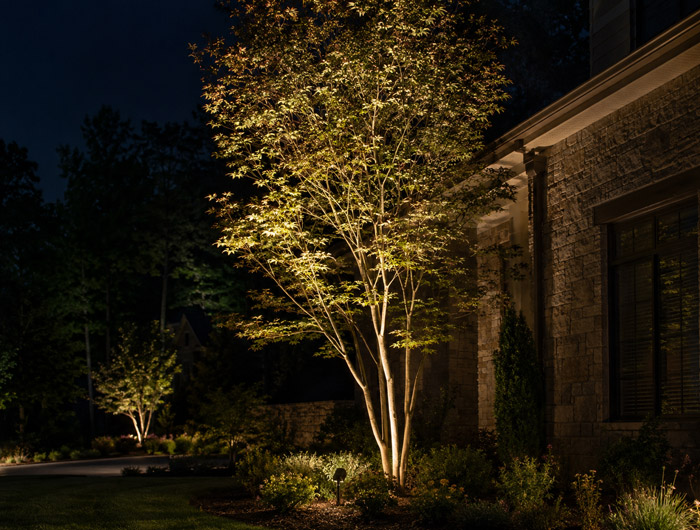
Uplighting places a fixture near ground level and directs the beam upward. It works well for columns, textured walls, large trees, and tall architectural features.
A narrow beam creates a dramatic effect, while a wider beam provides softer coverage. Fixtures should be positioned carefully to avoid shining directly into windows.
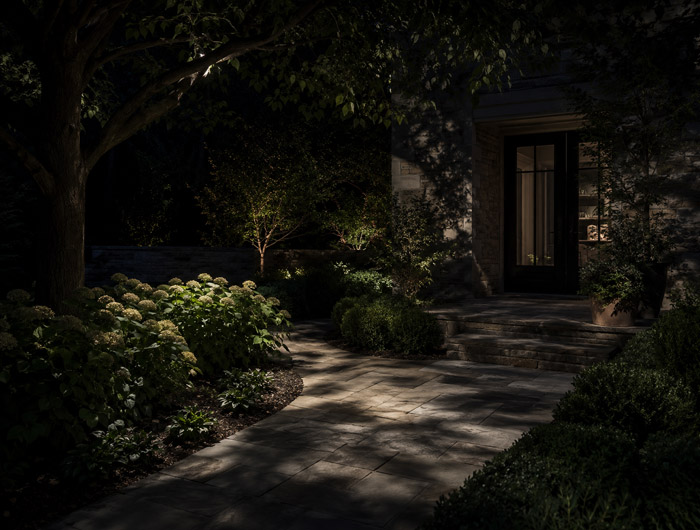
Downlighting
Downlighting places fixtures above the target area and directs light downward. It can illuminate entrances, patios, garden beds, and pathways.
When installed in trees, downlighting can create a natural moonlight effect. The fixtures should be concealed whenever possible so that the light, rather than the equipment, becomes the focus.
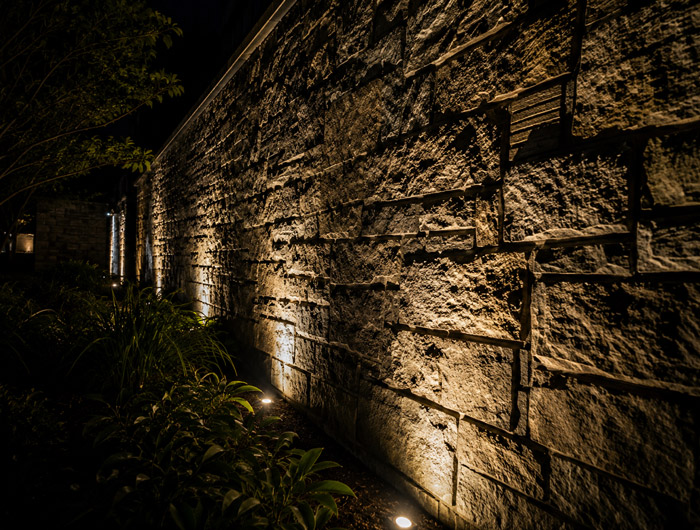
Grazing
Grazing places a light close to a textured surface and directs the beam across it at a sharp angle. This technique emphasizes shadows and surface details on stone, brick, stucco, and wood.
Grazing is especially effective when the material itself is an important part of the home’s design.
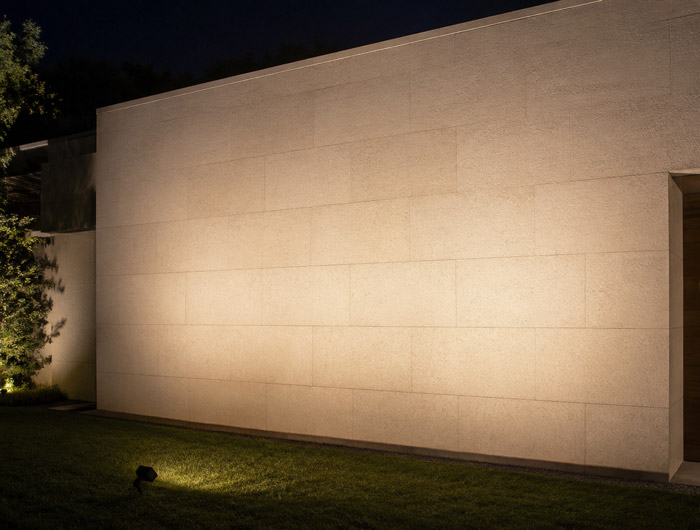
Wall Washing
Wall washing uses a wider beam positioned farther from the wall. It creates smooth, even illumination and reduces harsh shadows.
This technique is suitable for broad façades, solid walls, and areas where a clean, balanced appearance is preferred.

Silhouetting
Silhouetting places a light behind a plant, sculpture, or architectural feature and aims it toward a nearby wall. The illuminated background reveals the dark outline of the object.
This approach works best with distinctive shapes, such as ornamental trees, tall grasses, or sculptural plants.
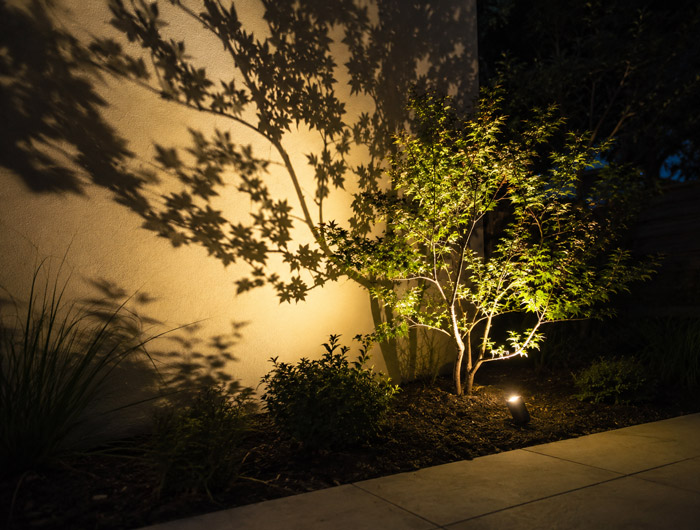
Shadowing
Shadowing places a fixture in front of an object so that its shadow appears on a wall or other surface. The distance between the object, light, and wall determines the size and sharpness of the shadow.
It can add movement and character to landscape lighting, but it should be used selectively.
Match Fixture Placement to the Architecture
Exterior lighting should support the proportions and symmetry of the house. On a balanced façade, fixtures may be arranged symmetrically around the entrance, columns, or windows. On an asymmetrical home, the lighting can follow the building’s dominant lines and materials.
Avoid placing a light under every window or along every section of the wall. Uniform spacing can make a home look flat and commercial. Instead, select a limited number of focal points and use darkness to separate them.
For larger homes, divide the façade into visual sections. Light the entrance, one or two major architectural features, and selected landscape elements. This creates a coherent composition without illuminating the entire property at the same intensity.
Control Brightness and Beam Spread
More light does not necessarily produce a better result. Excessive brightness can create glare, eliminate visual depth, disturb neighbors, and reduce the effectiveness of accent lighting.
Use lower-output fixtures for pathways, steps, and smaller plants. Reserve stronger fixtures for tall trees, large walls, and multi-story architectural elements.
Beam angle is equally important. Narrow beams are useful for columns, tall trees, and vertical details. Medium beams work well for shrubs and architectural sections. Wide beams are better for broad walls and general area lighting.
Fixtures should be adjusted so the beam reaches the intended surface without spilling into windows, neighboring properties, or the night sky.
Select an Appropriate Color Temperature
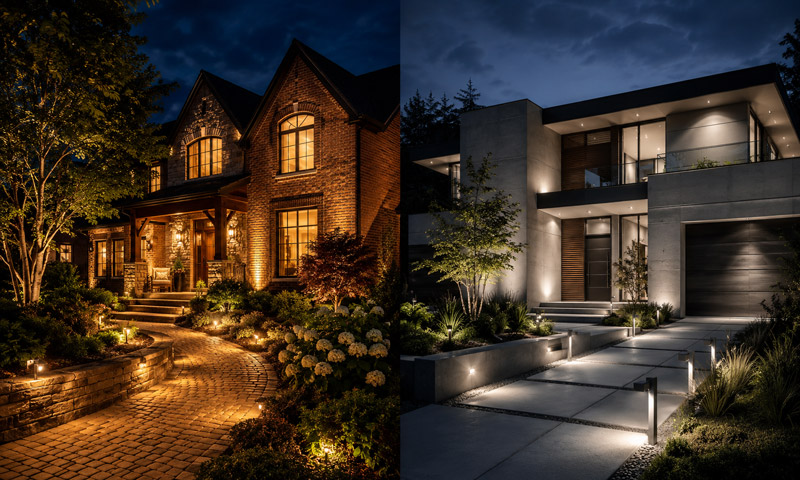
Color temperature affects how exterior materials and landscaping appear at night.
Warm white light, generally around 2700K to 3000K, creates a comfortable residential atmosphere and complements brick, wood, stone, and traditional architecture. Slightly cooler light can suit modern homes with concrete, metal, or gray finishes, but very cool light may feel harsh in residential settings.
Using one consistent color temperature across the main lighting system usually creates the most unified appearance. Minor variations can be used intentionally, but random differences between fixtures should be avoided.
Choose Durable Outdoor Fixtures
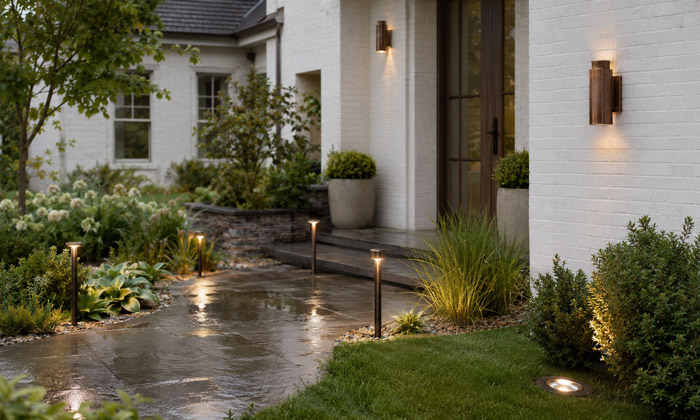
Exterior fixtures must be designed for outdoor conditions. They should be rated for exposure to rain, moisture, dust, temperature changes, and landscape irrigation.
Fixtures installed in exposed locations require suitable weather resistance. In-ground lights also need proper drainage and durable housings. Materials such as brass, copper, stainless steel, and high-quality coated aluminum generally perform better than lightweight indoor-style materials.
The fixture finish should complement the house during the day, especially when lights are mounted near entrances, walls, or visible landscape areas.
Low-voltage lighting is commonly used for residential accent lighting because it is flexible, energy-efficient, and suitable for many landscape applications. A typical system includes a transformer, low-voltage cable, fixtures, connectors, and controls.
The transformer must have enough capacity for the total fixture load, with additional room for future expansion. Cable routes should be planned to minimize voltage drop and allow easy maintenance.
Line-voltage fixtures may be appropriate for certain wall-mounted lights, security fixtures, or larger applications. Electrical work should comply with local codes and be completed by a qualified professional when required.
Lighting controls improve convenience and reduce unnecessary energy use. Common control options include:
- Astronomical timers
- Photocells
- Motion sensors
- Smart switches
- App-based lighting zones
- Dimming controls
An astronomical timer automatically adjusts operation according to sunset and sunrise times. Motion sensors are useful in service areas, side yards, and security zones but may not be ideal for decorative lighting that should remain steady.
Dividing the system into zones provides greater flexibility. The front façade, pathways, backyard, and patio can operate on different schedules or brightness levels.
Test the Design Before Final Installation
Temporary testing is one of the most important steps in exterior lighting design. Place fixtures above ground, connect them safely, and observe the results after dark.
Check the lighting from several angles. Look for glare, overly bright areas, unwanted shadows, dark gaps, and light entering windows. Adjust fixture positions, beam angles, brightness levels, and spacing before burying cable or permanently mounting equipment.
Small changes in placement can significantly affect the final result. A fixture moved only a short distance may produce a cleaner beam, better texture, or more balanced composition.
Exterior lighting requires periodic adjustment and cleaning. Plants grow, tree branches move, lenses collect dirt, and fixtures can shift after heavy rain or landscape work.
See also: How to Clean Garden Lights?
Inspect the system several times a year. Clean lenses, trim vegetation, reposition fixtures, check connections, and replace damaged components. Reassess the lighting after major landscaping or exterior renovations.
A maintained system will continue to look intentional rather than becoming blocked, uneven, or excessively bright.
How much does professional exterior accent lighting cost?
The cost depends on property size, fixture quality, wiring complexity, and installation requirements.
A small system may cost a few hundred dollars, while a professionally designed whole-house installation can cost several thousand dollars.
How many lumens are recommended for exterior accent lighting?
Most architectural and landscape accent lights use approximately 100 to 300 lumens per fixture.
Larger trees, tall façades, and distant features may require higher output, while steps and decorative elements usually need less.
Does exterior accent lighting increase home value?
Well-designed exterior lighting can improve curb appeal, nighttime presentation, security, and outdoor usability.
These benefits may make a property more attractive to buyers, although the exact increase in value varies by market and installation quality.
Are solar lights suitable for permanent exterior accent lighting?
Solar lights are convenient for locations without accessible wiring, but their brightness and operating time depend on sunlight exposure and battery condition.
Wired low-voltage systems generally provide more consistent and reliable performance.
What exterior lighting attracts the fewest insects?
Warm-colored LED lights with lower blue and ultraviolet output generally attract fewer insects than cool white or bright conventional bulbs.
Fixtures should also be positioned away from doors, windows, and outdoor seating areas.
