

Why Do Solar Lights Become Cloudy?
What You Need to Clean Cloudy Solar Lights
Step-by-Step Guide to Cleaning Cloudy Solar Lights
How to Restore Severely Cloudy Solar Light Covers
Cleaning Inside a Foggy Solar Light
How to Prevent Solar Lights From Becoming Cloudy Again
FAQs
Solar lights are a convenient and energy-efficient way to illuminate gardens, pathways, patios, and outdoor spaces. However, after months or years of exposure to sunlight, rain, dust, and temperature changes, the plastic covers on solar lights can become cloudy, yellow, or foggy. A cloudy solar light cover reduces the amount of sunlight reaching the solar panel and weakens the brightness of the LED at night.
Cleaning cloudy solar lights is usually simple and does not require expensive tools. With the right method, you can remove surface dirt, restore clearer covers, and improve the performance of your outdoor lighting.
Why Do Solar Lights Become Cloudy?
Before cleaning solar lights, it helps to understand why they become cloudy. Several factors can cause the plastic surfaces to lose their clarity.
Dirt and Outdoor Debris
Solar lights are constantly exposed to outdoor conditions. Dust, pollen, mud, leaves, and air pollution can build up on the plastic cover and solar panel. This layer blocks light transmission and makes the fixture appear cloudy.
UV Damage From Sunlight
Most solar lights use plastic components that are exposed to direct sunlight every day. Ultraviolet rays can slowly break down the plastic surface, causing oxidation. This process often creates a yellow or white haze that cannot be removed by simple washing.
Moisture and Mineral Deposits
Water droplets can leave behind mineral marks when they dry on the surface. If moisture enters inside the light housing, condensation can also make the lens appear foggy.
Aging Plastic
Over time, inexpensive plastic covers naturally lose transparency. Even with regular cleaning, older solar lights may eventually need polishing or replacement.
What You Need to Clean Cloudy Solar Lights
For basic cleaning, prepare the following supplies:
- Warm water
- Mild dish soap
- Soft microfiber cloth
- Soft toothbrush or small cleaning brush
- Baking soda
- White vinegar
- Plastic polish (for heavily cloudy covers)
- Fine-grit sandpaper (for severe oxidation)
Avoid using harsh chemicals, abrasive cleaners, or rough scrubbing materials because they can scratch the plastic and make cloudiness worse.
Step-by-Step Guide to Cleaning Cloudy Solar Lights
Step 1: Turn Off and Remove the Solar Light
Before cleaning, switch off the solar light if it has an on/off button. If possible, remove the light from the ground or mounting area.
Take out the rechargeable battery if the design allows easy removal. This prevents accidental damage if water reaches the internal components.
Step 2: Clean Loose Dirt and Dust
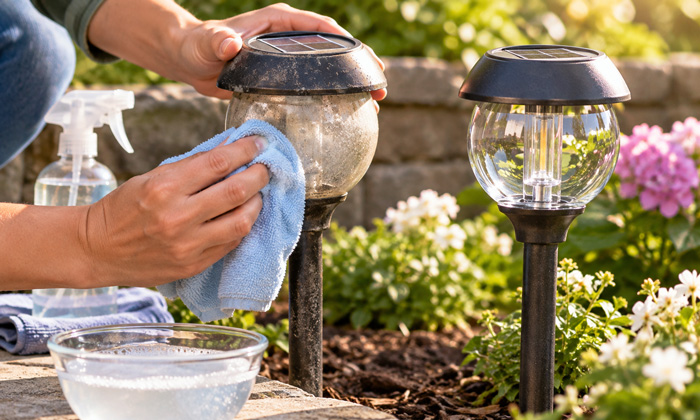
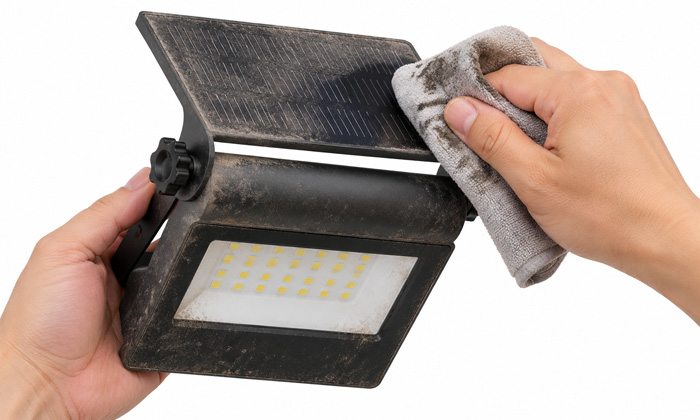
Start by removing surface dirt. Use a dry microfiber cloth to wipe away dust, sand, and debris from the solar panel and light cover.
For dirt stuck around edges or small gaps, use a soft toothbrush to gently loosen the buildup.
Do not begin with aggressive scrubbing because dirt particles can scratch the plastic surface.
Step 3: Wash the Solar Light Cover
Mix warm water with a small amount of mild dish soap.
Dip a soft cloth into the solution, squeeze out excess water, and wipe the cloudy cover carefully. Clean all sides of the lens, including areas around seams where dirt often collects.
For stubborn stains, allow the soapy water to sit on the surface for a few minutes before wiping.
After cleaning, rinse with clean water and dry completely with a microfiber cloth.
Step 4: Clean the Solar Panel
A dirty solar panel reduces charging efficiency. Even if the light cover looks clean, a dusty panel can prevent the battery from receiving enough energy.
Use a damp microfiber cloth to gently clean the panel surface. Avoid soaking the solar panel because water can enter through cracks or seals.
Dry the panel completely before testing the light.
Step 5: Use Baking Soda for Mild Cloudiness
If the cover remains cloudy after washing, baking soda can help remove light oxidation and stubborn marks.
Create a paste by mixing baking soda with a small amount of water. Apply the paste gently with a soft cloth and rub in small circular motions.
After a few minutes, wipe away the residue and rinse the surface.
This method works best for minor haze, dirt buildup, and surface stains.
Step 6: Try Vinegar for Mineral Deposits
If the cloudiness comes from water spots or mineral residue, white vinegar can be useful.
Mix equal parts white vinegar and water. Apply it to the cloudy area with a cloth and allow it to sit briefly before wiping clean.
Do not leave vinegar on plastic surfaces for long periods because acidic solutions may affect certain materials.
How to Restore Severely Cloudy Solar Light Covers
When a solar light cover has heavy yellowing or oxidation, normal cleaning may not be enough. In this case, additional restoration methods may help.
Use Plastic Polish
Plastic polish is designed to restore transparency to cloudy plastic surfaces. Apply a small amount according to the product instructions and gently buff the cover with a microfiber cloth.
This method can improve the appearance of solar light lenses affected by UV damage.
Wet Sanding for Heavy Oxidation
For severely damaged plastic covers, fine-grit wet sanding can remove the oxidized outer layer.
Use very fine sandpaper and plenty of water to reduce scratching. Sand gently, moving in consistent directions. After sanding, polish the surface to restore clarity.
This process requires more care because excessive sanding can damage thin plastic covers.
Cleaning Inside a Foggy Solar Light
Sometimes the cloudiness is not on the outside. If condensation has formed inside the housing, external cleaning will not solve the problem.
To clean the inside:
- Open the solar light carefully if the design allows.
- Remove moisture with a dry cloth.
- Allow internal parts to air dry completely.
- Check seals and cracks that may allow water entry.
- Reassemble the light securely.
If water has damaged the electronics, cleaning may not restore full function.
How to Prevent Solar Lights From Becoming Cloudy Again
Regular maintenance can keep solar lights clear and bright for longer.
Clean Them Regularly
Wipe the solar panel and light cover every few weeks, especially during dusty seasons. Regular cleaning prevents dirt buildup from becoming difficult to remove.
Keep Them Away From Excessive Moisture
Avoid placing solar lights in areas where water constantly splashes or collects. Good drainage helps protect the internal components.
Apply a Protective Coating
A plastic-safe UV protectant can help slow down fading and oxidation caused by sunlight exposure.
Store Seasonal Solar Lights Properly
If you remove solar lights during winter or long periods of non-use, clean and dry them before storage. Keep them in a cool, dry place away from direct sunlight.
FAQs
