
1. Make the Front Walk Easy to Follow
2. Give One or Two Trees a Leading Role
3. Use Moonlighting for a Softer Backyard
4. Highlight Selected Architectural Details
5. Build Patio Lighting Around Everyday Activities
6. Integrate Light into Steps and Low Walls
7. Give Planting Beds Depth Without Lighting Every Plant
Choose a Consistent Warm Light
Match the Power Source to the Location
Plan for Winter and Seasonal Maintenance
Use Controls to Suit Your Routine
FAQs
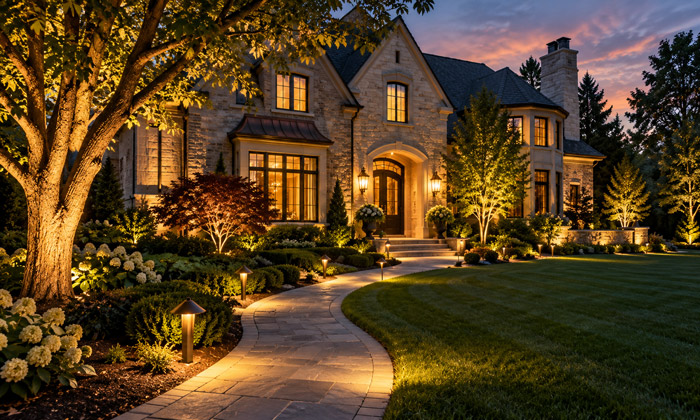
The best Burr Ridge landscape lighting ideas start with how you use your property after sunset. A front walk needs clear, comfortable visibility. A patio needs a softer atmosphere. A favorite tree or stone entryway may deserve a little extra attention.
For a local home, a successful design should also work beyond summer evenings. Consider how planting beds change through the seasons, where snow collects, and what the lighting looks like from inside the house.
Start with the route from the driveway to the front door, add light where people gather, and choose a few landscape features to highlight. This approach creates a welcoming outdoor space without making every corner equally bright.
1. Make the Front Walk Easy to Follow
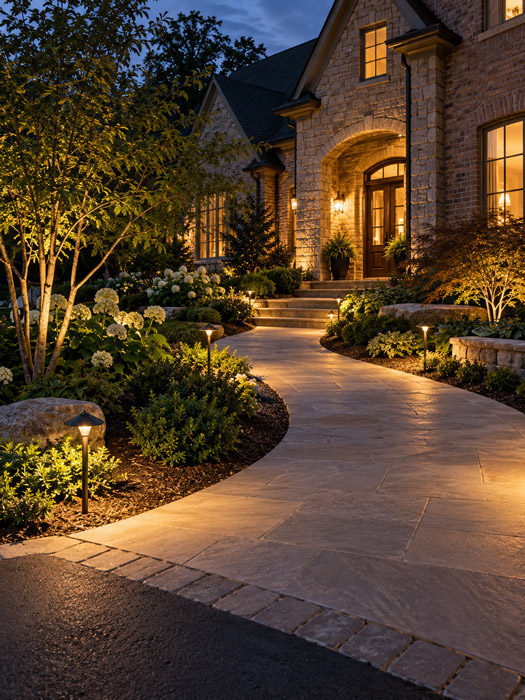
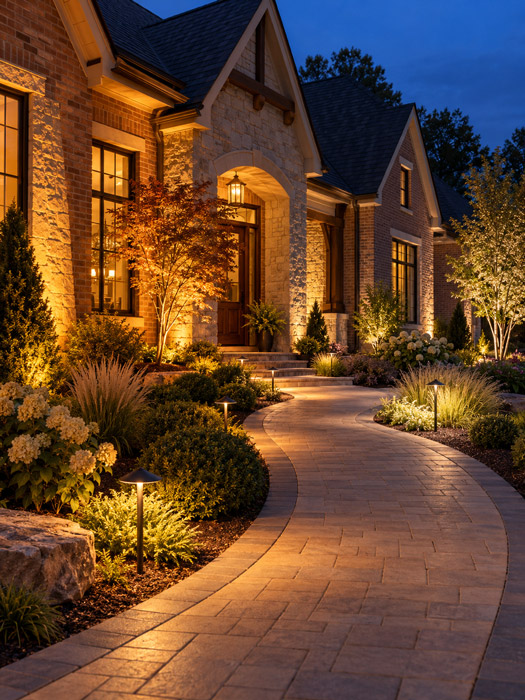
Path lighting is a practical starting point because it supports a route you use every day. Focus first on turns, changes in elevation, and the transition between the driveway and the front entrance.
Choose shielded fixtures that direct light onto the walking surface. Place them within adjacent planting beds where possible, leaving room for mature foliage and routine maintenance.
Avoid choosing spacing by appearance alone. Set up a few fixtures temporarily and check their coverage after dark. The goal is to make the route readable without alternating between harsh bright spots and deep shadows.
For a curved walkway, follow the shape of the path rather than arranging fixtures in rigid pairs. Check the result while walking toward the house and while returning to the driveway; glare may be visible from only one direction.
2. Give One or Two Trees a Leading Role
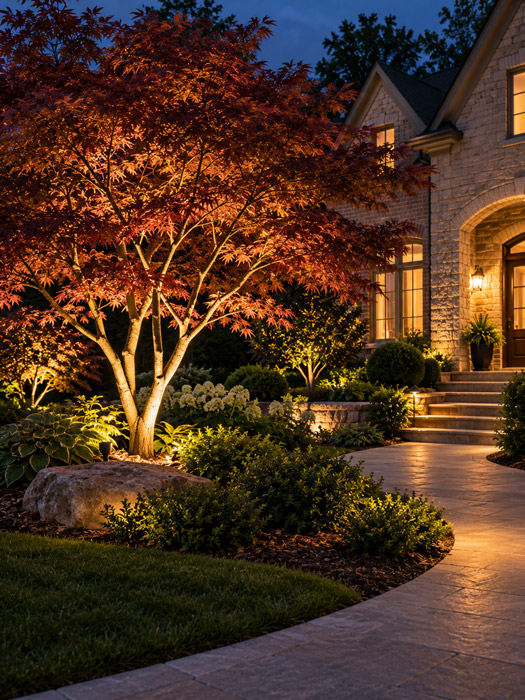
A distinctive tree can provide a strong focal point for the front yard. Choose one with an interesting trunk, branching pattern, or canopy rather than lighting every tree along the property boundary.
A carefully aimed uplight can reveal the trunk and lower branches. For a broad canopy, test whether lighting from a second direction adds useful depth before increasing brightness.
Keep the beam on the tree as much as possible. Light that misses its subject contributes little to the design and may become distracting from nearby windows.
The choice between uplighting and downlighting depends on the effect you want: uplighting emphasizes the tree itself, while downlighting helps illuminate the space beneath it.
Revisit the aiming when leaves fall. A fixture that disappears behind summer foliage can become conspicuous against bare branches.
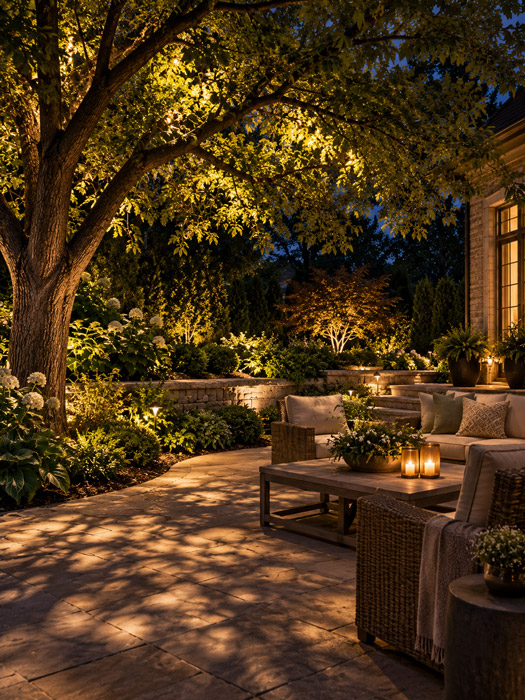
3. Use Moonlighting for a Softer Backyard
Where a suitable mature tree stands near a patio or garden path, moonlighting can create a gentle wash of light from above. Downward-facing fixtures allow branches and leaves to cast shadows across the ground, giving the area a more natural nighttime character.
This can suit a backyard where you want usable light without filling planting beds with visible fixtures.
Keep the light source out of direct view from chairs and indoor seating areas. The effect should be comfortable when someone sits down, not only when they stand in the yard.
Tree-mounted lighting needs careful installation and ongoing attention as the tree grows. Have the mounting position, wiring route, and maintenance access planned by someone experienced with this type of work.
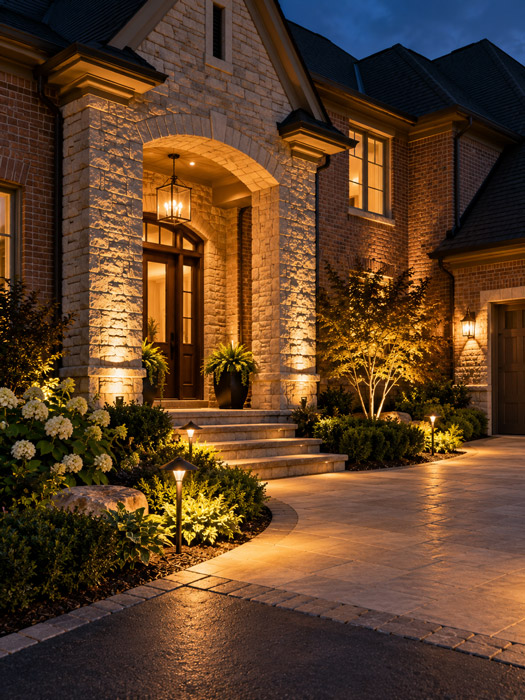
4. Highlight Selected Architectural Details
For a Burr Ridge home with brick, stone, columns, or a recessed entry, selective architectural lighting can connect the house visually to its landscape.
Begin with one or two features that define the front elevation. A stone entrance surround or a prominent column may need only restrained illumination to become visible after dark.
Light close to a textured surface produces stronger shadows, while a broader wash creates a gentler effect. Test both approaches before fixing the fixture position.
Keep beams away from windows and review the design from inside the house. A façade that looks attractive from the driveway should also feel comfortable from the living room.
Coordinate new lighting with existing porch and garage fixtures so the entry remains visually balanced.
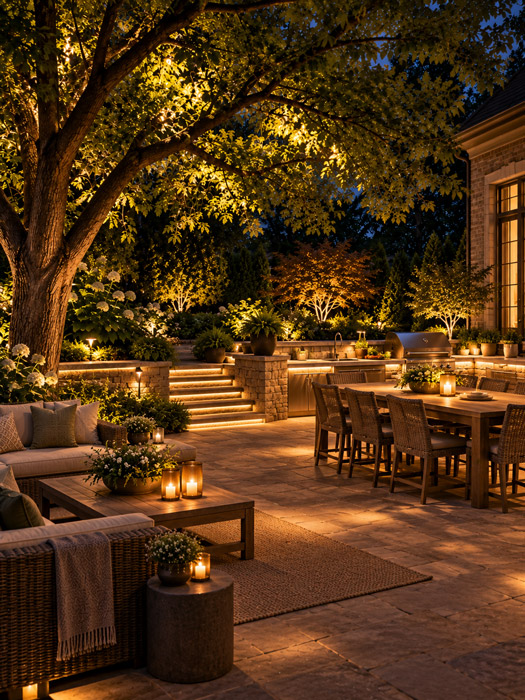
5. Build Patio Lighting Around Everyday Activities
A patio often serves several purposes, and each calls for a different amount of light. Eating, preparing food, walking between doors, and relaxing beside a fire do not need identical illumination.
Plan around those activities:
- Use soft background lighting around the seating area.
- Give steps and changes in level their own illumination.
- Add focused light where food is prepared or served.
- Keep decorative lighting separately controllable.
Under-bench or concealed railing lights can define the edges of a space without placing bright bulbs near eye level. A modest garden accent beyond the patio can also make the view from a chair more interesting.
If string lights suit the setting, keep their layout simple and check any applicable association requirements before installing permanent supports.
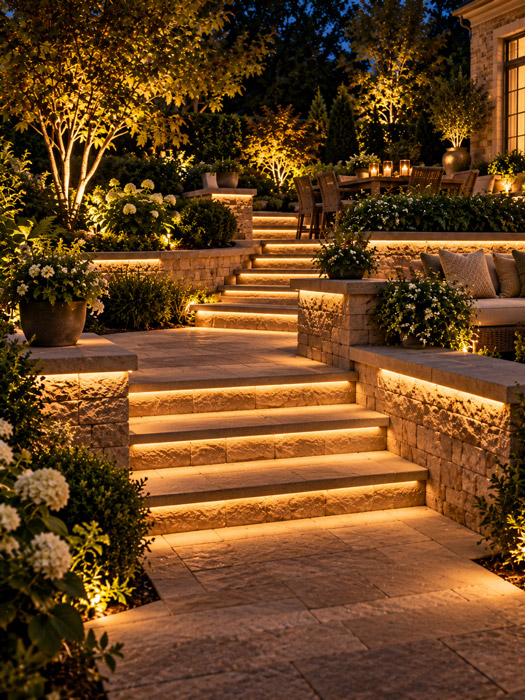
6. Integrate Light into Steps and Low Walls
Steps deserve attention even when the surrounding patio already feels bright. Overhead light can leave an individual tread or landing in shadow.
Position step lights so the walking surfaces and changes in height are easy to distinguish. Review the result from both the top and bottom of the staircase.
Low walls and built-in seating can also accommodate discreet fixtures beneath caps or ledges. These locations help define the hardscape while keeping the light source visually quiet.
When planning new masonry or a patio renovation, decide on lighting early. Reserving space for fixtures and wiring is easier before the hardscape is finished.
For existing structures, consider how each fixture will be accessed for cleaning or replacement before choosing a concealed location.
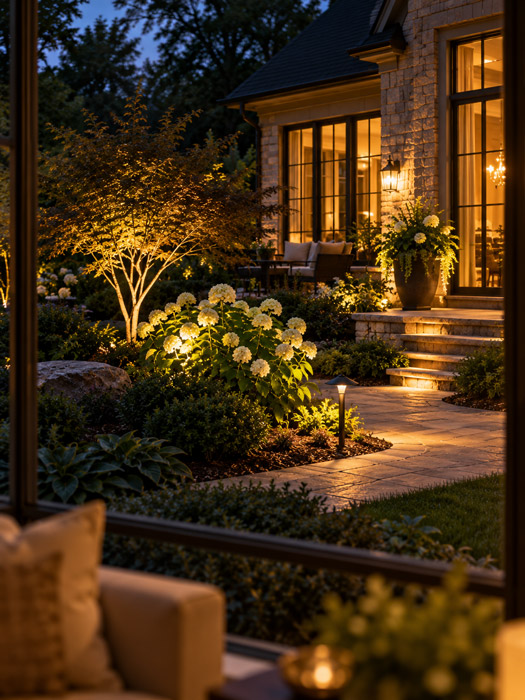
7. Give Planting Beds Depth Without Lighting Every Plant
Garden lighting works best when it establishes a few points of interest. Try a flowering shrub near the entry, an ornamental tree beside the patio, or a planter at the end of a path.
Consider the view from indoor rooms as well. A softly illuminated planting bed outside a window can become part of the evening experience even when nobody is outdoors.
Leave some areas unlit so the highlighted features remain distinct. Lighting every plant with equal intensity can flatten the scene.
Allow for growth when positioning fixtures. A clear beam in spring may be blocked by midsummer foliage. Adjustable fixtures and accessible locations make seasonal changes easier.
Choose a Consistent Warm Light
Color temperature affects how the house, planting, and paving look together. For a residential landscape, warm white is a useful starting point.
When comparing 2700K vs 3000K landscape lighting, think about the materials being illuminated. A 2700K source has a warmer, more golden appearance; 3000K remains warm white but looks slightly more neutral.
Test samples against your actual brick, stone, wood, and foliage. Coordinate nearby fixtures so adjoining areas do not appear unintentionally mismatched.
Color temperature does not tell you how much light a fixture produces. Evaluate output, beam spread, shielding, and placement separately. A warmer lamp can still create glare if its source is exposed or aimed toward the viewer.
Match the Power Source to the Location
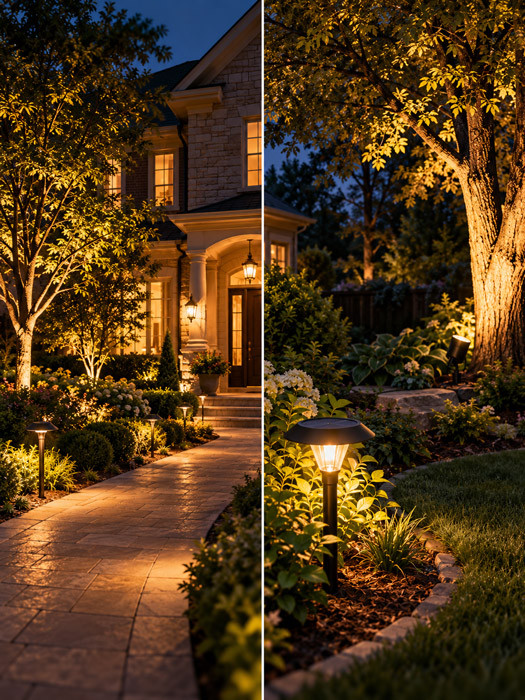
The decision between solar and low-voltage outdoor lighting should reflect sunlight availability and how dependable the illumination needs to be.
Solar fixtures can work well as decorative accents in sunny planting beds. They are also useful for experimenting with a location before committing to a wired installation. Their performance depends on charging conditions, battery capacity, and the product itself.
A wired low-voltage system is generally the more predictable choice for regularly used paths, coordinated architectural lighting, and areas shaded by trees or buildings.
For a larger property, plan the power supply and cable routes alongside the fixture layout. An attractive drawing still needs to account for available outlets, cable distances, and future access.
Plan for Winter and Seasonal Maintenance
A lighting layout should account for how the property is maintained throughout the year.
Before installation, identify where snow is usually shoveled or piled. Keep vulnerable fixtures away from those areas and from the edges routinely crossed by maintenance equipment.
Choose fixtures and connection components rated for their actual exposure. Outdoor suitability involves more than the housing material: seals, connectors, mounting hardware, and installation quality all matter.
Build a few simple checks into seasonal yard care:
- Clear leaves and mulch away from fixtures.
- Clean lenses when dirt begins to affect the beam.
- Recheck aiming after pruning or plant growth.
- Inspect displaced fixtures after snow removal.
- Review the operating schedule as daylight hours change.
A small adjustment can often restore the intended effect without adding another light.
Use Controls to Suit Your Routine
The front entrance, backyard entertaining area, and decorative accents may need different schedules.
Where the system allows it, separate these functions into zones. Patio lighting can operate when you are outside, while the entrance follows its own evening schedule.
Timers and compatible dusk sensors reduce the need for daily switching. Dimming can help fine-tune the atmosphere, provided the fixtures and controls are designed to work together.
Check the finished lighting from the street, neighboring boundaries, and bedroom windows. Redirect exposed beams and reduce output where necessary. Confirm applicable property or association requirements before finalizing the installation.
FAQs
How Much Electricity Does LED Landscape Lighting Use?
Electricity use depends on the system’s total wattage and operating hours.
For example, twenty 4-watt fixtures running five hours each night consume approximately 12 kWh over 30 days, excluding transformer losses. Multiply that figure by the electricity rate on your bill to estimate the monthly energy cost.
Can Existing Halogen Landscape Lights Be Converted to LED?
Many fixtures with replaceable halogen lamps can accept compatible LED replacements.
Check the bulb base, physical dimensions, operating voltage, and transformer compatibility before purchasing. Some older electronic transformers may not work properly with LED lamps, so matching the bulb socket alone is not enough.
Are Replaceable-Bulb or Integrated LED Landscape Lights Better?
Replaceable-bulb fixtures make it easier to change lamps and adjust specifications later, while integrated fixtures incorporate the LED light source directly into the fixture design.
Before choosing an integrated model, ask whether the LED module can be serviced and what replacement involves. The better option depends on repair access, replacement-part availability, and warranty coverage.
Why Does CRI Matter for Landscape Lighting?
Color Rendering Index, or CRI, indicates how faithfully a light source renders colors compared with a reference source.
It can help homeowners evaluate how flowers, foliage, and exterior materials may appear after dark. CRI is different from color temperature, so two warm-white lamps can still render colors differently.
What Should a Landscape Lighting Warranty Cover?
Check warranty coverage for fixture housings, finishes, LED components, and transformers separately because different parts may have different warranty periods and exclusions.
Also ask whether troubleshooting, removal, shipping, and reinstallation are included. A lifetime warranty on the housing should not be assumed to cover every component or installation expense.
