
What You Need Before You Start
1. Plan and Measure the Roofline
2. Choose Lights That Suit the Roofline
3. Match the Clips to Your Roof Edge
4. Test and Prepare the Lights on the Ground
5. Hang the Lights in Short Sections
6. Connect the Display Safely
7. Check the Finished Roofline
FAQs
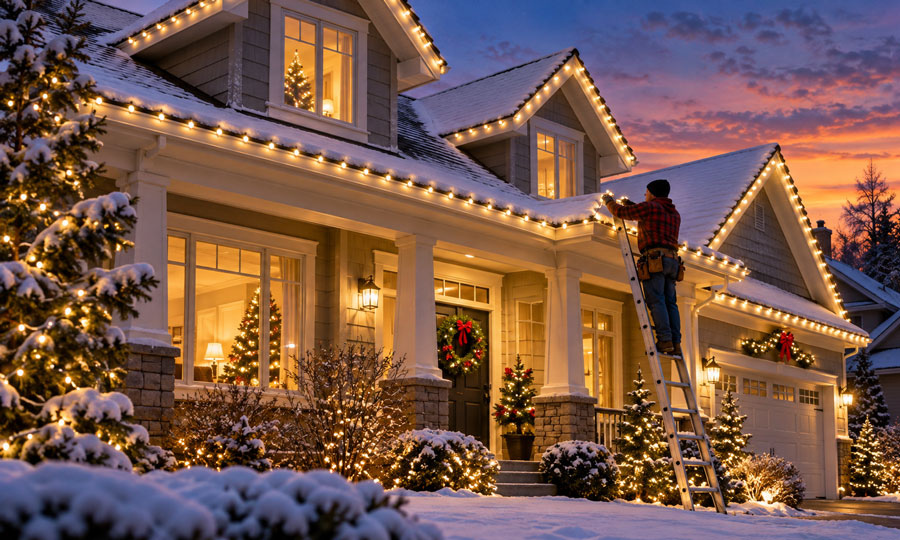
To put Christmas lights on your roof, measure the roofline, choose outdoor-rated lights, and secure them with clips that fit your gutters or roof edge. Test every strand before installation, keep the power disconnected while hanging, and connect the finished display to a GFCI-protected outdoor outlet. Avoid nails, staples, and screws that can damage roofing or light cords.
For most homes, the easiest place to start is the front gutter line. A straight, evenly spaced outline creates a finished look without requiring you to decorate every peak.
What You Need Before You Start
Gather your supplies on the ground:
- Outdoor-rated Christmas lights.
- Light clips compatible with both your bulbs and attachment surface.
- Outdoor-rated extension cords with sufficient capacity for the connected load.
- A measuring tape and a simple sketch of the house.
- A suitable ladder or a compatible light-hanging extension pole.
- Non-slip footwear and a helper.
- An optional outdoor-rated timer.
Check the outdoor-use rating of the complete lighting system, including its power adapter and controller. A weather-resistant light string may still come with components that require a sheltered location.
Inspect cords, plugs, and sockets before use. Replace sets with damaged insulation, exposed conductors, or cracked electrical components. Outdoor decorations should use GFCI protection, and lights should be switched off before you leave home or go to sleep.
1. Plan and Measure the Roofline
Stand back from your house and choose the edges you want to highlight. Start with the main eaves, then decide whether a porch or garage roof needs its own run.
Record three measurements separately:
| Measurement | What it determines |
|---|---|
| Roof edges being decorated | Required illuminated length |
| Outlet-to-starting-point distance | Required power lead or extension cord length |
| Gaps between decorated sections | Additional unlit cable routing |
For example, a 40-foot front eave and a 20-foot garage edge need approximately 60 feet of illuminated coverage. The cable reaching from the outlet to the first bulb is additional.
Check the lighted length on the packaging. Total string length may include unlit leads that will not contribute to the roof outline.
Measure accessible sections from the ground where possible. Do not climb onto the roof simply to take measurements. For sloping gable edges, use building measurements or have an installer measure them safely.
Mark where each strand will begin and end. This helps prevent a connector from landing awkwardly at a corner.
2. Choose Lights That Suit the Roofline
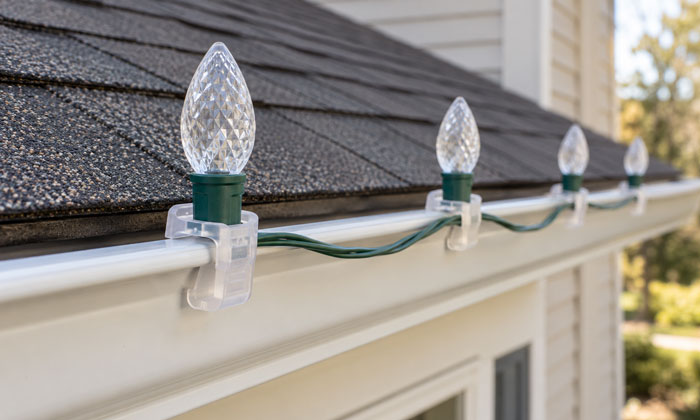
C7 and C9-style lights create a defined outline, while mini lights produce a finer line. Icicle lights hang below the eaves and work well when you want a cascading effect.
LED Christmas lights generally use less electricity and produce less heat than incandescent alternatives. However, their lower power consumption does not remove the need to follow connection limits.
Choose one bulb style and consistent spacing for each continuous roof edge. For white displays, comparing warm white Christmas lights vs. cool white can help you coordinate the roofline with your porch and garden lighting.
Test different strands together before hanging them. Lights sold under the same general color description may still look noticeably different side by side.
3. Match the Clips to Your Roof Edge
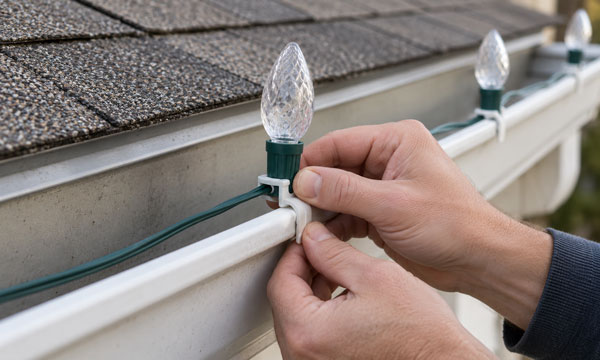
The best clip is the one designed for your attachment surface and light string. A clip that holds a small wire may not support a larger bulb socket correctly.
| Attachment area | Suitable approach | What to check |
|---|---|---|
| Open gutter lip | Gutter clips or compatible all-in-one clips | Secure fit without bending the gutter |
| Gutters with guards | Clips approved for that guard and gutter combination | No lifting, puncturing, or obstructing the guard |
| Roof edge without gutters | Compatible drip-edge or fascia clips | Approval for the specific edge profile |
| Asphalt shingles | Prefer an approved gutter or edge attachment | Do not lift shingles or disturb their seal |
| Metal roof edge | Compatible nonpenetrating clips | Magnetic clips only work on suitable ferromagnetic surfaces |
| Tile or slate | Purpose-made attachments approved for the roof | No forcing clips onto brittle edges |
Do not assume a “universal” clip works on every roof. If installation requires prying, bending flashing, or lifting a sealed shingle, stop and choose another attachment point.
Never puncture the roof to hang seasonal lights. Even small holes can create a path for water, and sliding clips beneath shingles can disturb their seal.
4. Test and Prepare the Lights on the Ground
Unroll each strand, untangle it, and inspect it before plugging it in. Confirm that every section illuminates and that any controller works properly.
Then unplug the lights before fitting clips or replacing user-serviceable bulbs.
If your clip system allows it, attach clips to the bulbs or sockets while still on the ground. Arrange each strand in installation order, with its power-input end facing the planned supply point.
For socket-mounted C7 or C9 systems, supporting each socket helps maintain consistent bulb orientation. For mini or icicle lights, follow the clip and light manufacturers’ spacing instructions. Add support where necessary to prevent sagging without pulling the cord tight.
5. Hang the Lights in Short Sections
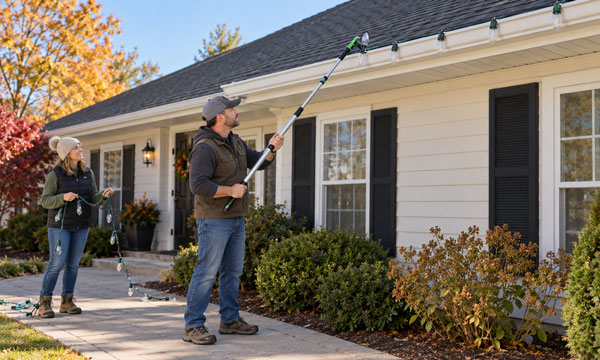
Choose a dry, calm day and work in daylight. Set your ladder on firm, level ground, following its setup instructions. Keep your body centered, maintain three points of contact while climbing, and climb down to reposition the ladder whenever the next attachment point is beyond comfortable reach.
Keep yourself, ladders, poles, and light strings at least 10 feet from overhead power lines.
Begin at the end nearest your planned power supply:
- Attach the first clip to the approved gutter or roof-edge surface.
- Secure the light string without placing tension on its plug.
- Continue along the edge, keeping bulbs facing the same direction.
- Support corners so the wire does not pull diagonally across them.
- Reposition your ladder before continuing.
- Connect the next compatible strand while the entire run remains disconnected from power.
Keep the line straight with a little natural slack. Tightening the cord to remove every dip can strain the sockets and pull clips loose.
For icicle lights, support the horizontal cable and let the drops hang freely. Do not pull the drops to straighten the main strand.
The demonstration uses icicle lights; follow the instructions for your own clips and roof surface.
Can You Install Them Without a Ladder?
A light-hanging pole can work on reachable eaves when paired with compatible clips. Check the pole’s working range and confirm that you can see each attachment point clearly.
If the pole cannot reach securely, choose a lower section of the house or hire an installer.
What About High Peaks and Ridges?
A sloping gable edge and the ridge across the top of a roof require different access and attachment methods. Do not walk onto the roof or improvise a ladder position to reach them.
High, steep, or inaccessible sections are best handled by an insured installer with appropriate access equipment. A complete gutter outline can still look balanced without lights across the highest ridge.
6. Connect the Display Safely
Before switching on, check both the light-string connection limit and the capacity of the power supply arrangement.
These are separate limits:
- String limit: The maximum number of compatible sets, or maximum connected wattage, permitted by the light manufacturer.
- Circuit limit: The total load supplied by the circuit, including other connected equipment.
- Accessory limit: The rating of extension cords, timers, controllers, and connectors.
The lowest applicable limit governs the setup. Using another outlet does not necessarily provide another circuit.
When planning a larger display, understanding how many LED lights a 15-amp circuit can support helps you assess the overall load, but it does not replace each strand’s connection instructions.
Use a GFCI-protected outdoor supply. Keep connections clear of standing water and protect them with accessories intended for that purpose. Do not treat a wrap of tape as a substitute for a suitable outdoor connection enclosure. Route cables away from doors, sharp edges, and walking paths.
7. Check the Finished Roofline
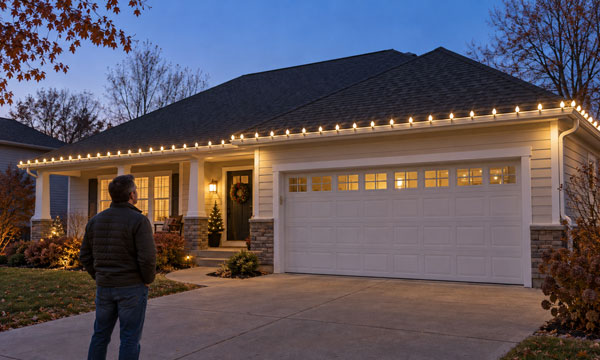
Switch on the display and inspect it from the ground at dusk.
Look for uneven bulb direction, unsupported sections, and cords pulling against corners. Check that hanging drops do not interfere with doors or nearby branches.
Disconnect the power before making adjustments, and leave any ladder work until daylight. Set an outdoor-rated timer to turn the display off before bedtime.
After windy weather, inspect the lights from the ground again. When removing them, release each clip individually instead of pulling down the string. Let the lights dry before storing them loosely wound and labeled by roof section.
FAQs
1. Can You Cut Christmas Lights to Fit Your Roof?
Most preassembled mini-light and sealed LED strings should not be cut. Their internal wiring and electrical layout are designed for a fixed length, and cutting them may create safety risks or cause the lights to stop operating.
Some commercial socket-wire systems are made for custom installations, but only modify a product when the manufacturer specifically allows cutting and provides instructions for proper termination. A C7 or C9 bulb style alone does not indicate that a string can be cut.
2. Can You Leave Christmas Roof Lights Up All Year?
Only install Christmas lights year-round when the complete system is designed and rated for permanent outdoor use. Seasonal decorative strings should be installed only within the usage limits provided by the manufacturer.
An outdoor rating does not automatically mean permanent installation is allowed. Continuous exposure to sunlight, rain, temperature changes, and moisture can affect cords, sockets, mounting hardware, and seals.
3. How Much Does It Cost to Run Christmas Roof Lights?
Estimate electricity cost using:
Total watts ÷ 1,000 × hours per day × number of days × electricity rate per kWh
For example, a 100-watt display operating six hours per day for 30 days uses about 18 kWh. At an example electricity rate of $0.20 per kWh, the energy cost would be approximately $3.60.
Use the actual input wattage of the complete lighting setup and your electricity provider’s current rate for a more accurate estimate.
4. How Long Do LED Christmas Lights Last Outdoors?
There is no single lifespan that applies to every outdoor LED string. Weather exposure, material quality, storage conditions, and the durability of cords, sockets, and connectors all influence service life.
When evaluating how long LED Christmas lights last, separate the LED component’s rated hours from the lifespan of the complete product. A functioning bulb does not guarantee that the entire string remains safe if wiring or insulation has deteriorated.
5. Why Does Only Half of a Christmas Light String Work?
Many Christmas light strings are divided into separate electrical sections. A failed bulb, loose connection, damaged socket, or internal fault in one section can cause part of the string to stop working while another section remains lit.
Unplug the string before checking it. Follow the manufacturer’s troubleshooting steps and use only compatible replacement parts. If the insulation is damaged or the product contains sealed, non-serviceable components, replacement is usually safer than attempting repairs.
