


What Is the Cut Line on Outdoor Strip Lights?
Where Can You Find the Cut Line?
How to Identify the Cut Line on Waterproof Outdoor Strip Lights
Can You Cut Outdoor Strip Lights Anywhere?
What Happens After Cutting Outdoor Strip Lights?
How to Cut Outdoor Strip Lights Correctly
FAQs
Outdoor strip lights are a popular choice for decorating patios, gardens, balconies, fences, and outdoor entertainment areas. They provide flexible lighting solutions because they can be installed in different lengths and shapes. However, during installation, many people find that they cannot locate the cut line on outdoor strip lights.
Finding the correct cut line is important because cutting the strip in the wrong place can damage the circuit and cause the lights to stop working. Understanding how outdoor strip lights are designed will help you cut them safely and maintain proper performance.
What Is the Cut Line on Outdoor Strip Lights?
The cut line on outdoor strip lights is the marked section where the strip can be safely cut without damaging the electrical circuit. Most outdoor LED strip lights are designed with repeating sections, and each section contains a group of LED chips and a complete circuit. The cut line is usually identified by a small scissors symbol, a straight line across the strip, copper contact pads near the cutting area, or a visible gap between LED sections.
These markings show the only locations where the strip can be shortened safely. Cutting anywhere other than the designated cut line may break the connection between LED components, causing part of the strip or the entire strip to stop working properly.
Where Can You Find the Cut Line?
The cut line is usually located between groups of LEDs rather than directly next to each individual light. Depending on the type of outdoor strip light, the cutting points may appear every few inches or every specific length.
Common locations include:
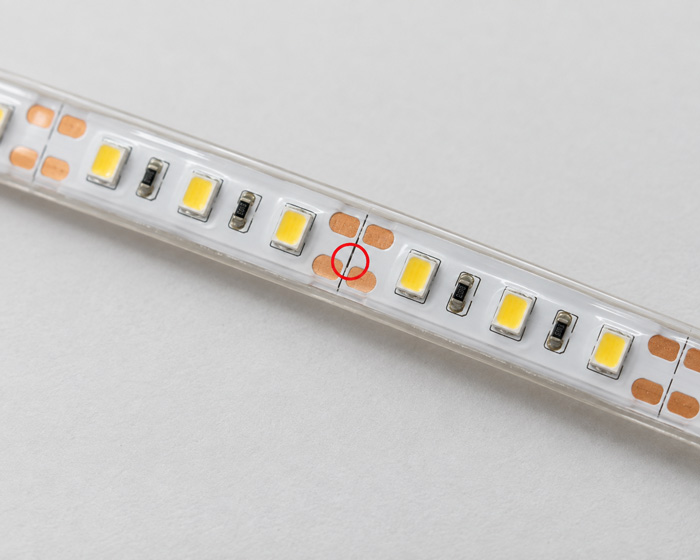
Between Copper Pads
The easiest way to identify the cut line is to look for copper-colored pads along the strip. These small metal contact points are designed for cutting and reconnecting.
The cutting mark is normally located directly between two copper pads.
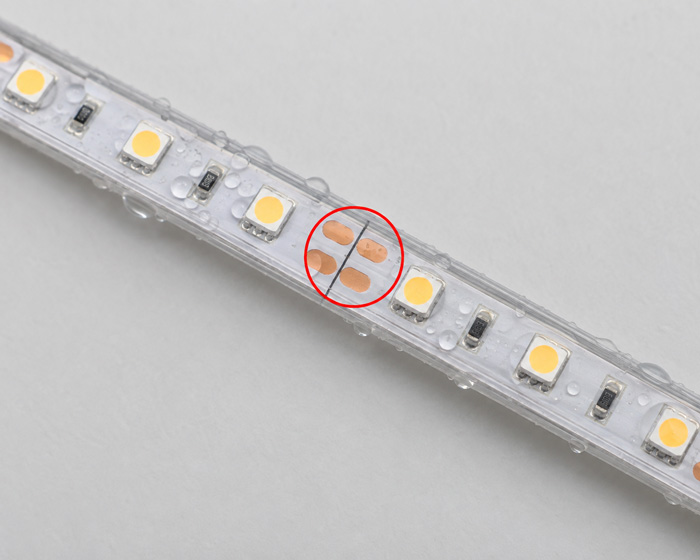
Near Scissors Symbols
Many outdoor LED strip lights have a printed scissors icon. This symbol clearly shows where the strip can be cut.
Always cut directly on this marking instead of cutting through the LED area.
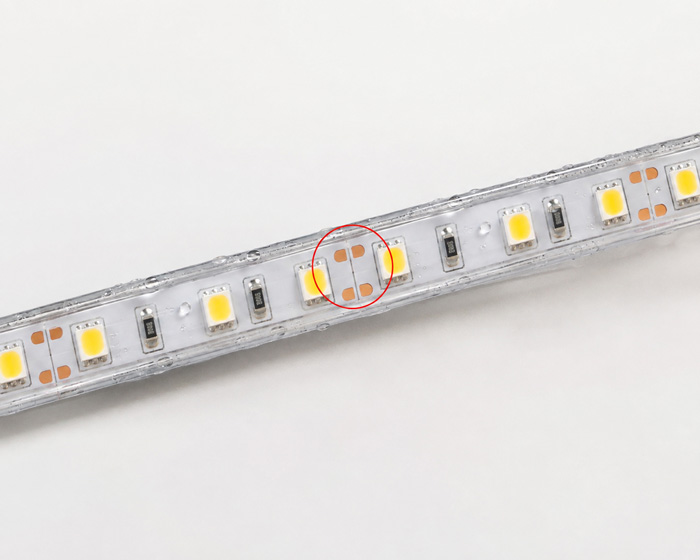
Between Repeating LED Units
LED strips are manufactured in repeating electrical sections. Each section has its own LEDs and resistors.
The cut line appears at the end of each complete section, allowing the remaining strip to continue operating normally.
How to Identify the Cut Line on Waterproof Outdoor Strip Lights
Outdoor strip lights often have a protective silicone coating or waterproof sleeve, which can make the cut line harder to see. To locate it:
- Inspect the surface of the strip carefully.
- Look for printed scissors marks or cutting symbols.
- Find the small copper contact areas under the waterproof coating.
- Check the spacing between LED groups.
- Cut only at the marked points.
For waterproof strip lights, avoid cutting through areas covered only by silicone without visible cutting marks. The waterproof layer protects the circuit, and cutting in the wrong place may expose or damage the internal wiring.
Can You Cut Outdoor Strip Lights Anywhere?
No. Outdoor strip lights cannot be cut anywhere you want. They must be cut only at the designated cut lines marked on the strip. Cutting between the marked points may cause some LEDs to stop working, disconnect the circuit, prevent the strip from receiving power correctly, or damage the waterproof protection.
Each LED strip has a specific minimum cutting length based on its circuit design. For example, some outdoor strip lights can be cut every 5 centimeters, while others may require cutting every 10 centimeters or longer. The exact cutting distance depends on the strip’s design, voltage type, and LED configuration, so it is important to check the markings before cutting.
What Happens After Cutting Outdoor Strip Lights?
After cutting an outdoor strip light, the remaining section can still work properly if the cut is made at the correct cut line. However, the exposed cut end may require additional protection, especially when the strip is installed outdoors where it may be exposed to rain, humidity, and dust.
For waterproof installations, the cut end should be sealed with suitable protective materials such as waterproof end caps, silicone sealant, or outdoor-rated heat-shrink tubing. Proper sealing helps prevent water, moisture, and dirt from entering the strip and damaging the internal electrical components, ensuring better durability and longer-lasting performance.
How to Cut Outdoor Strip Lights Correctly
Before cutting, follow these steps:
- Turn off the power supply.
- Measure the required length carefully.
- Find the nearest marked cut line.
- Use sharp scissors or a proper cutting tool.
- Cut straight along the marked line.
- Protect the cut end if the strip will remain outdoors.
Avoid cutting while the strip is connected to electricity, as this can create safety risks and damage the product.
FAQs
